Indicator gauge jig for table saw alignment
I have a digital indicator that measures to the thousandth of an inch. I purchased it some time back to help level the bed on my 3D printer.
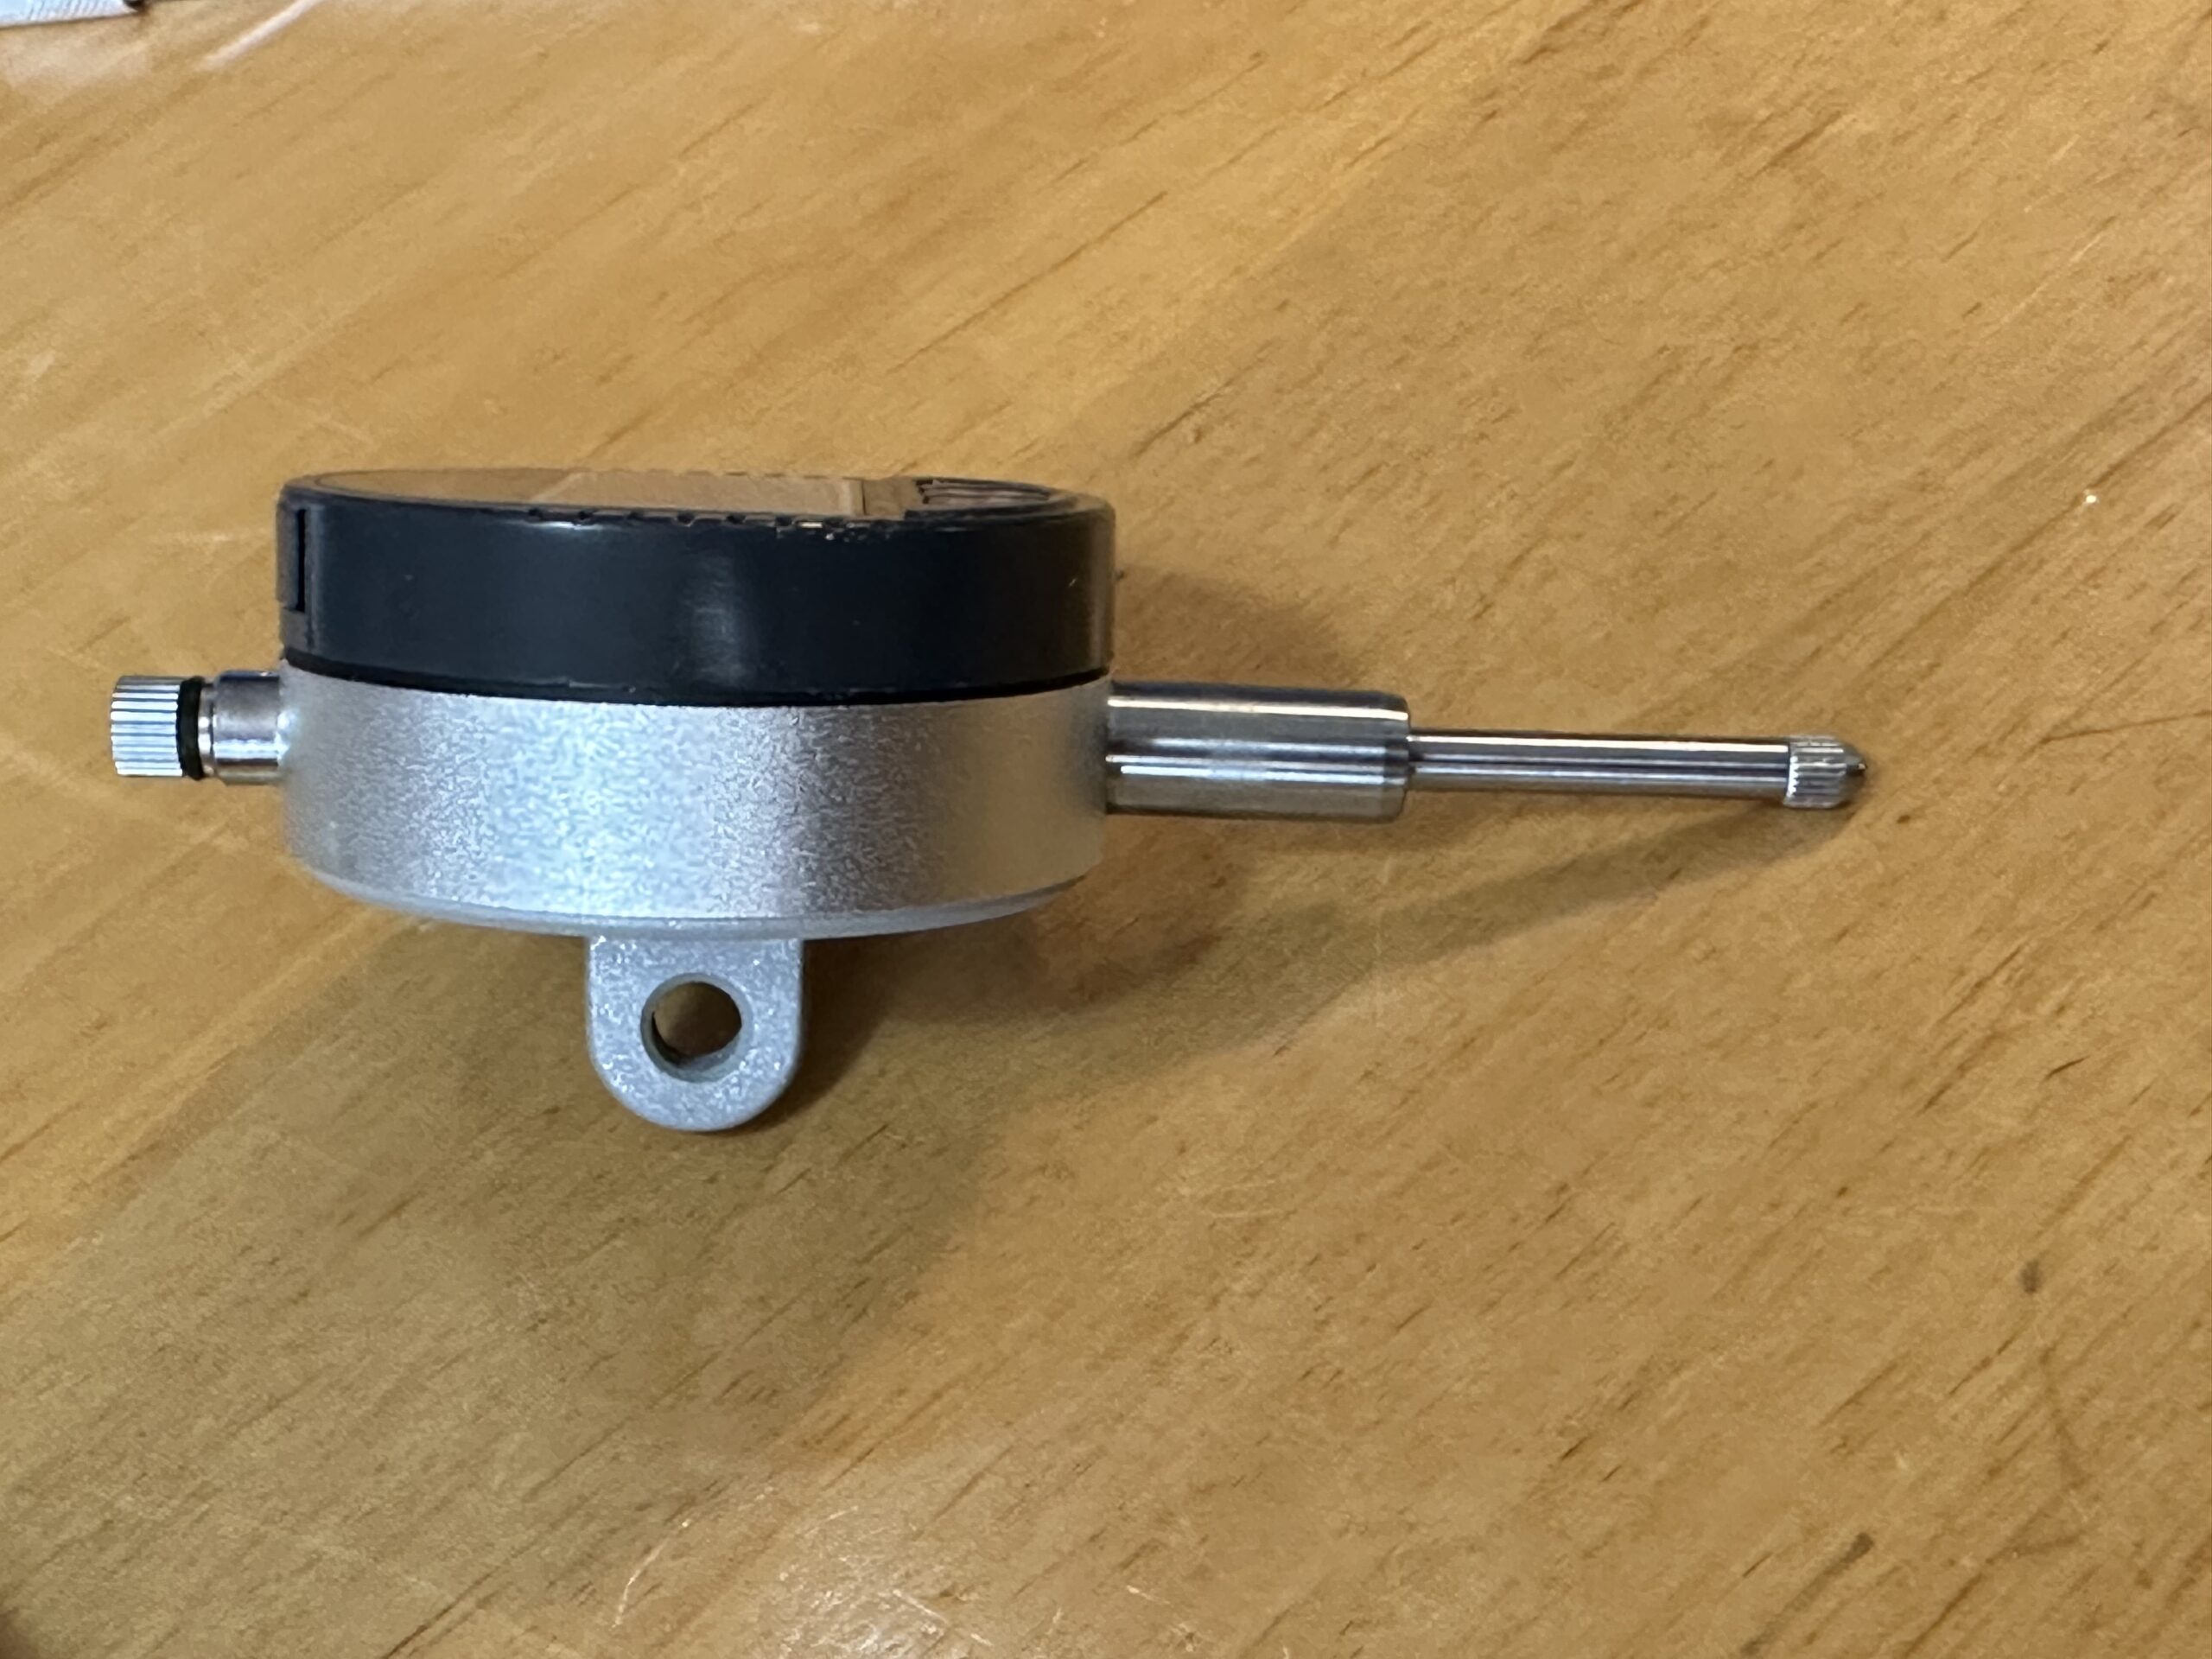
Lately, I wanted to use it to more accurately align the top of my cabinet saw to the blade, and then align the rip fence. I did this during the initial setup of the saw using a combo square and achieved reasonable results, until I started to rip long boards. There was some pinching that occurred that led me to think things were a bit off. The idea is to run the indicator along the saw miter slot with the tip of the indicator pressed against the blade. Any deflection in the measurement would then indicate that the table top is out of alignment.
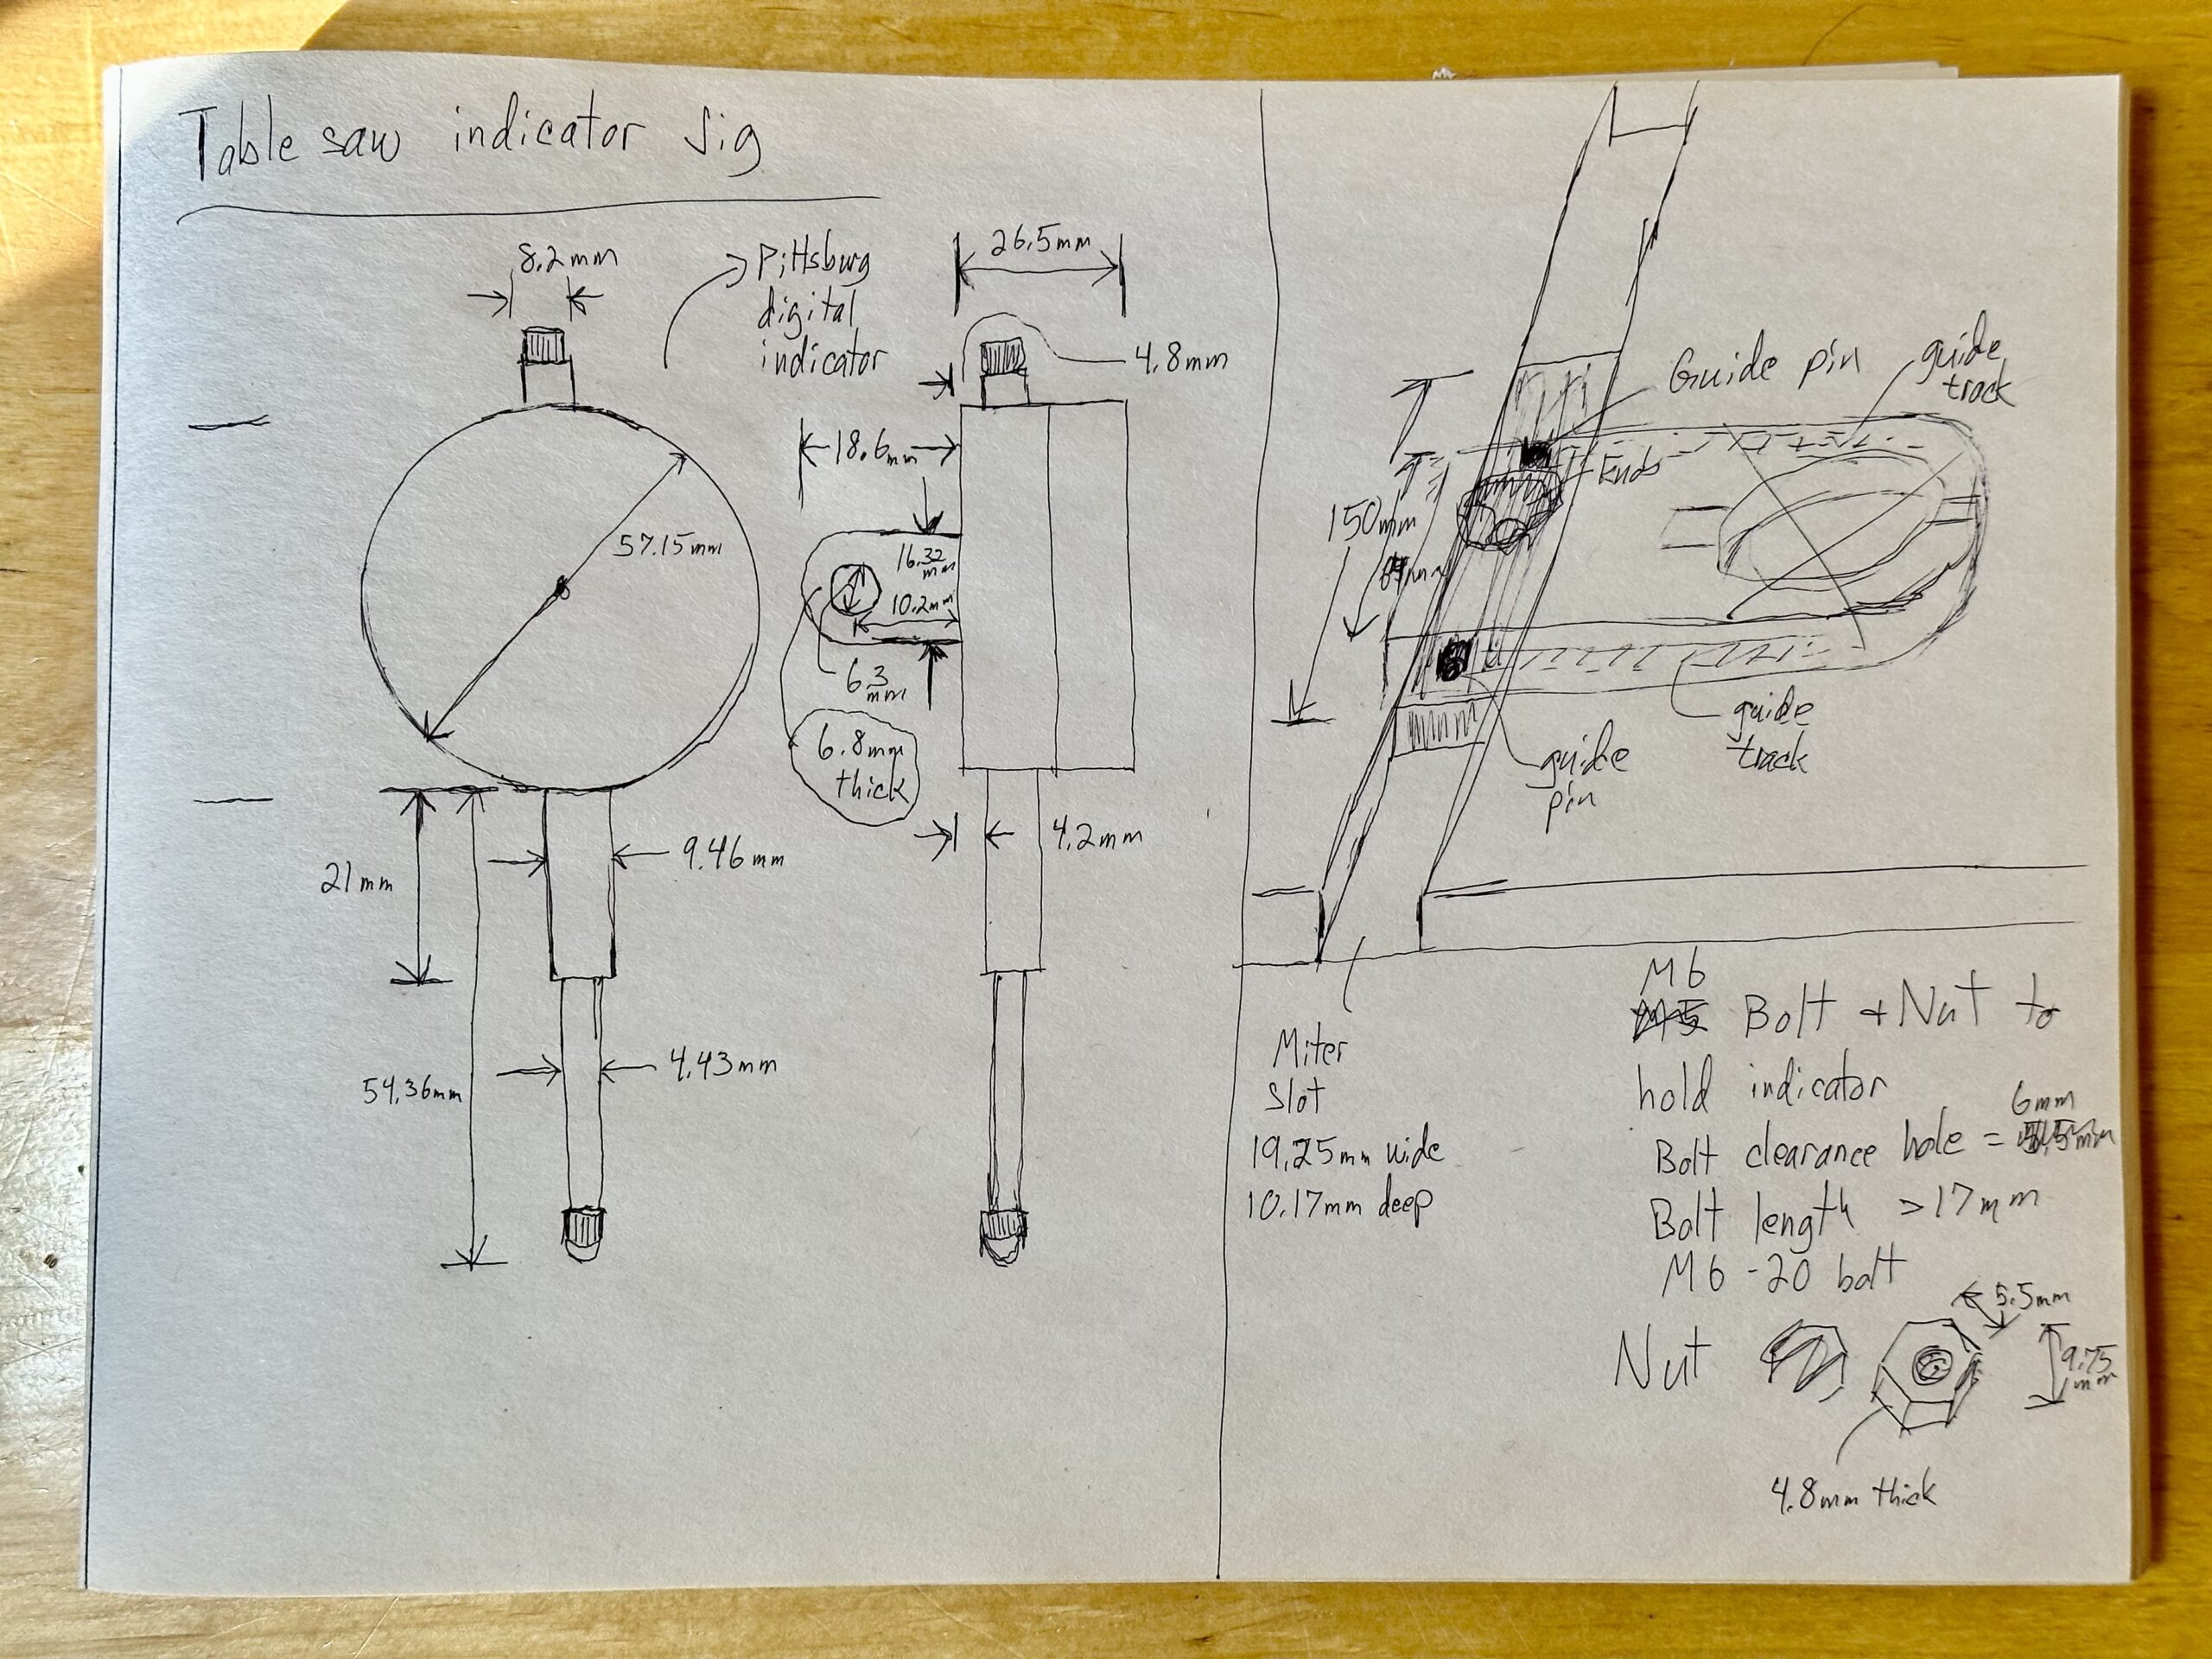
I started off by measuring various parts of the indicator and then did a rough idea sketch of what this jig would look like. I scrapped this initial idea once I started drawing it out in Shapr3D and went with something super simple.
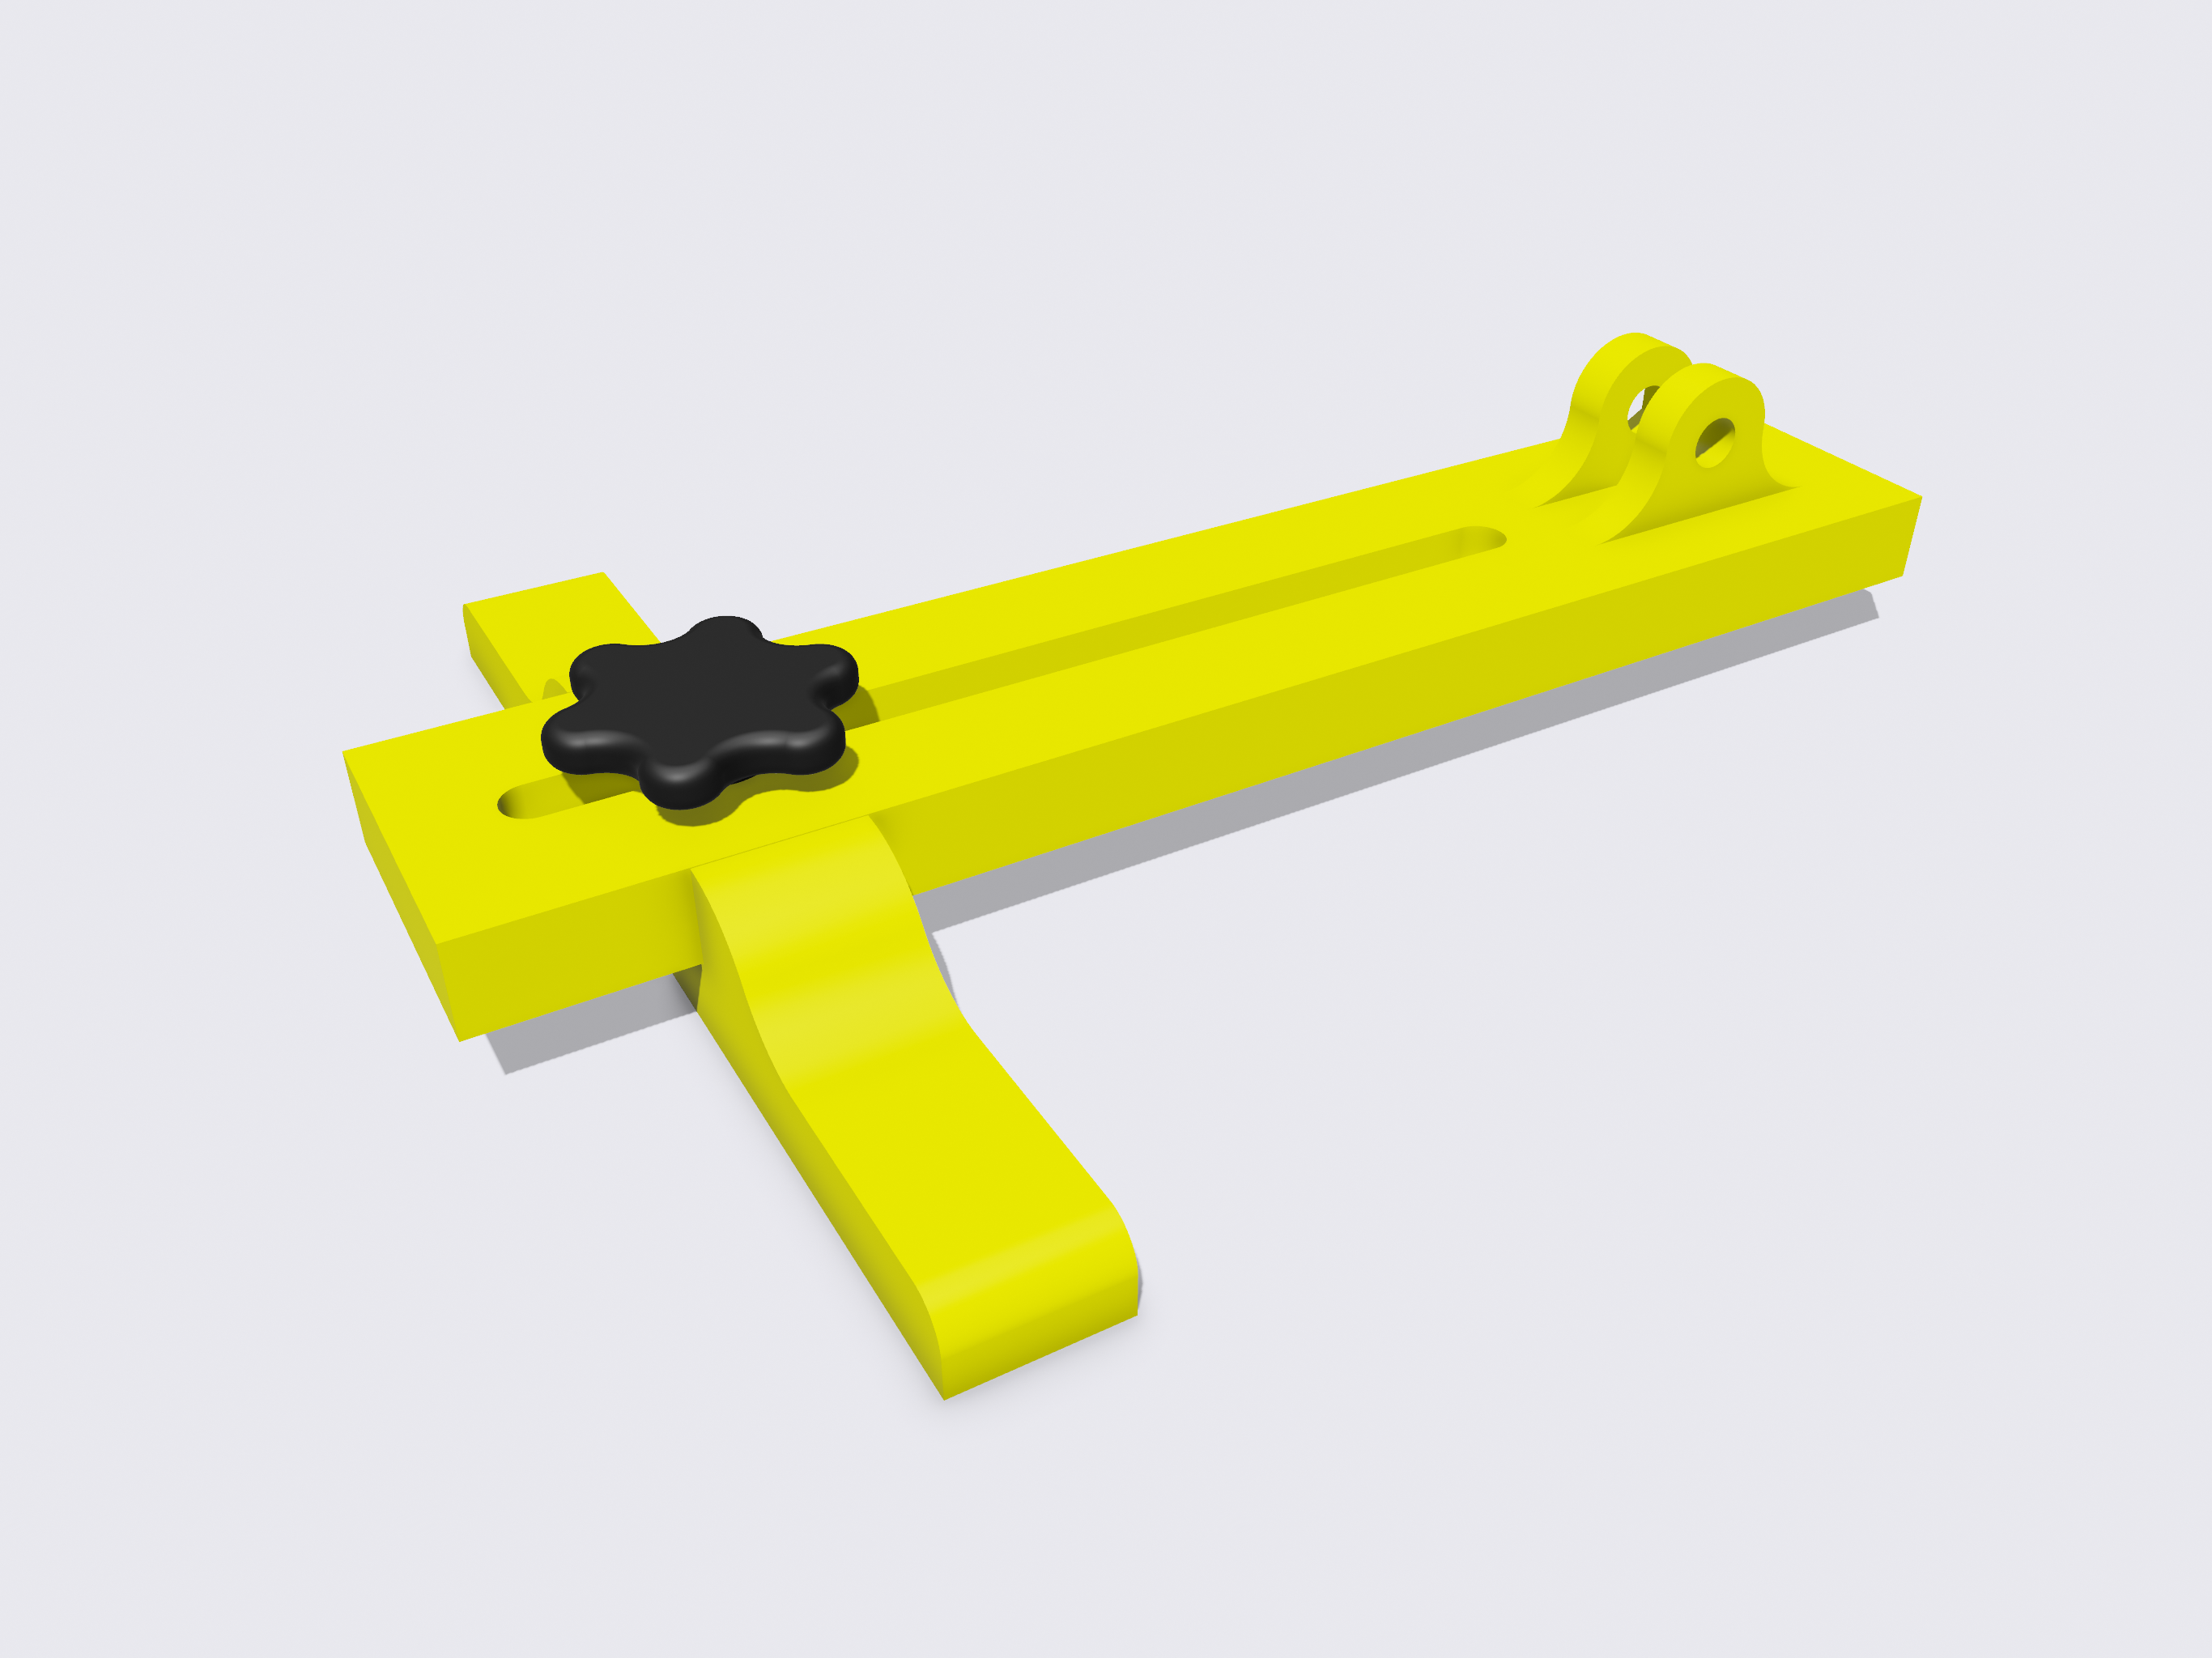
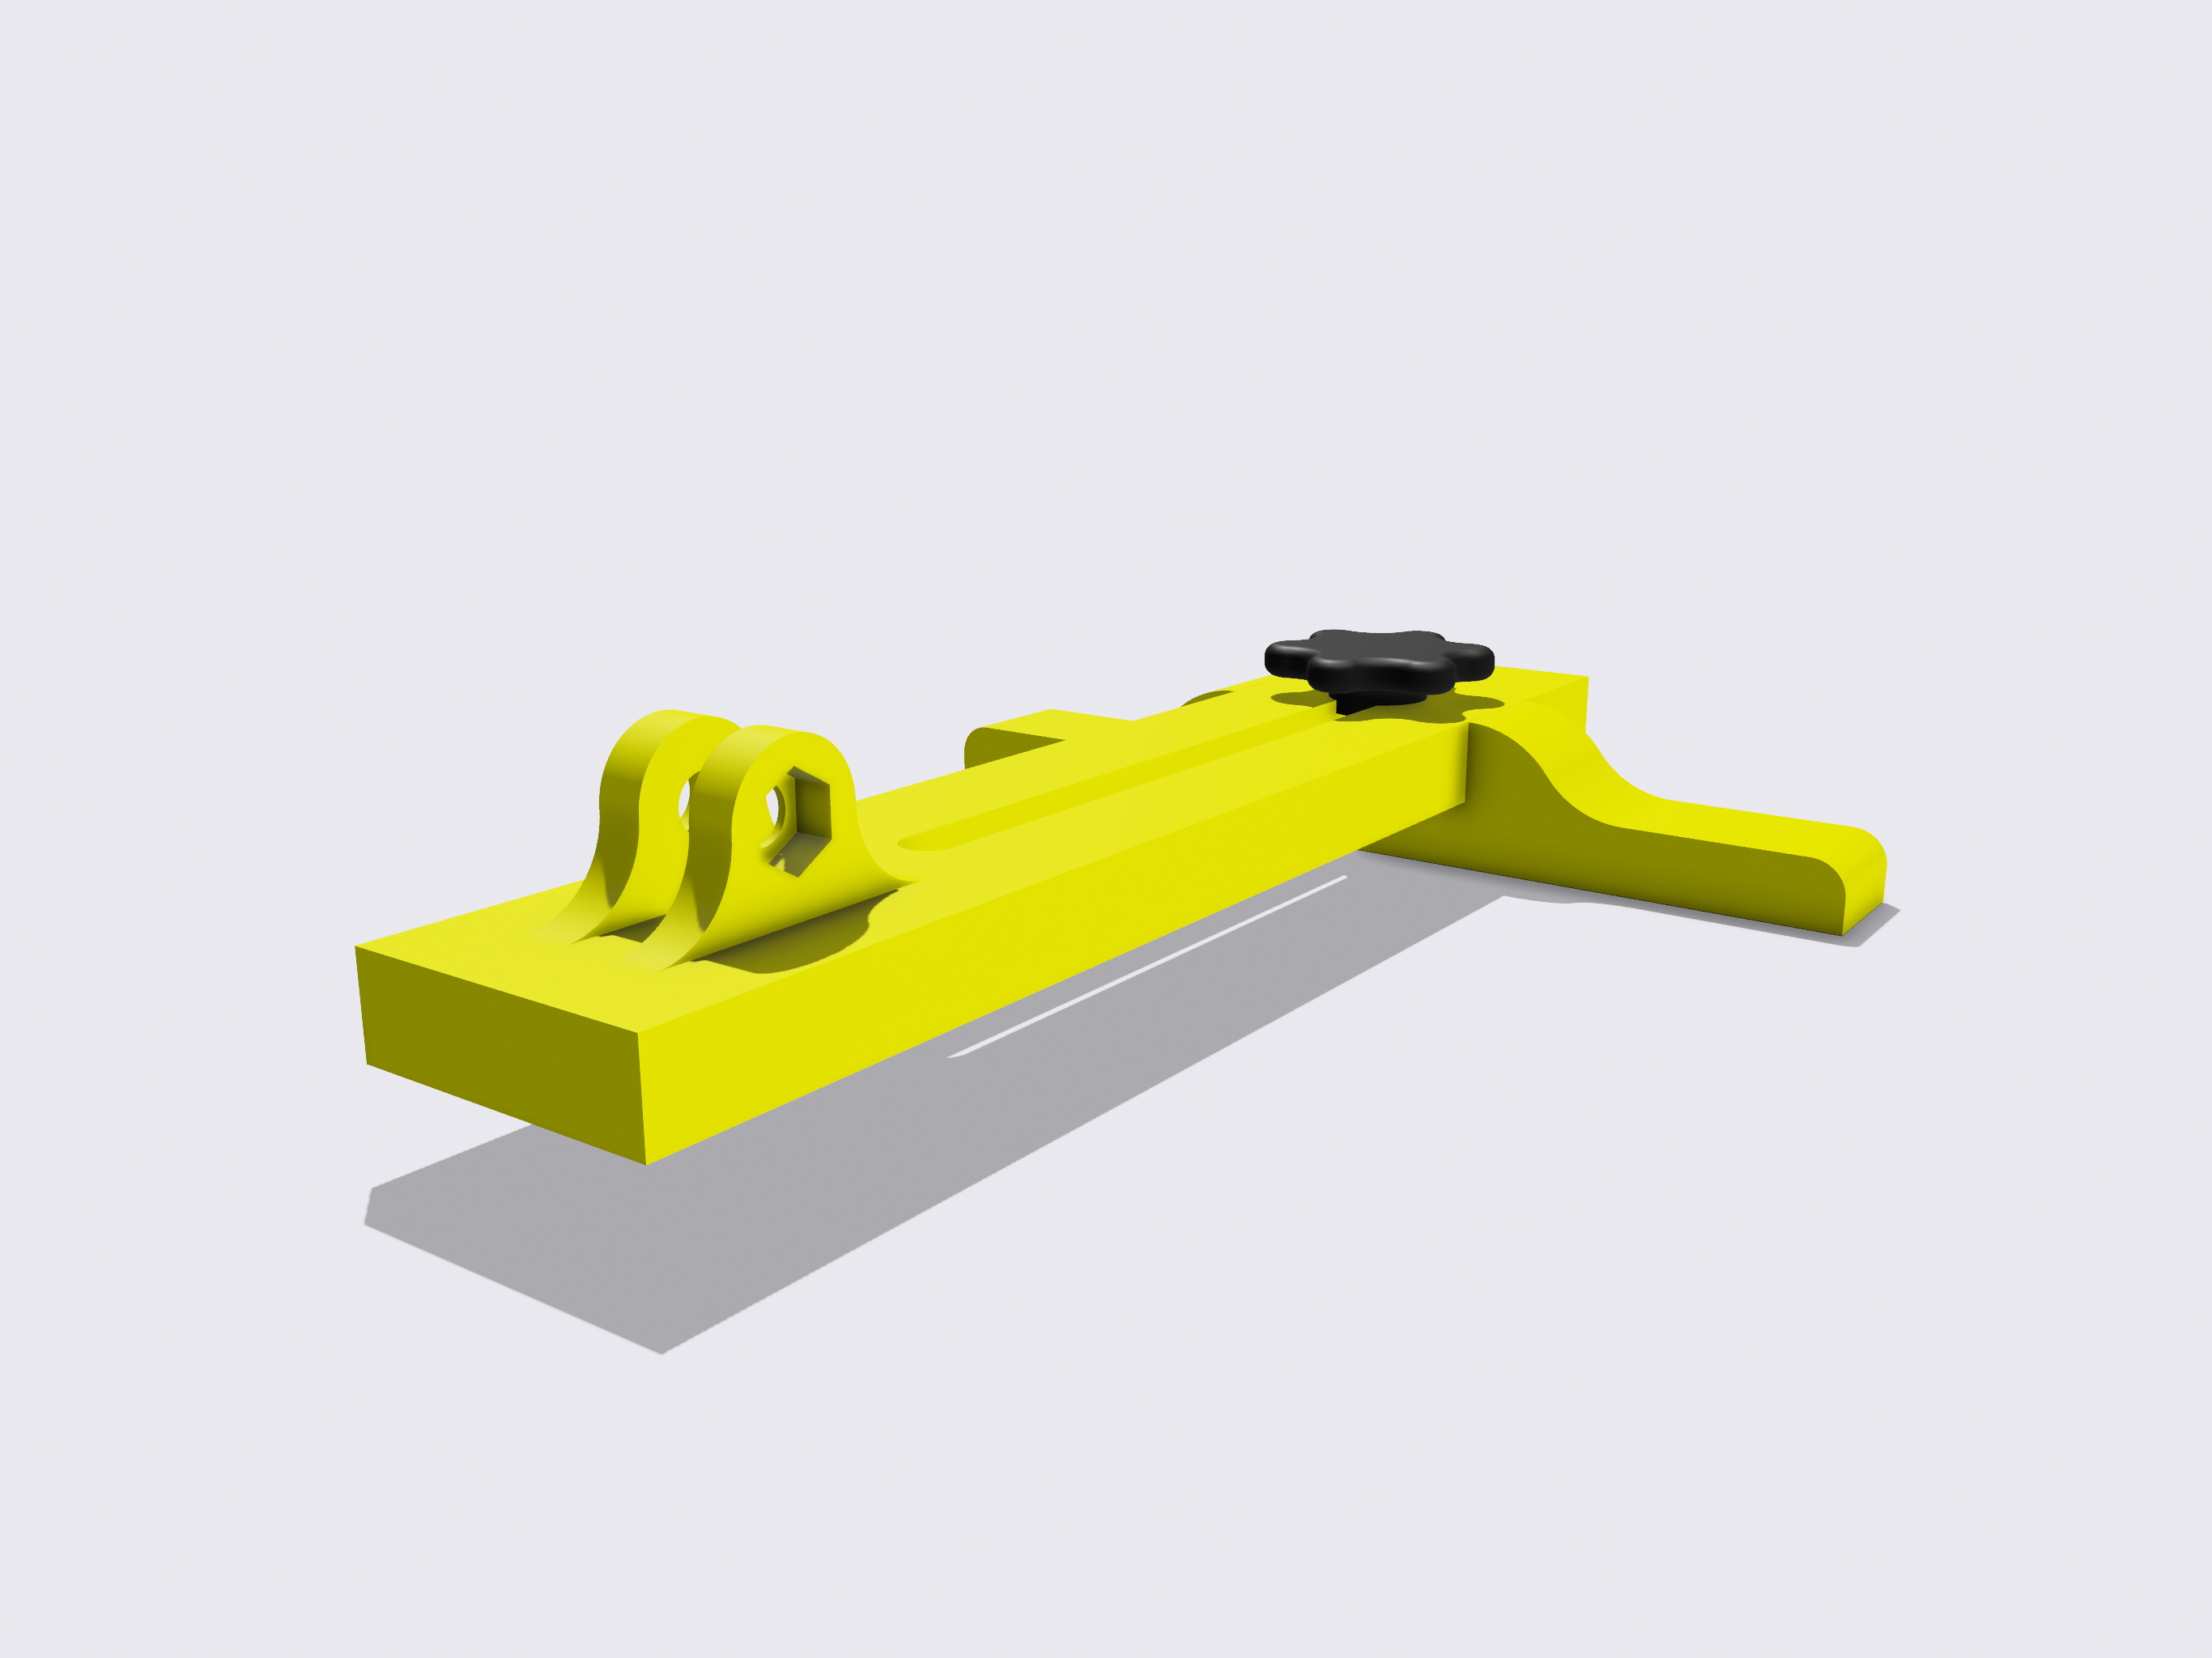
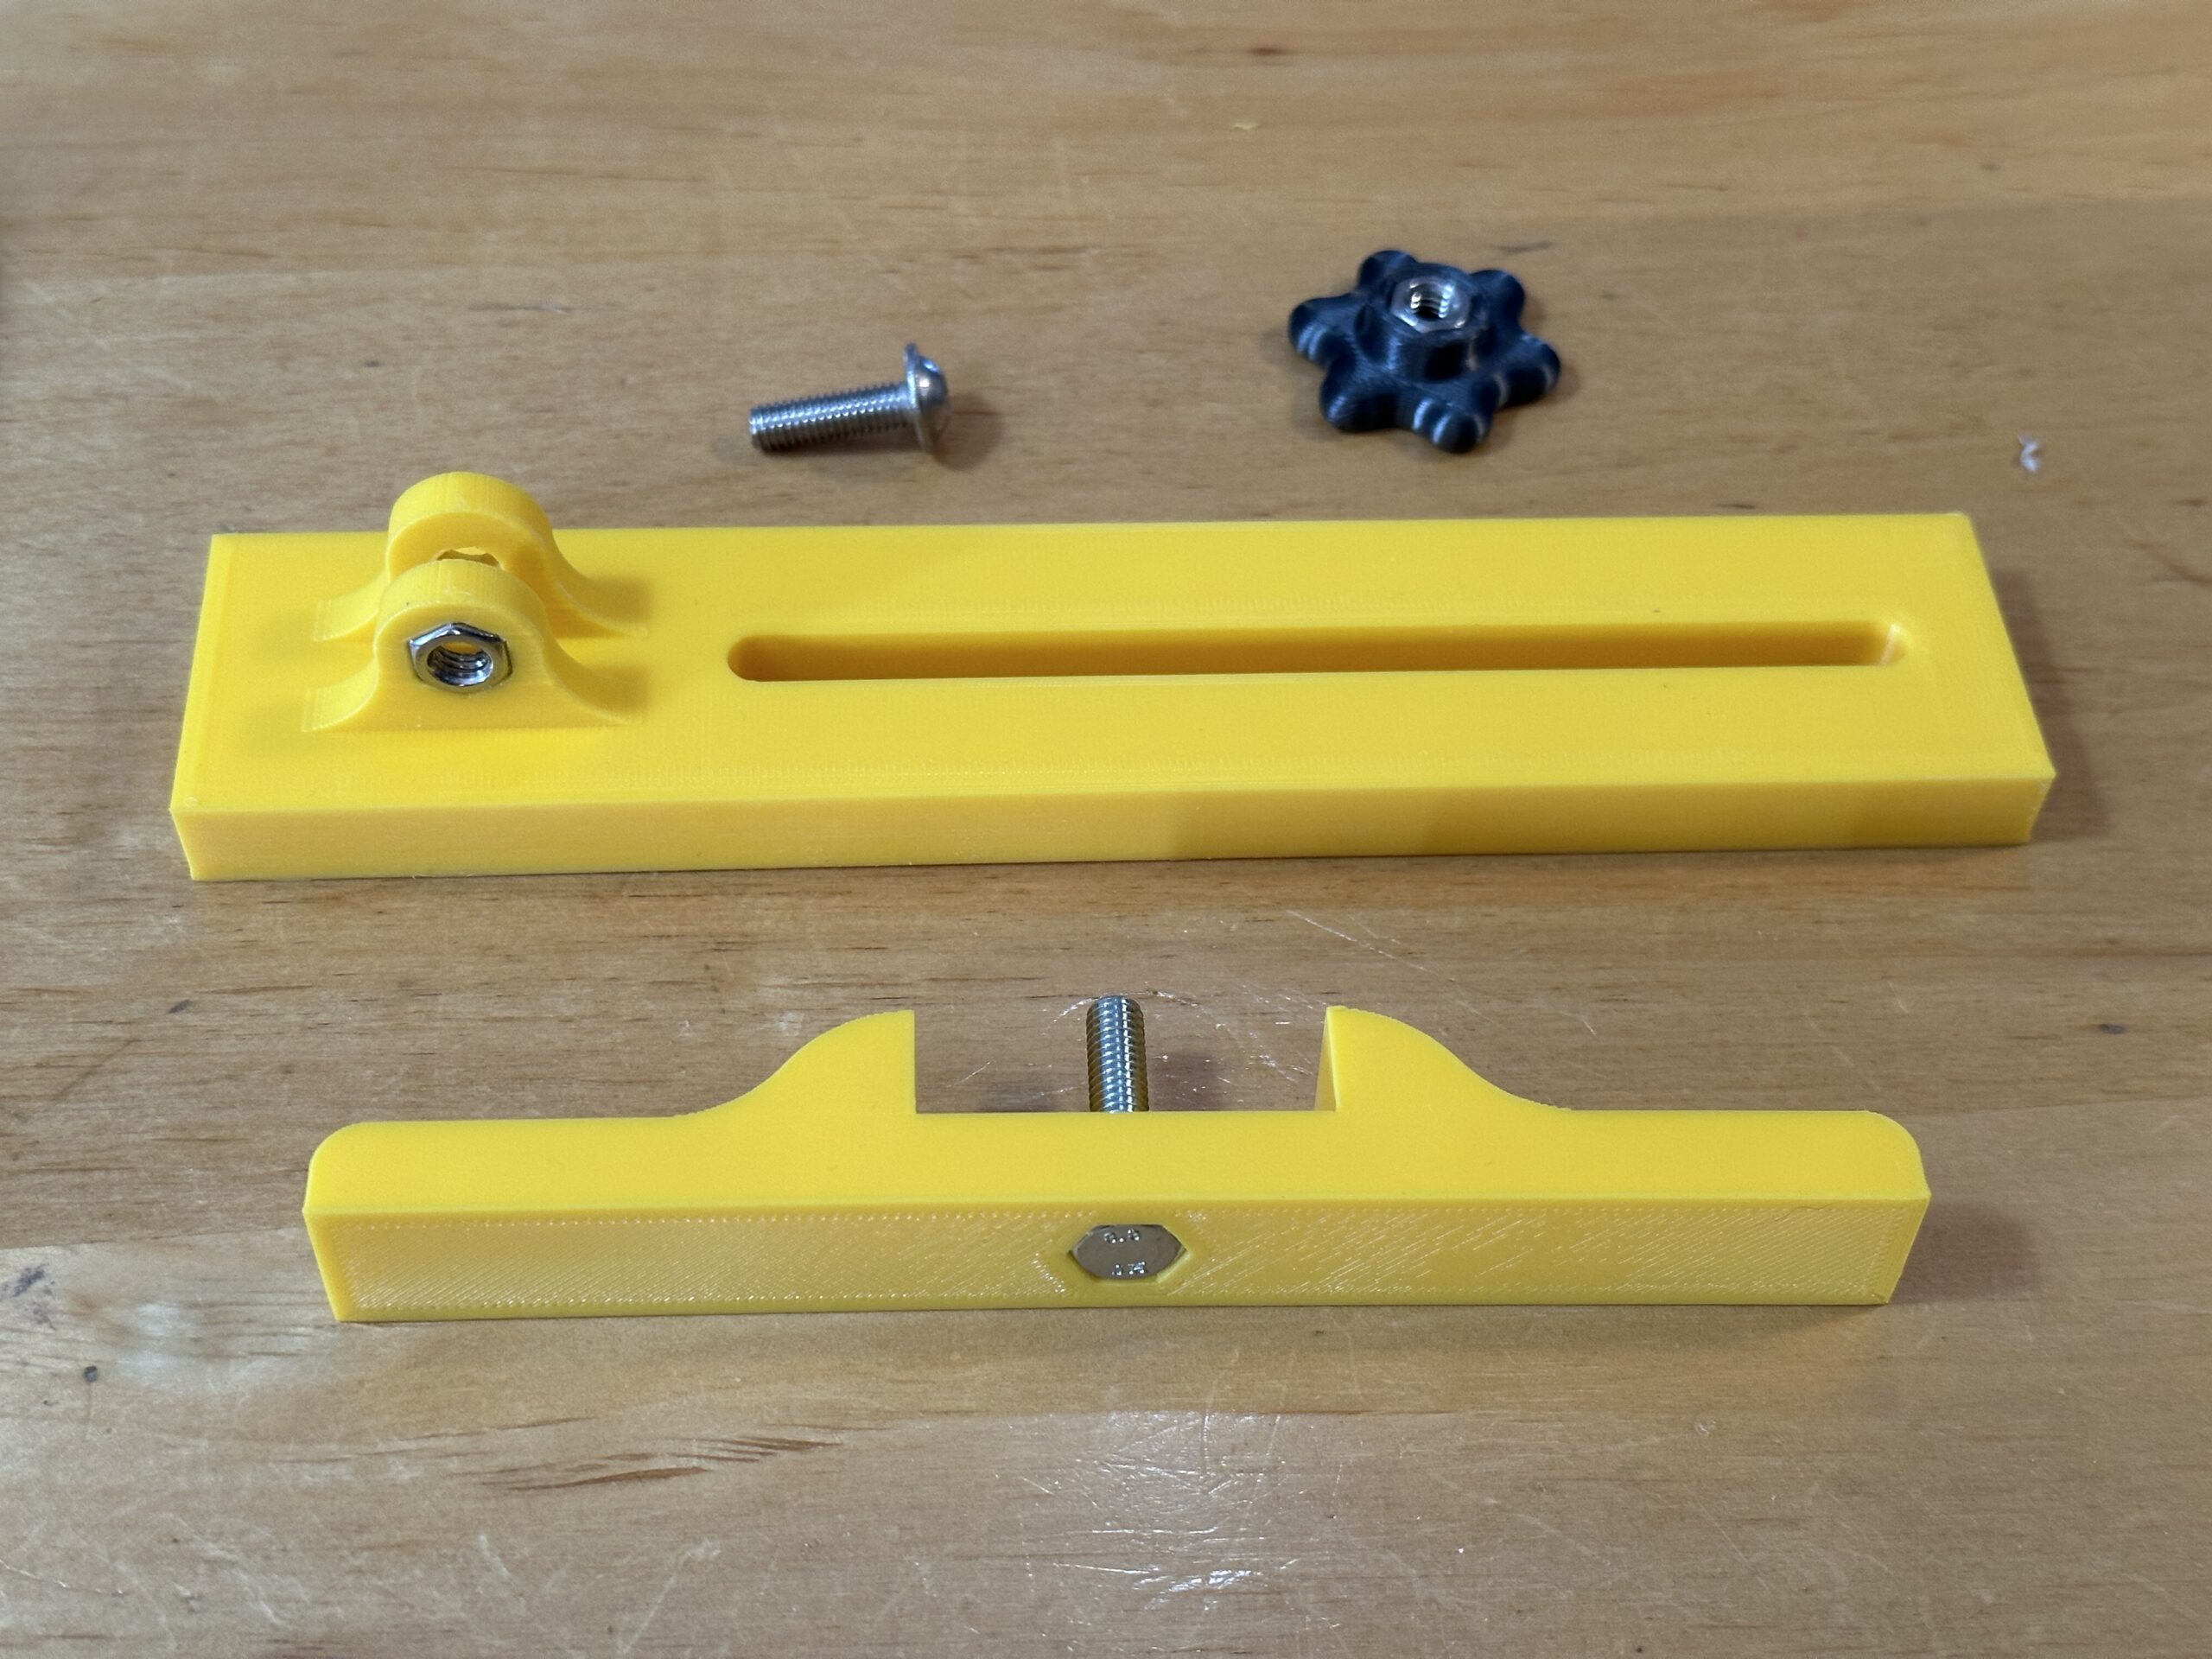
The jig consists of two pieces, a miter bar that slides in the table’s slot, and a cross-bar that slides along the miter bar and on which the indicator is attached. The printing tolerances had to be spot on for this, as any slop in the movement would throw off the readings of the slot-to-blade distance. I slightly oversized the miter bar and then fine-sanded the printed version until it just fit inside the slot. There is no slop whatsoever and it slides easily with little force. I did the same for the cross bar so that it would fit snuggly in the miter bar and not offer any wiggle once the knob was tightened down. Here are the printed parts before assembly.
Here’s the basic idea of how it works. With the jig resting in the miter slot, you adjust the cross bar until the tip of the indicator presses against one end of the saw blade. It should indent just a bit. You take a marker and mark the point on the blade where the tip of the indicator touches it. Next you zero out the indicator reading and then slide it along the blade to the other end of the slot. At the same time, you rotate the blade so that at the other end, the tip touches the same part of the blade. This is so you remove any offset that an out-of-true arbor might have on the measurement process.
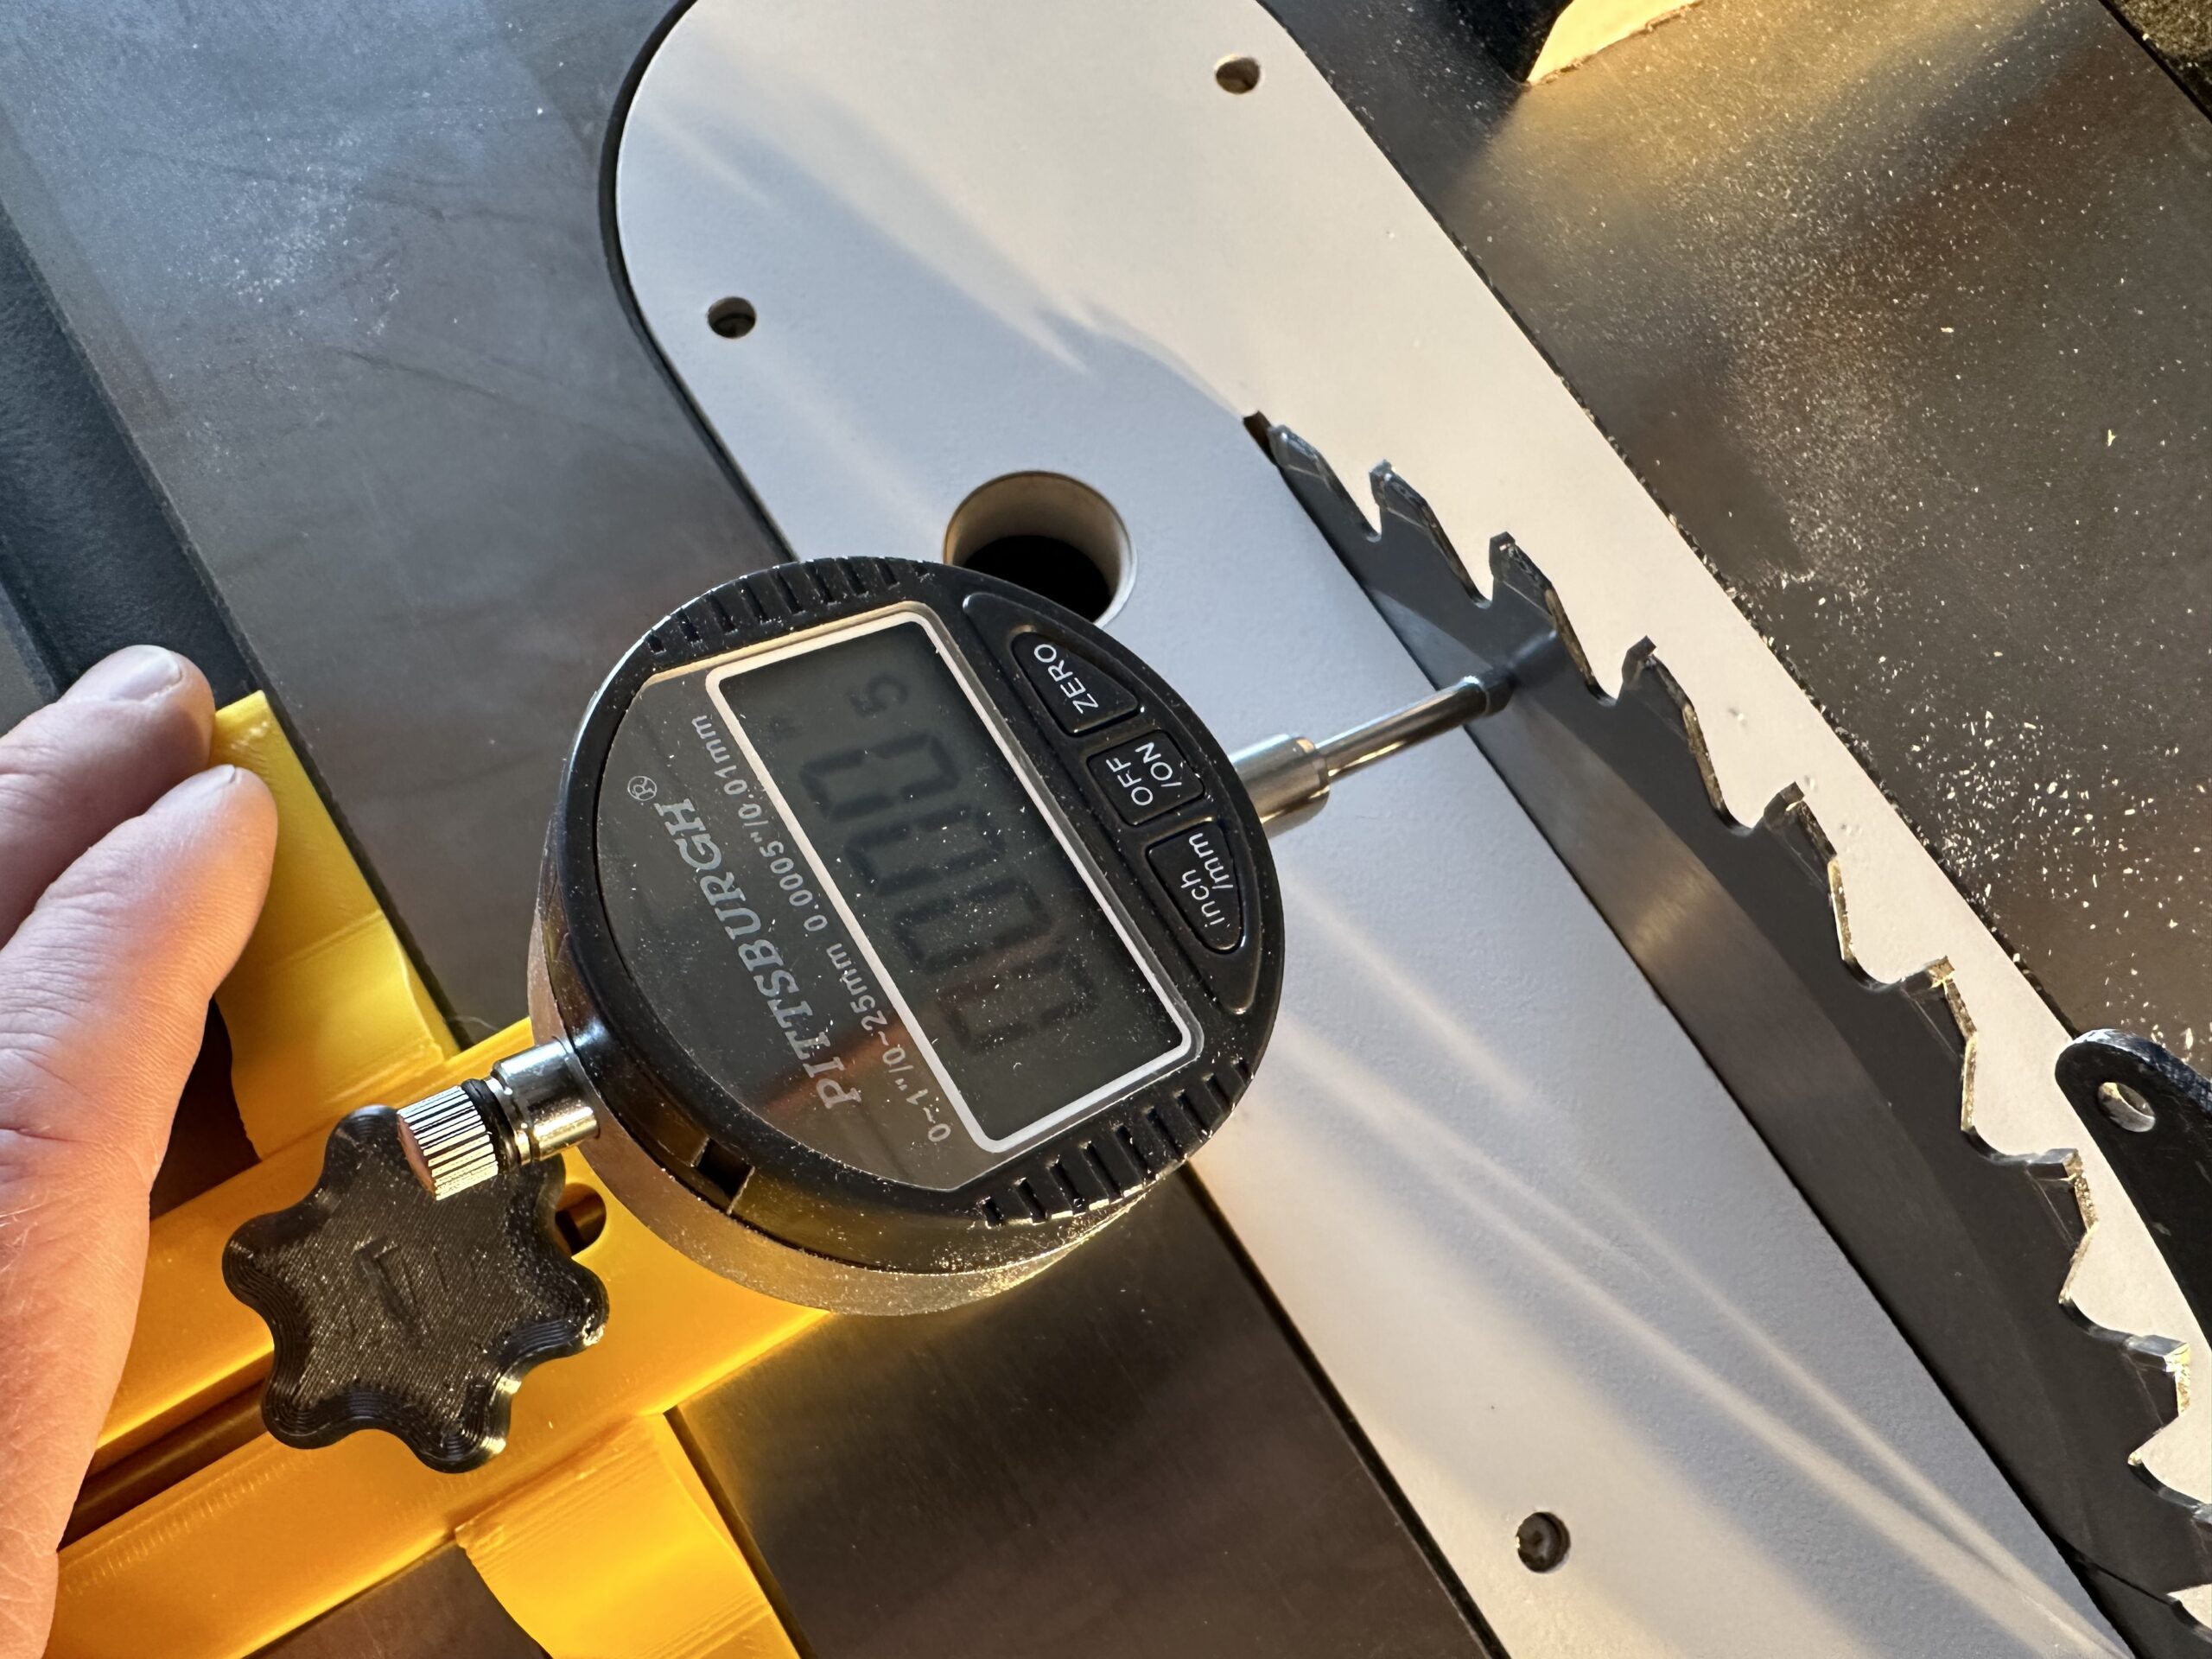
When I first did this, my reading went from zero to +0.005 inches, meaning the table top was out of alignment by 5 thousandths of an inch over a span of about 9 inches. Not acceptable. Four bolts hold the top in place, so these were loosened and then I made soft taps on the edges with a rubber mallet to move the top ever so slightly in the direction indicated by the gauge. After each tap, I would run the jig to see how much more needed to be corrected. No matter how softly I tapped, correcting one end would throw off the other, so the whole process involves a series of back and forth measure-then-tap steps. It took maybe five minutes to reach a point where the indicator remained at dead zero over the range measured. That means I was within a thousandth of an inch and that is perfect for woodworking. Finally, I tightened the bolts down, rechecking after each bolt was snug to ensure nothing moved. It was hard to rotate the blade while running the jig and holding the camera, so the video below only shows the jig being moved and not the saw blade. However, this is a new table saw and the arbor is true.
With the table top miter slot now perfectly parallel to the blade it was time to adjust the rip fence so that it, too, was parallel to the saw blade. This is done by adjusting the fence to be parallel to the same miter slot. The process is similar and involves sliding the jig and measure any deflection along the fence. There are two adjustment screws that rotate the fence towards or away from the blade. A quarter turn of any one of the screws is enough to put in a 0.003-inch correction, so these adjustments had to be tiny, with a run of the jig after each adjustment. The video below shows the final result, no deflection from one end to the other, about two feet part. Again, that is perfect for woodworking.
That’s it. I now have a properly aligned table saw top and fence. I did a few test rips with a four foot board and it moved through smooth as butter.
Files to print your own jig can be found here. The miter bar will fit any standard 3/4″ (19.25mm) wide, 1/2″ (12.7mm) deep miter slot. The miter bar is only 10mm thick to avoid hitting the bottom of the slot.


Recent Comments