3D Printed Replacement Off-button for a Jointer
Here is a functional print that I’ve been meaning to do for some weeks now. It is a replacement off-button for one of my workshop machines.
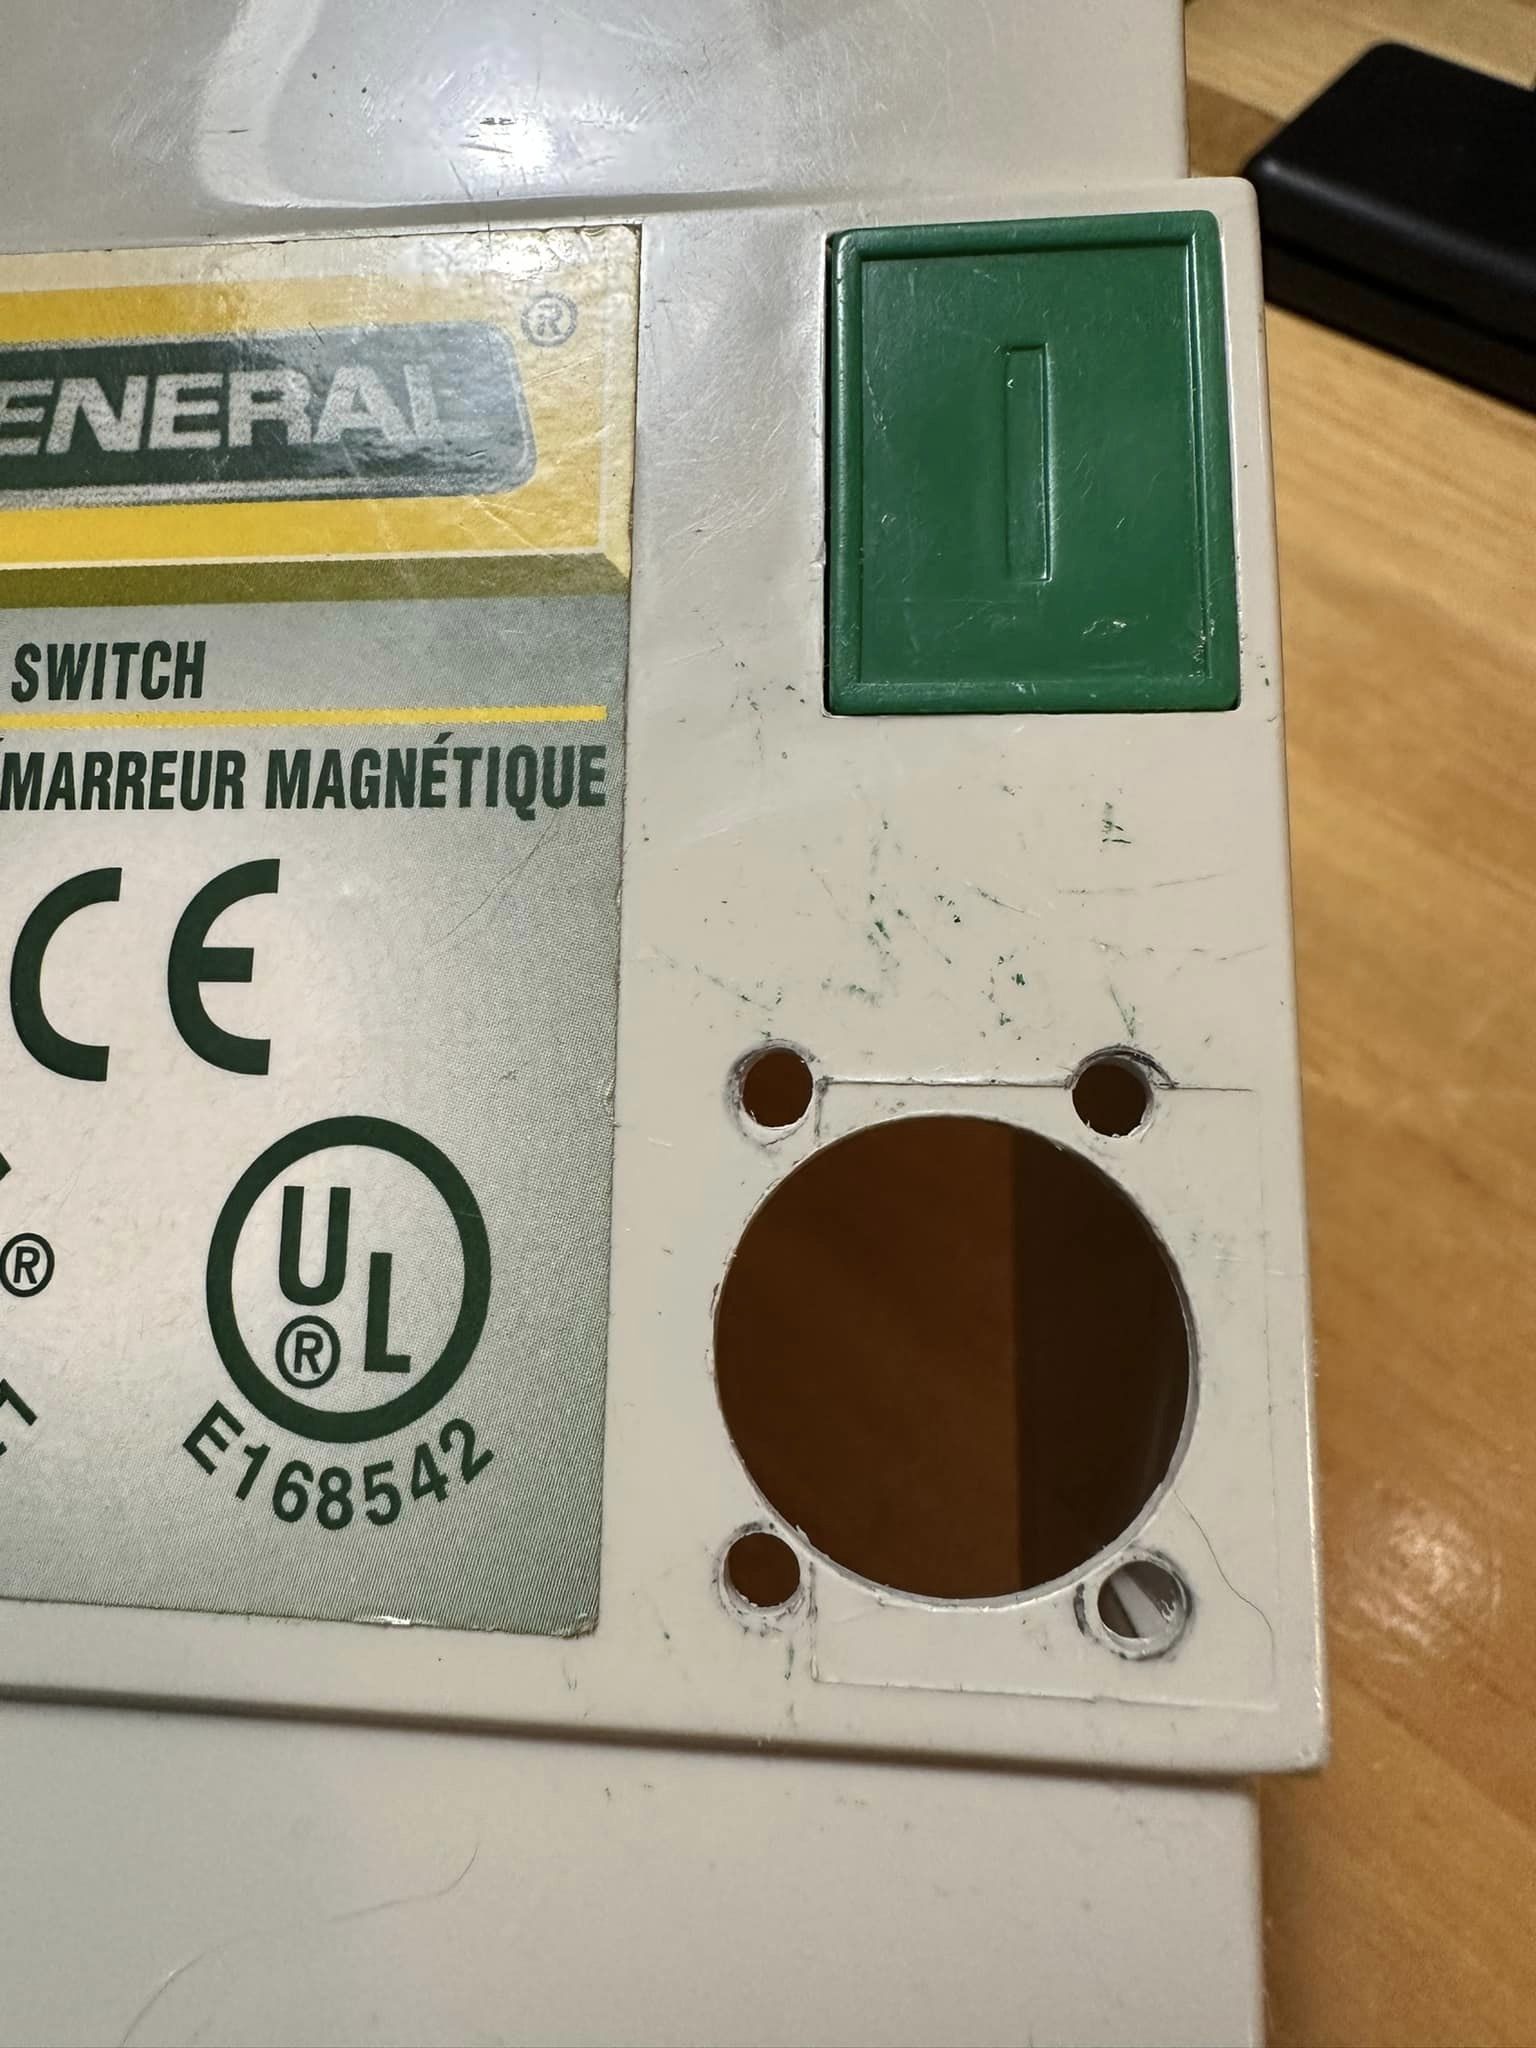
Two months ago I got a great deal on a used 8-inch General jointer (original Canadian made) and it is a terrific machine, except that it was missing the big red push button that turns it off. Instead, you would have to insert a finger into the hole where the button should be, and press a smaller button offset to the left by about 2-1/2 centimeters. It’s a bit awkward and complicated by the fact that your finger is exposed to 240V/20A wires on the inside of the box if you aren’t careful.
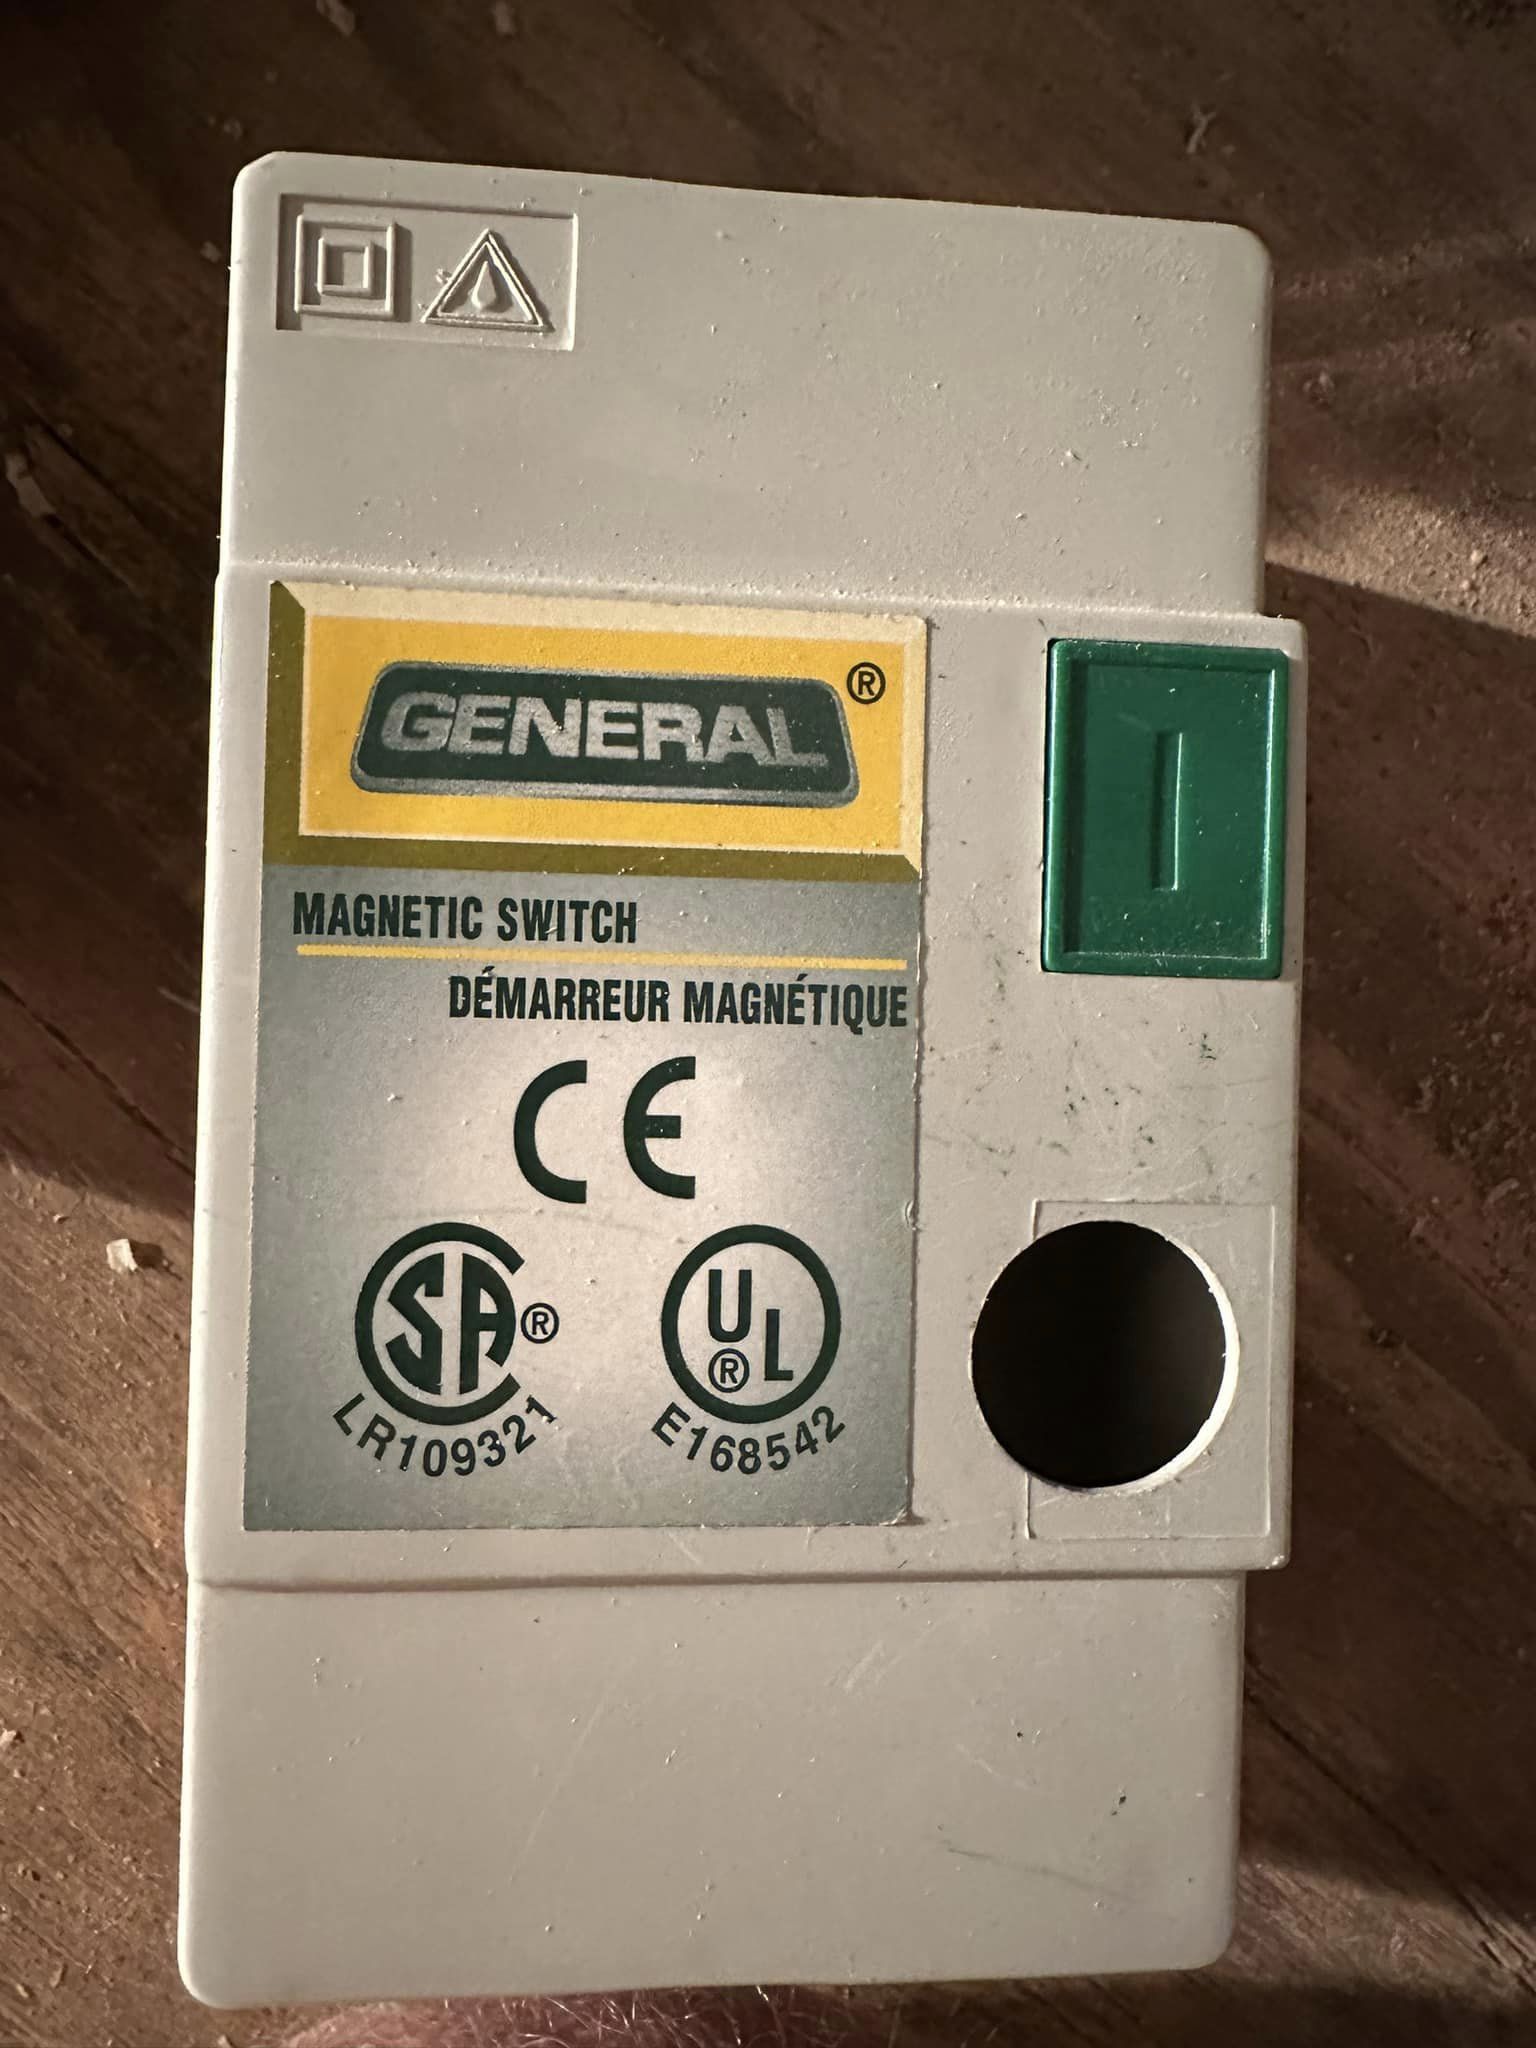
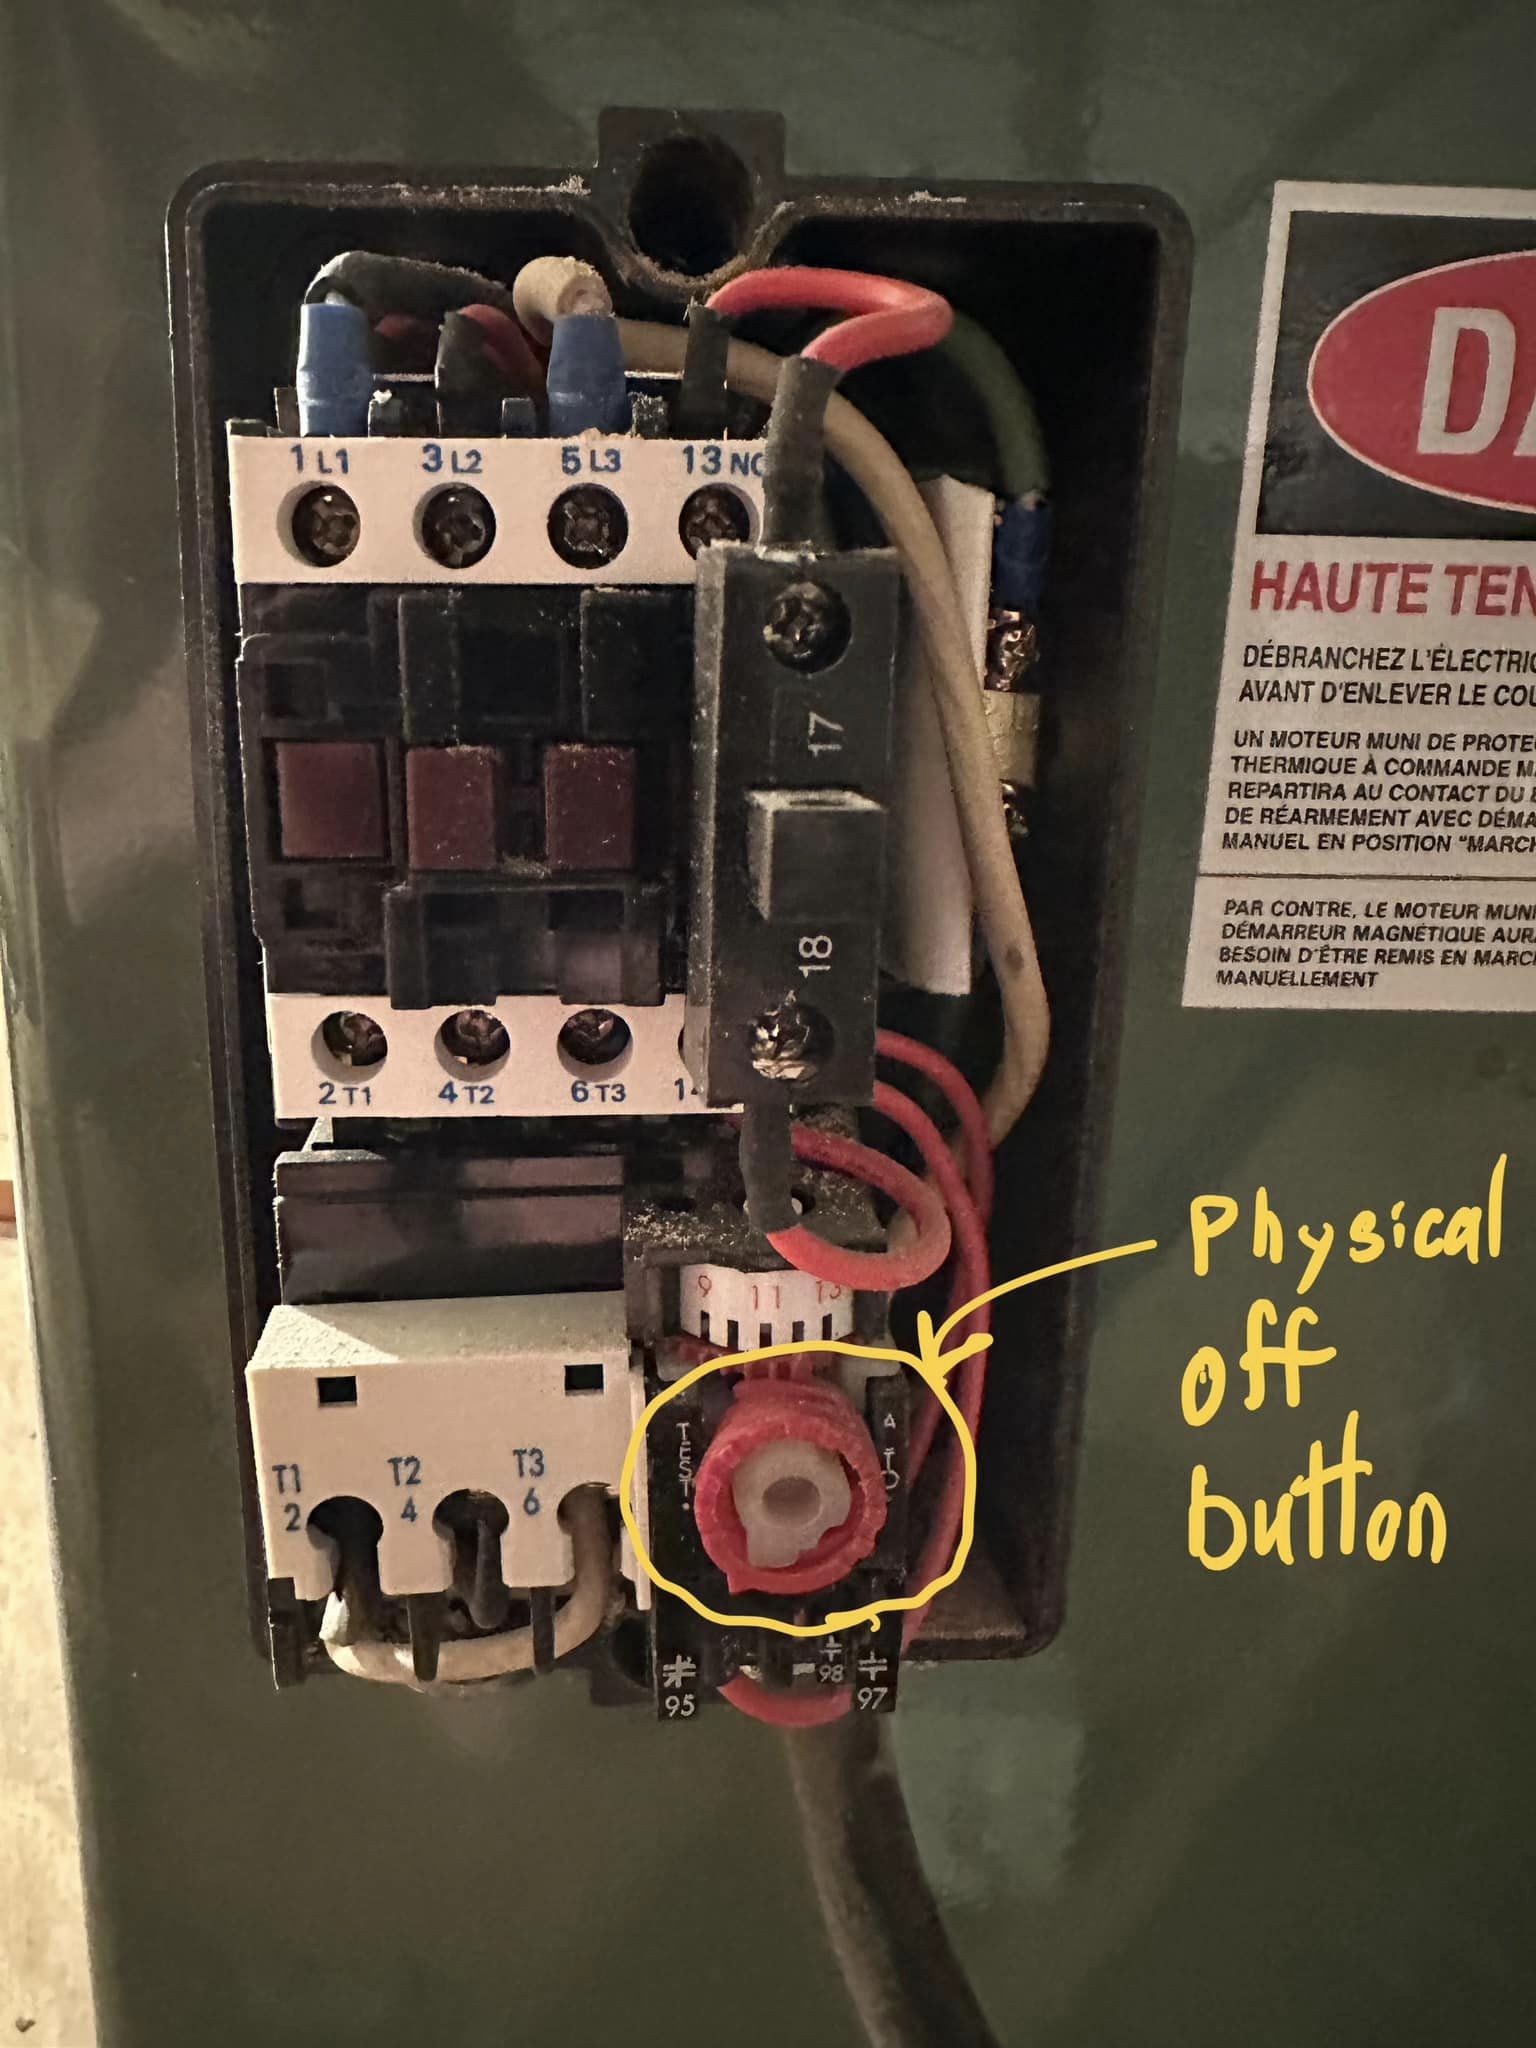
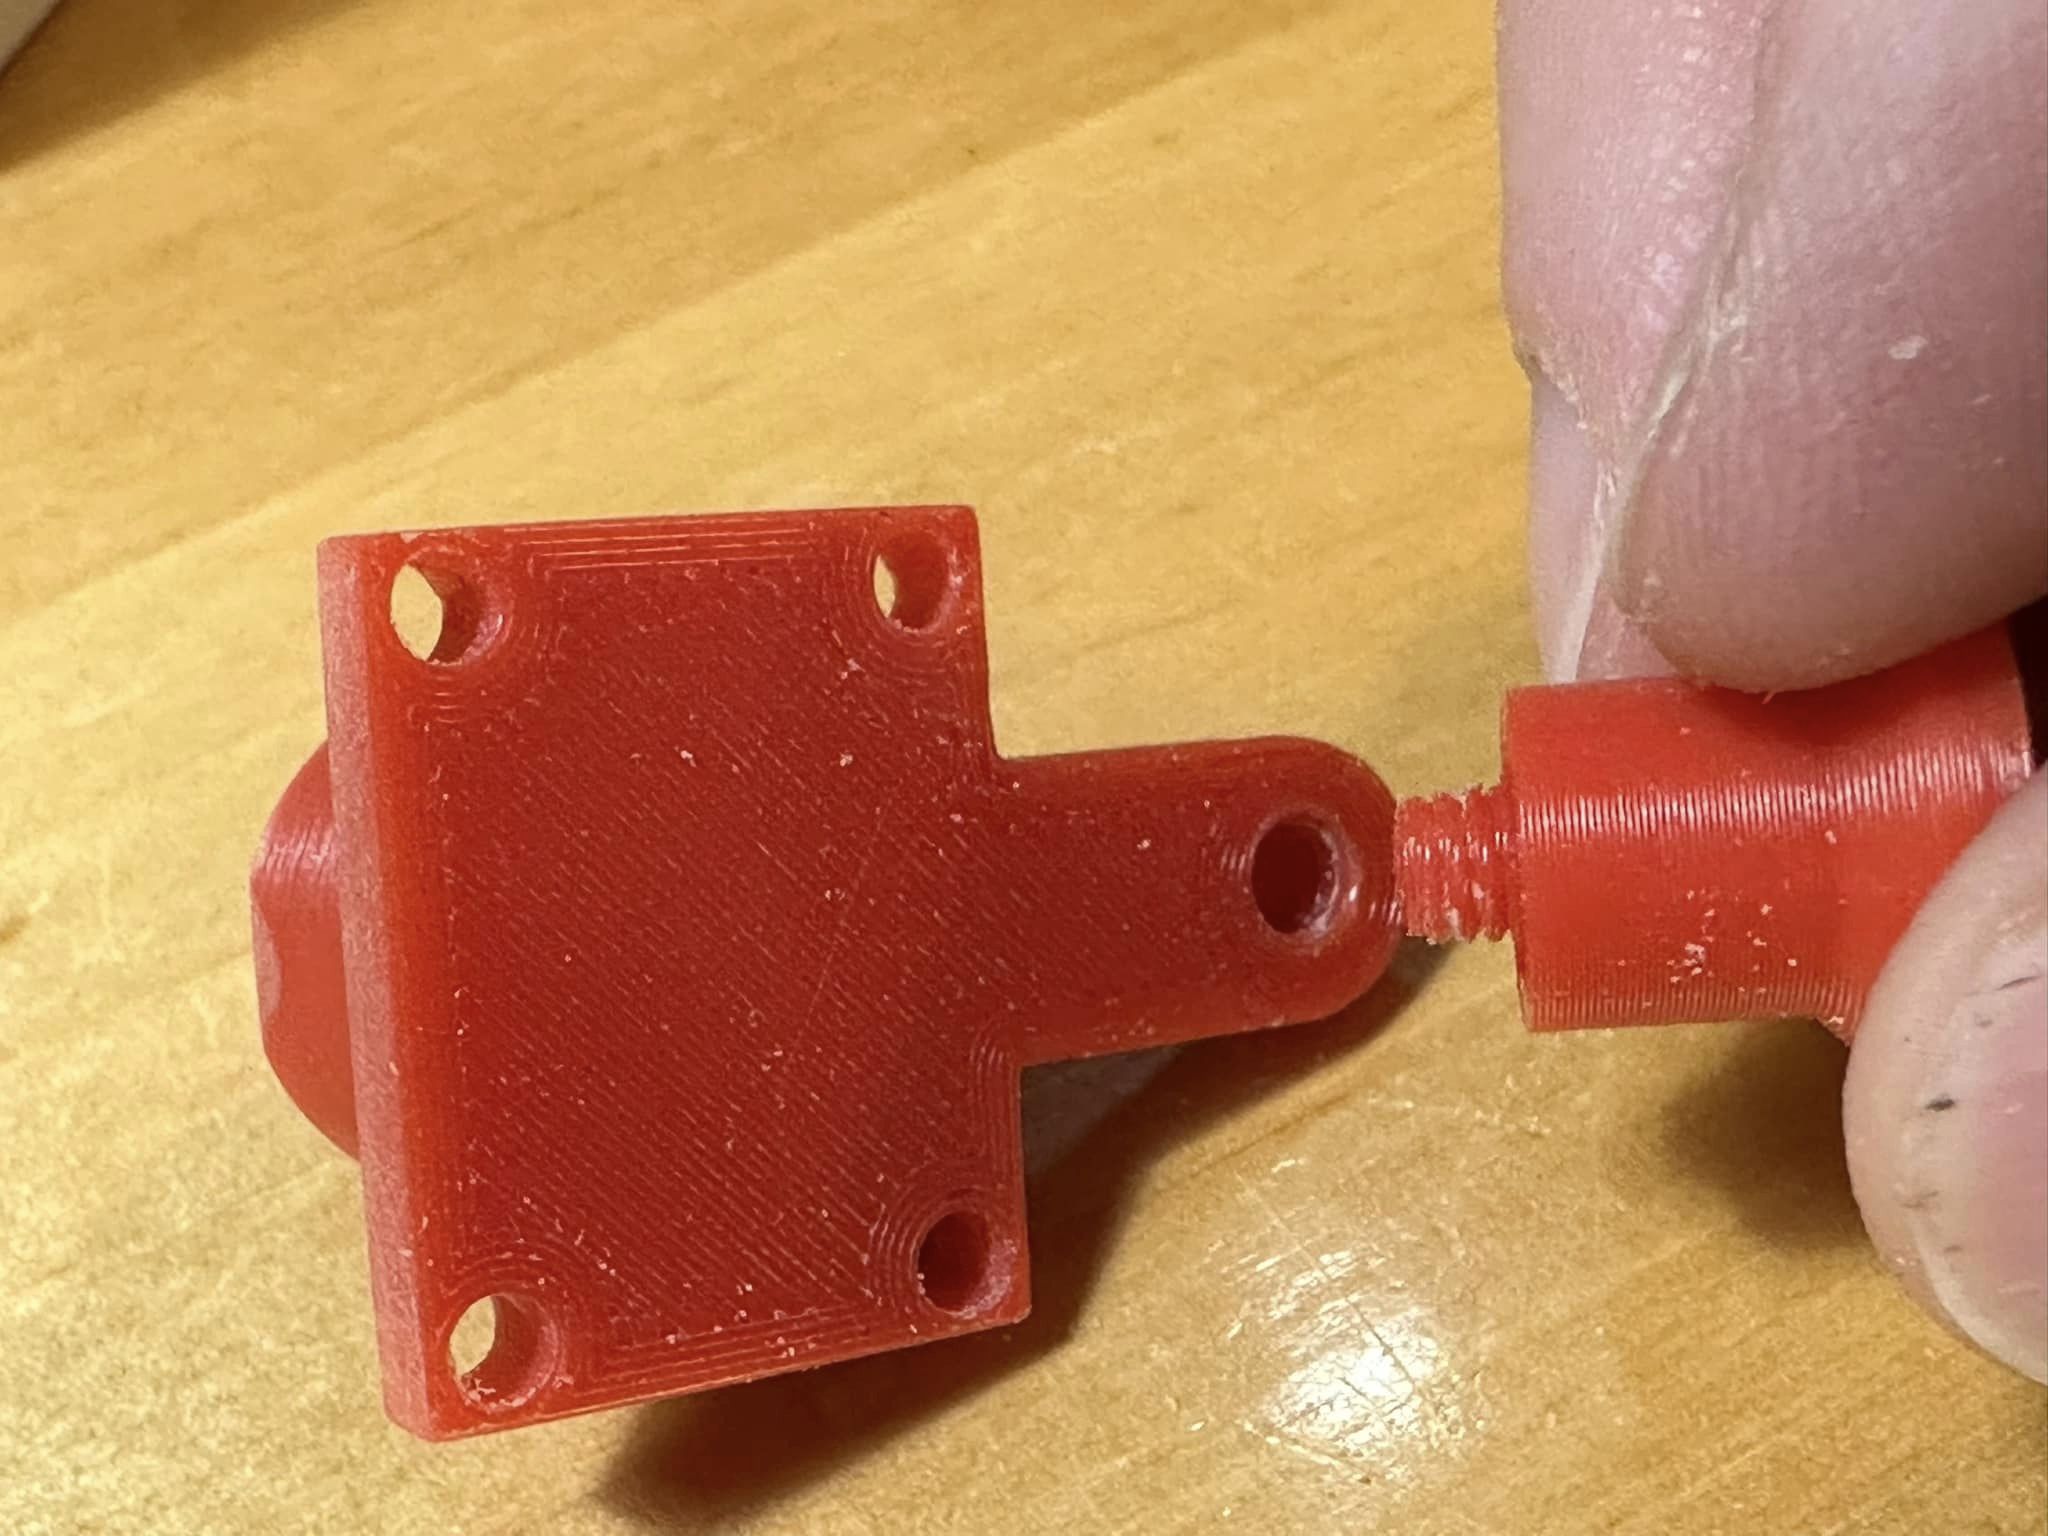
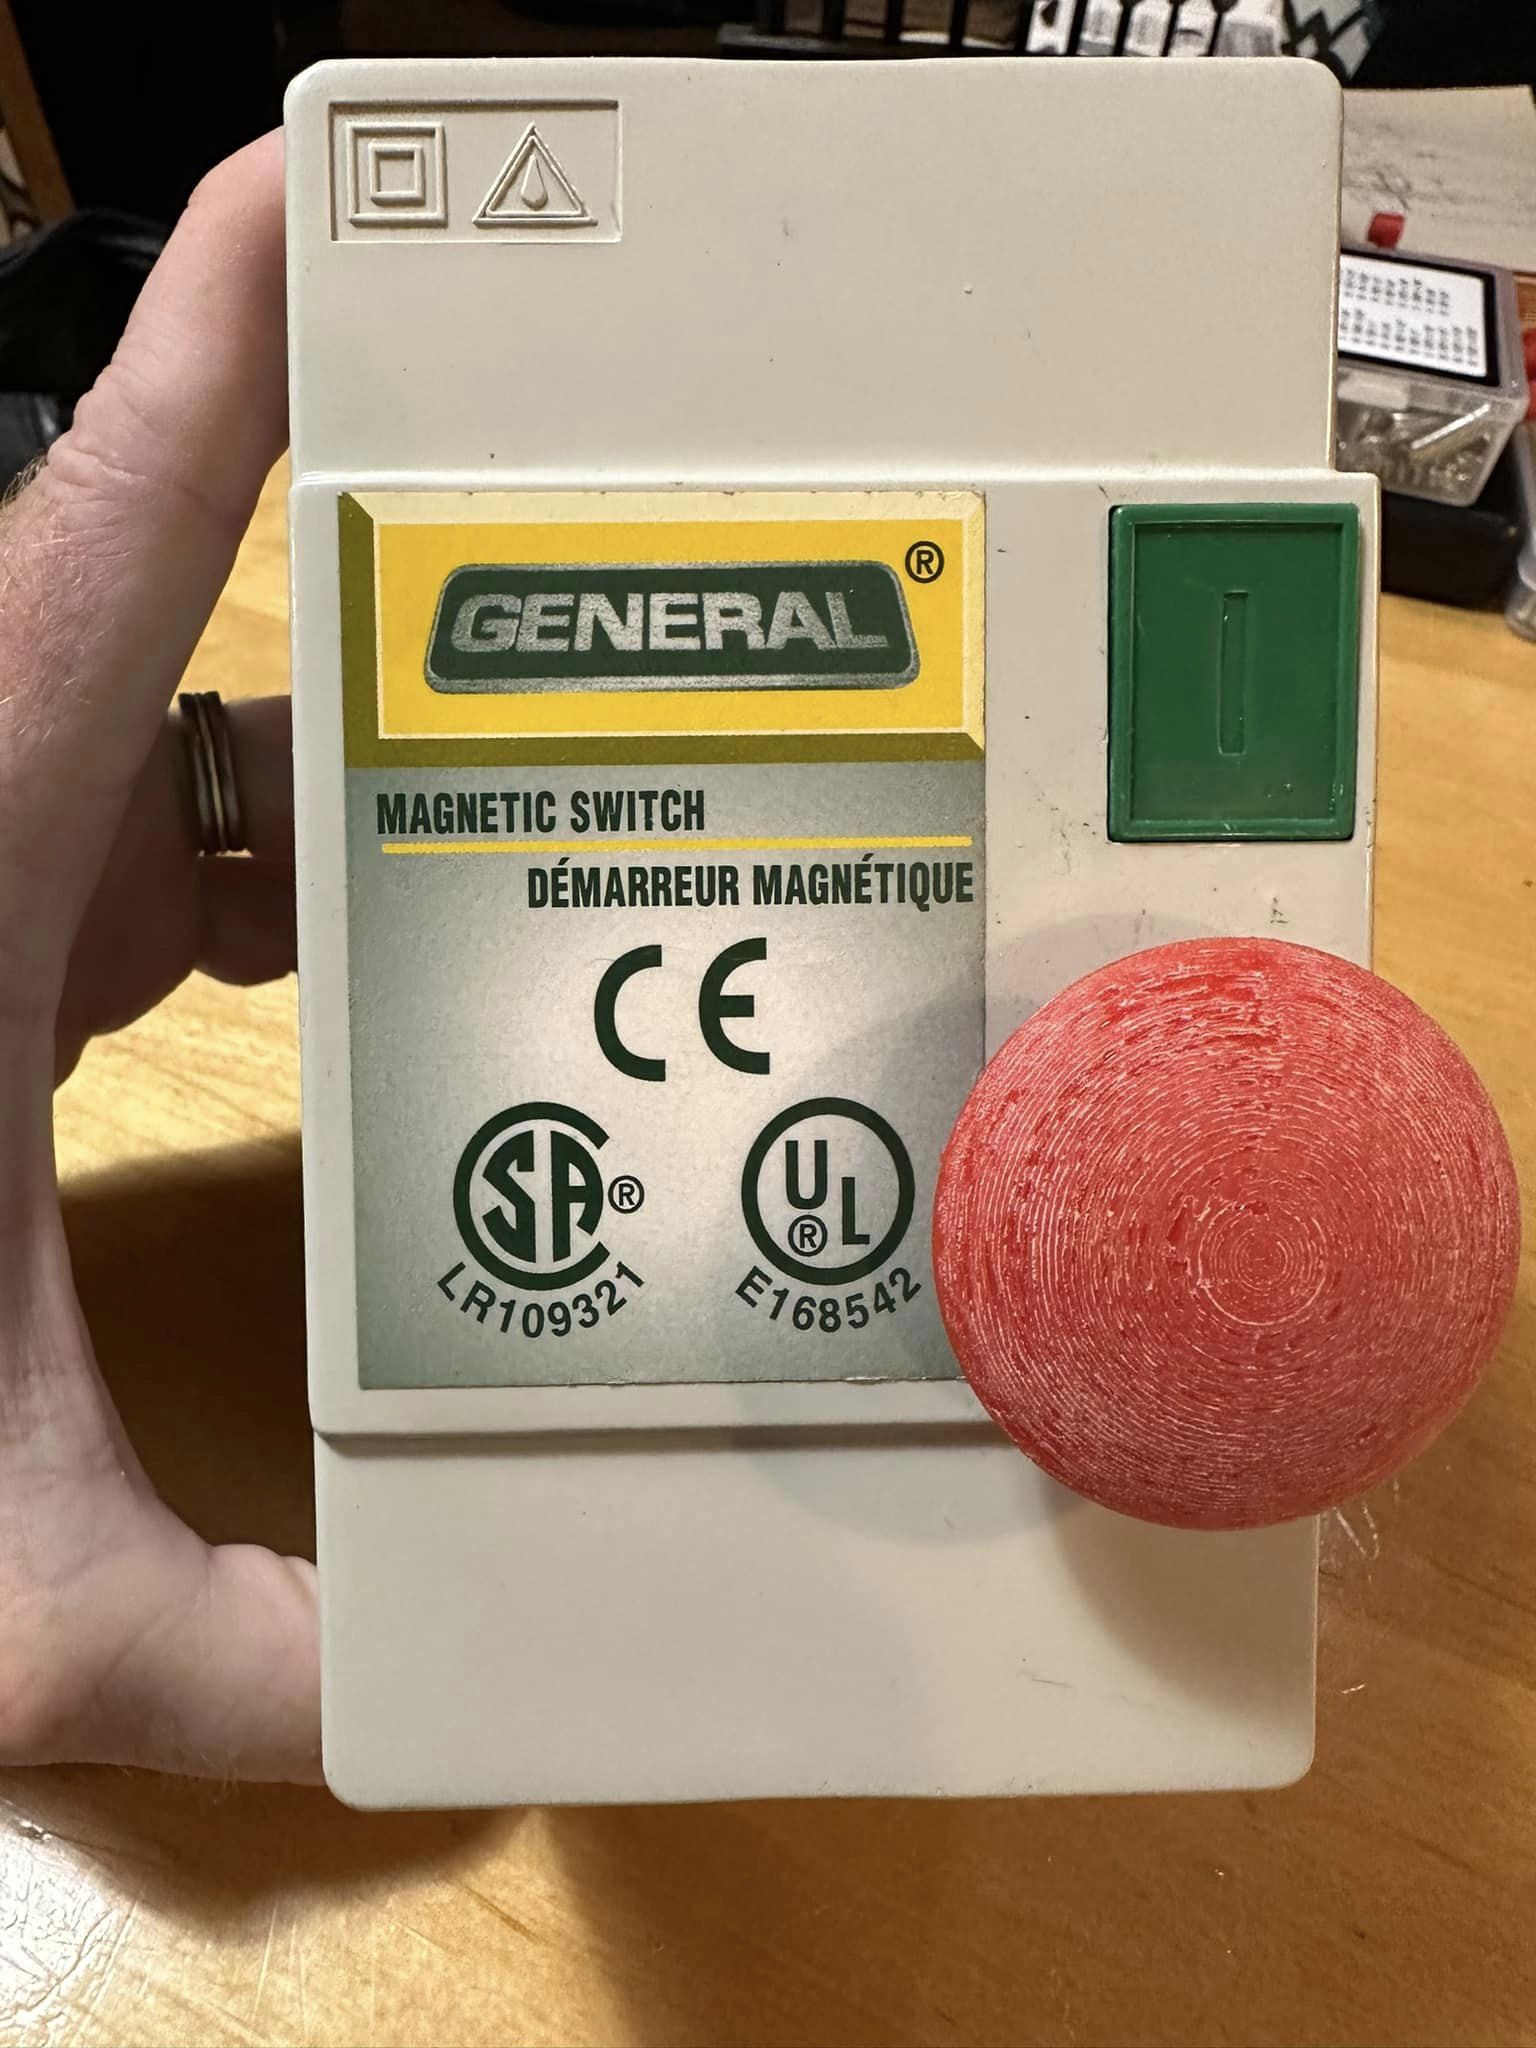
A new compatible switch module runs around $85 at the moment and I didn’t want to purchase a new one unless I absolutely had to. I scoured the web looking for details of this magnetic switch module. All I could find was photos of the outside, showing the big round red button that should have been there. Looking at the inside, there is nothing indicating how the button attached, no broken pieces, nada. Because the physical button on the inside is offset from where the hole is on the outer box, things were not straight forward. What I ended up designing was a simple box that would house a set of springs, and an internal mechanism that would connect to a big red button on the outside, and transfer the push to a smaller cylinder on the inside. This cylinder makes contact with the physical button on the control module. It is the small red circle at the bottom in the photo above showing the wired up switch module.
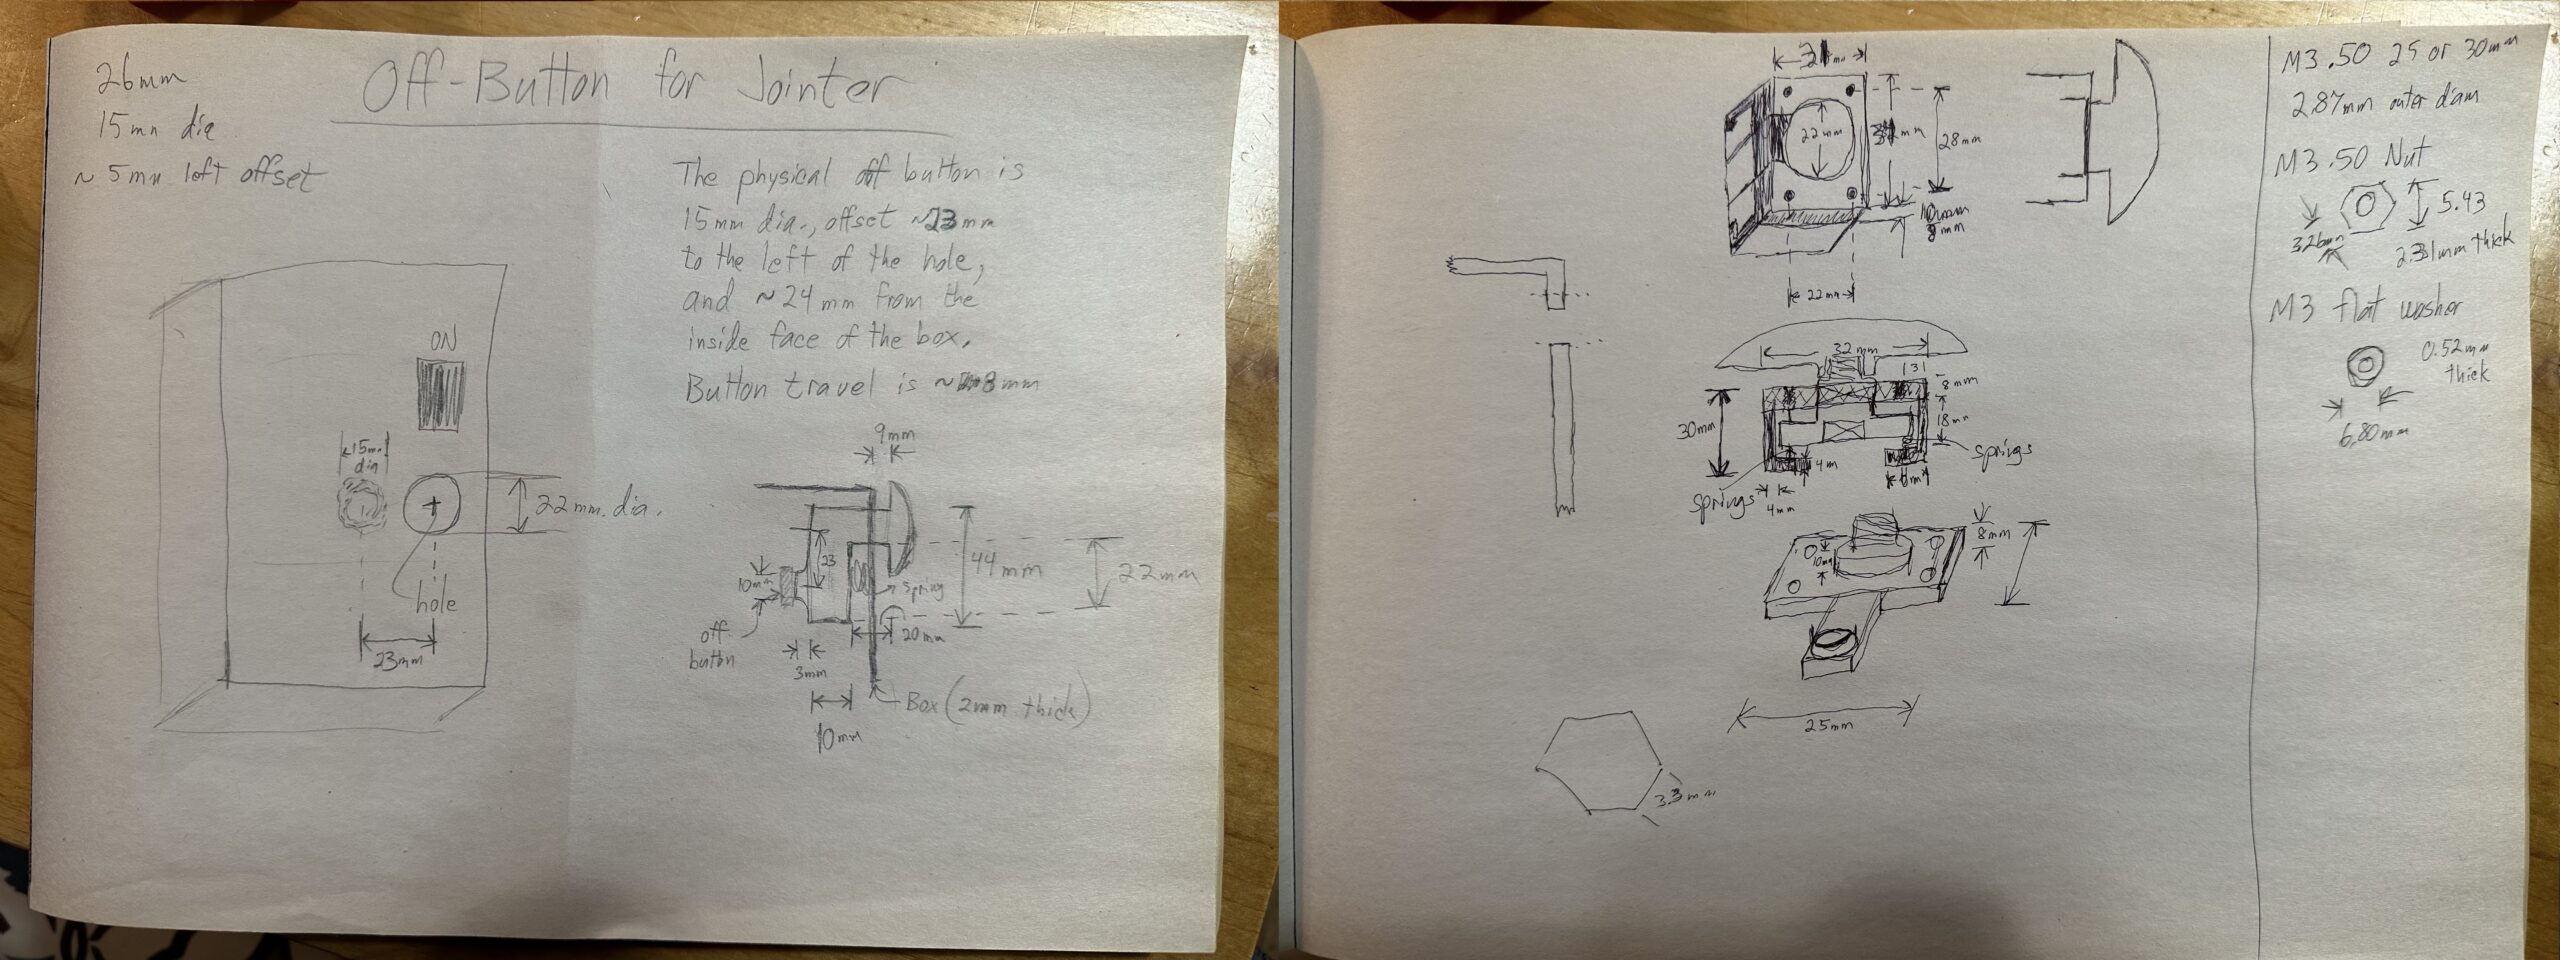
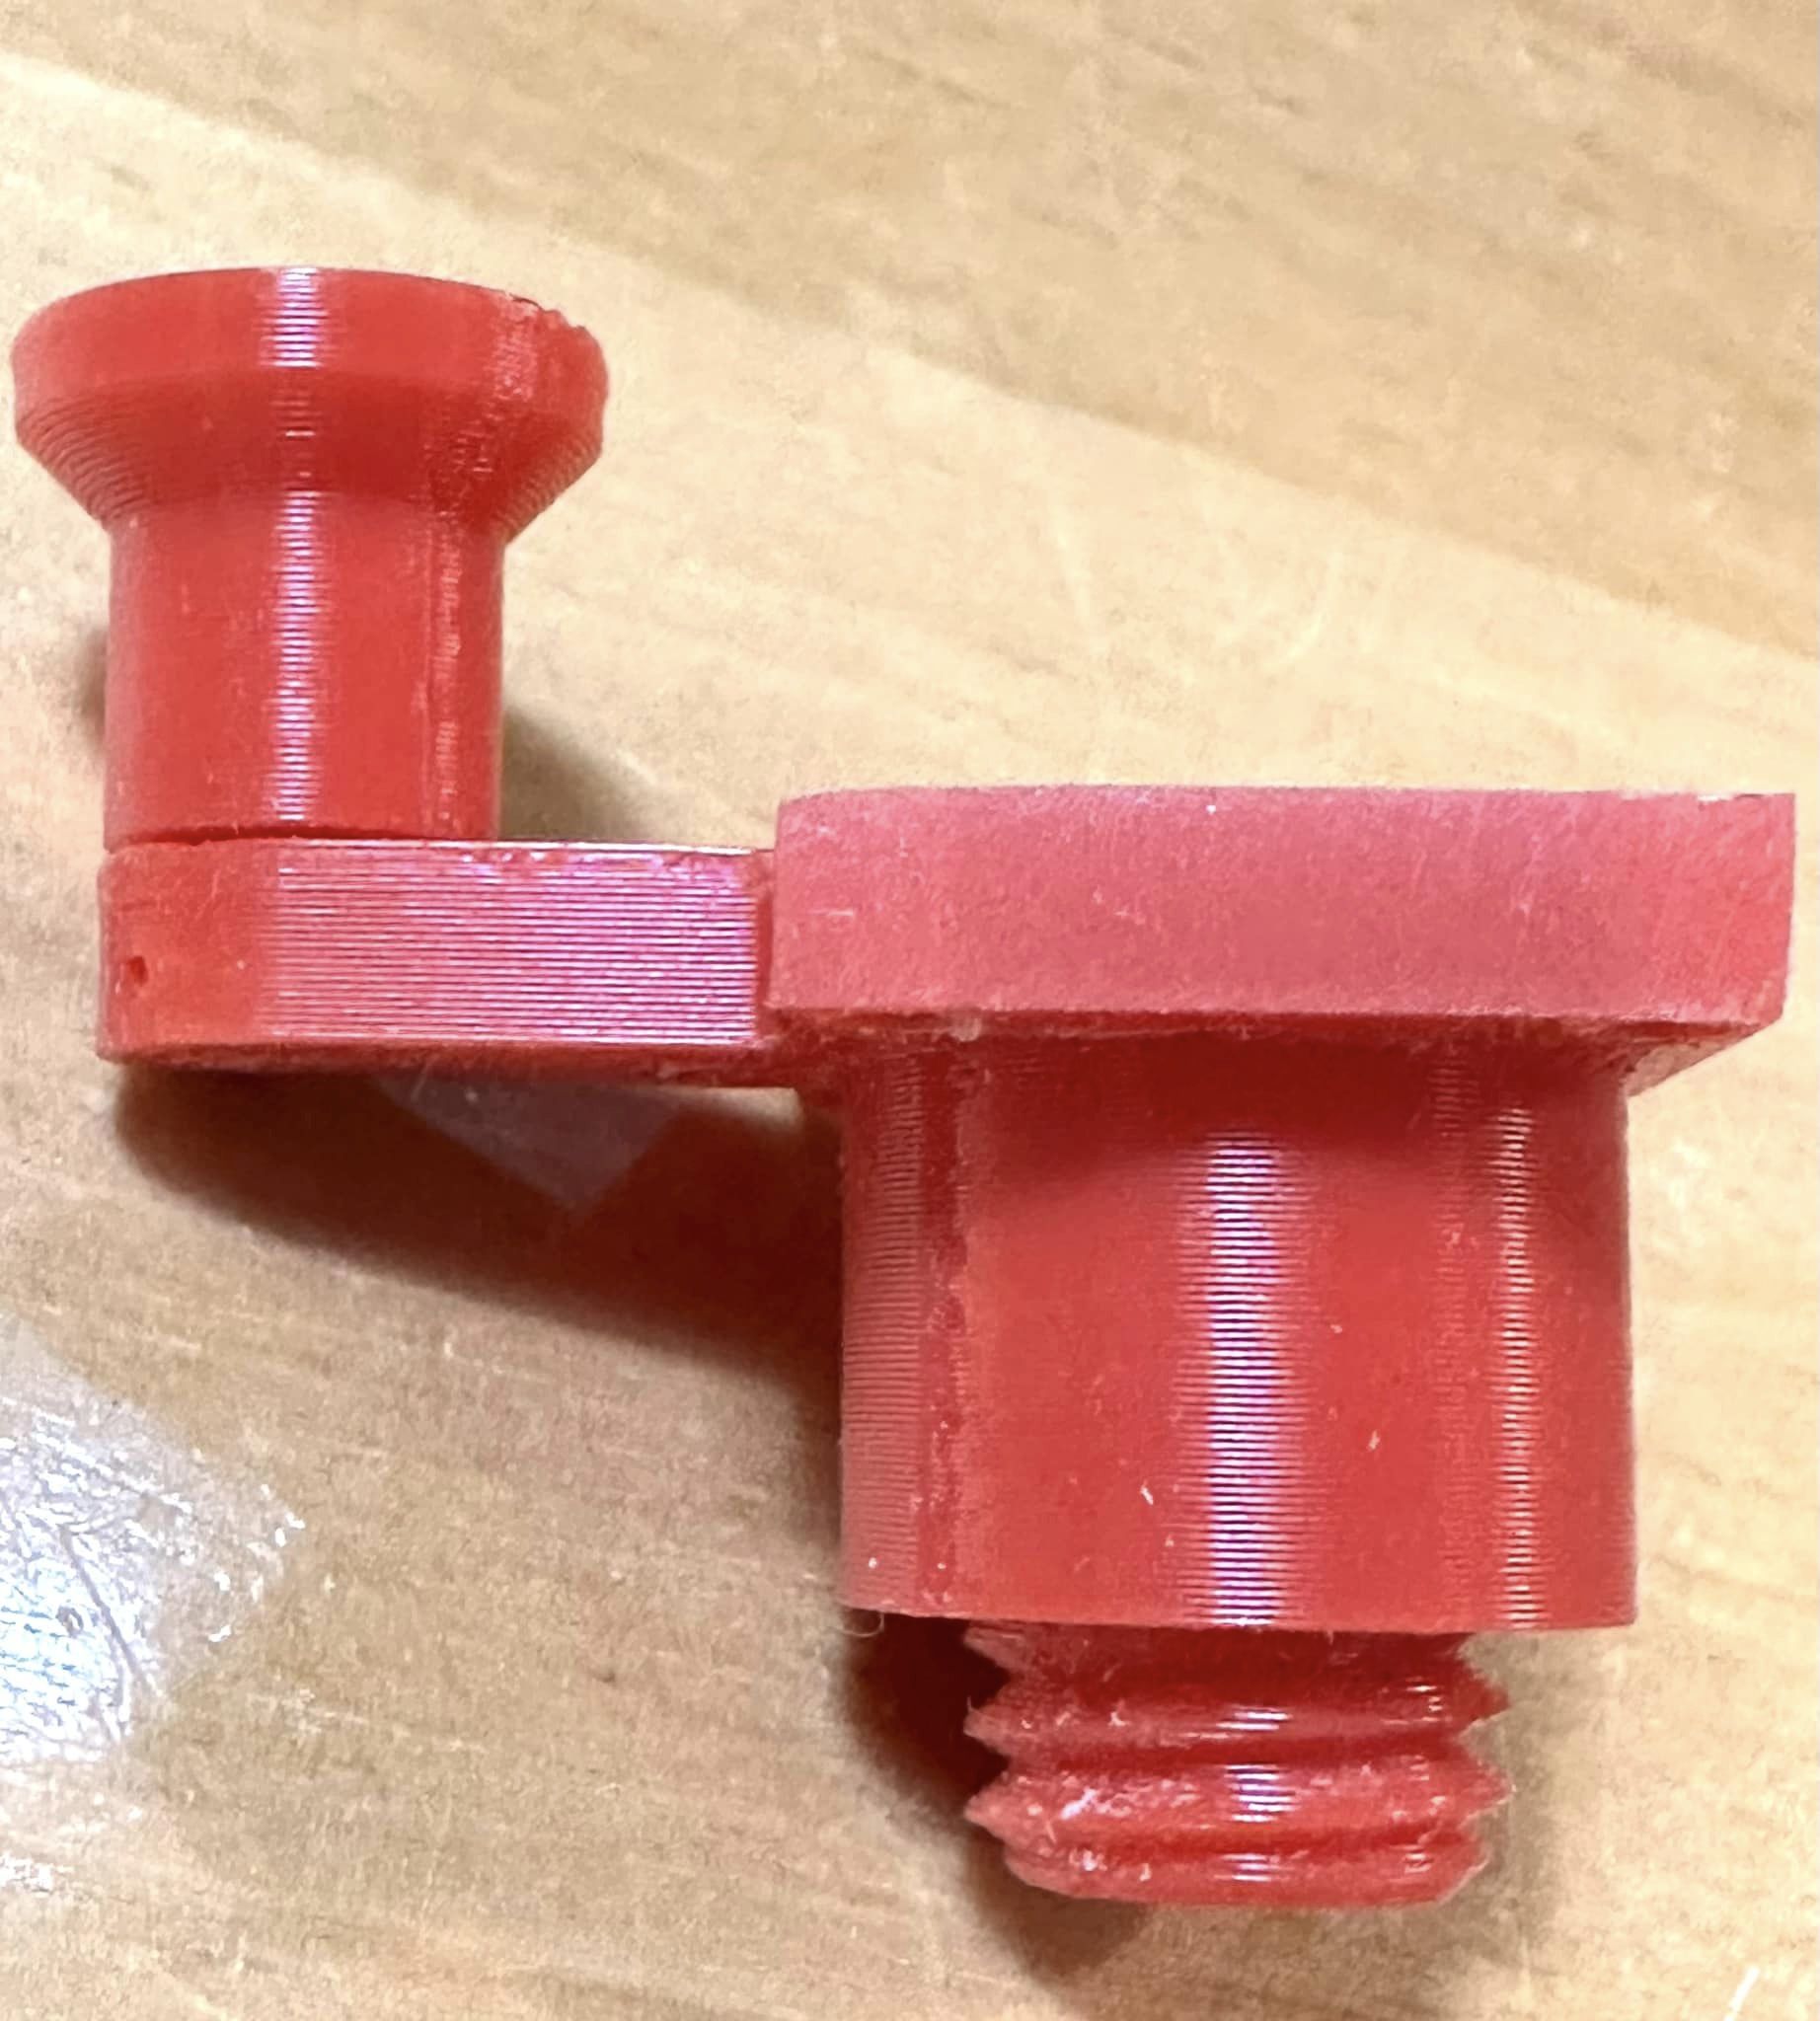
The red pieces in the photo below were designed in Shapr3D on my iPad and printed on my Ender 3v2 printer. The cylinder that does the direct pushing was printed with metric M5 threads to screw into the internal button mechanism. This makes printing of the two pieces much faster as no plastic is wasted on support material for what would otherwise be a very awkward shape to print. It also gave me the advantage that if the cylinder length was a bit off, I would only have to reprint that one small part. Similarly, the big red outer button was printed with internal M12 threads to screw onto the internal button mechanism from the outside of the switch box cover.
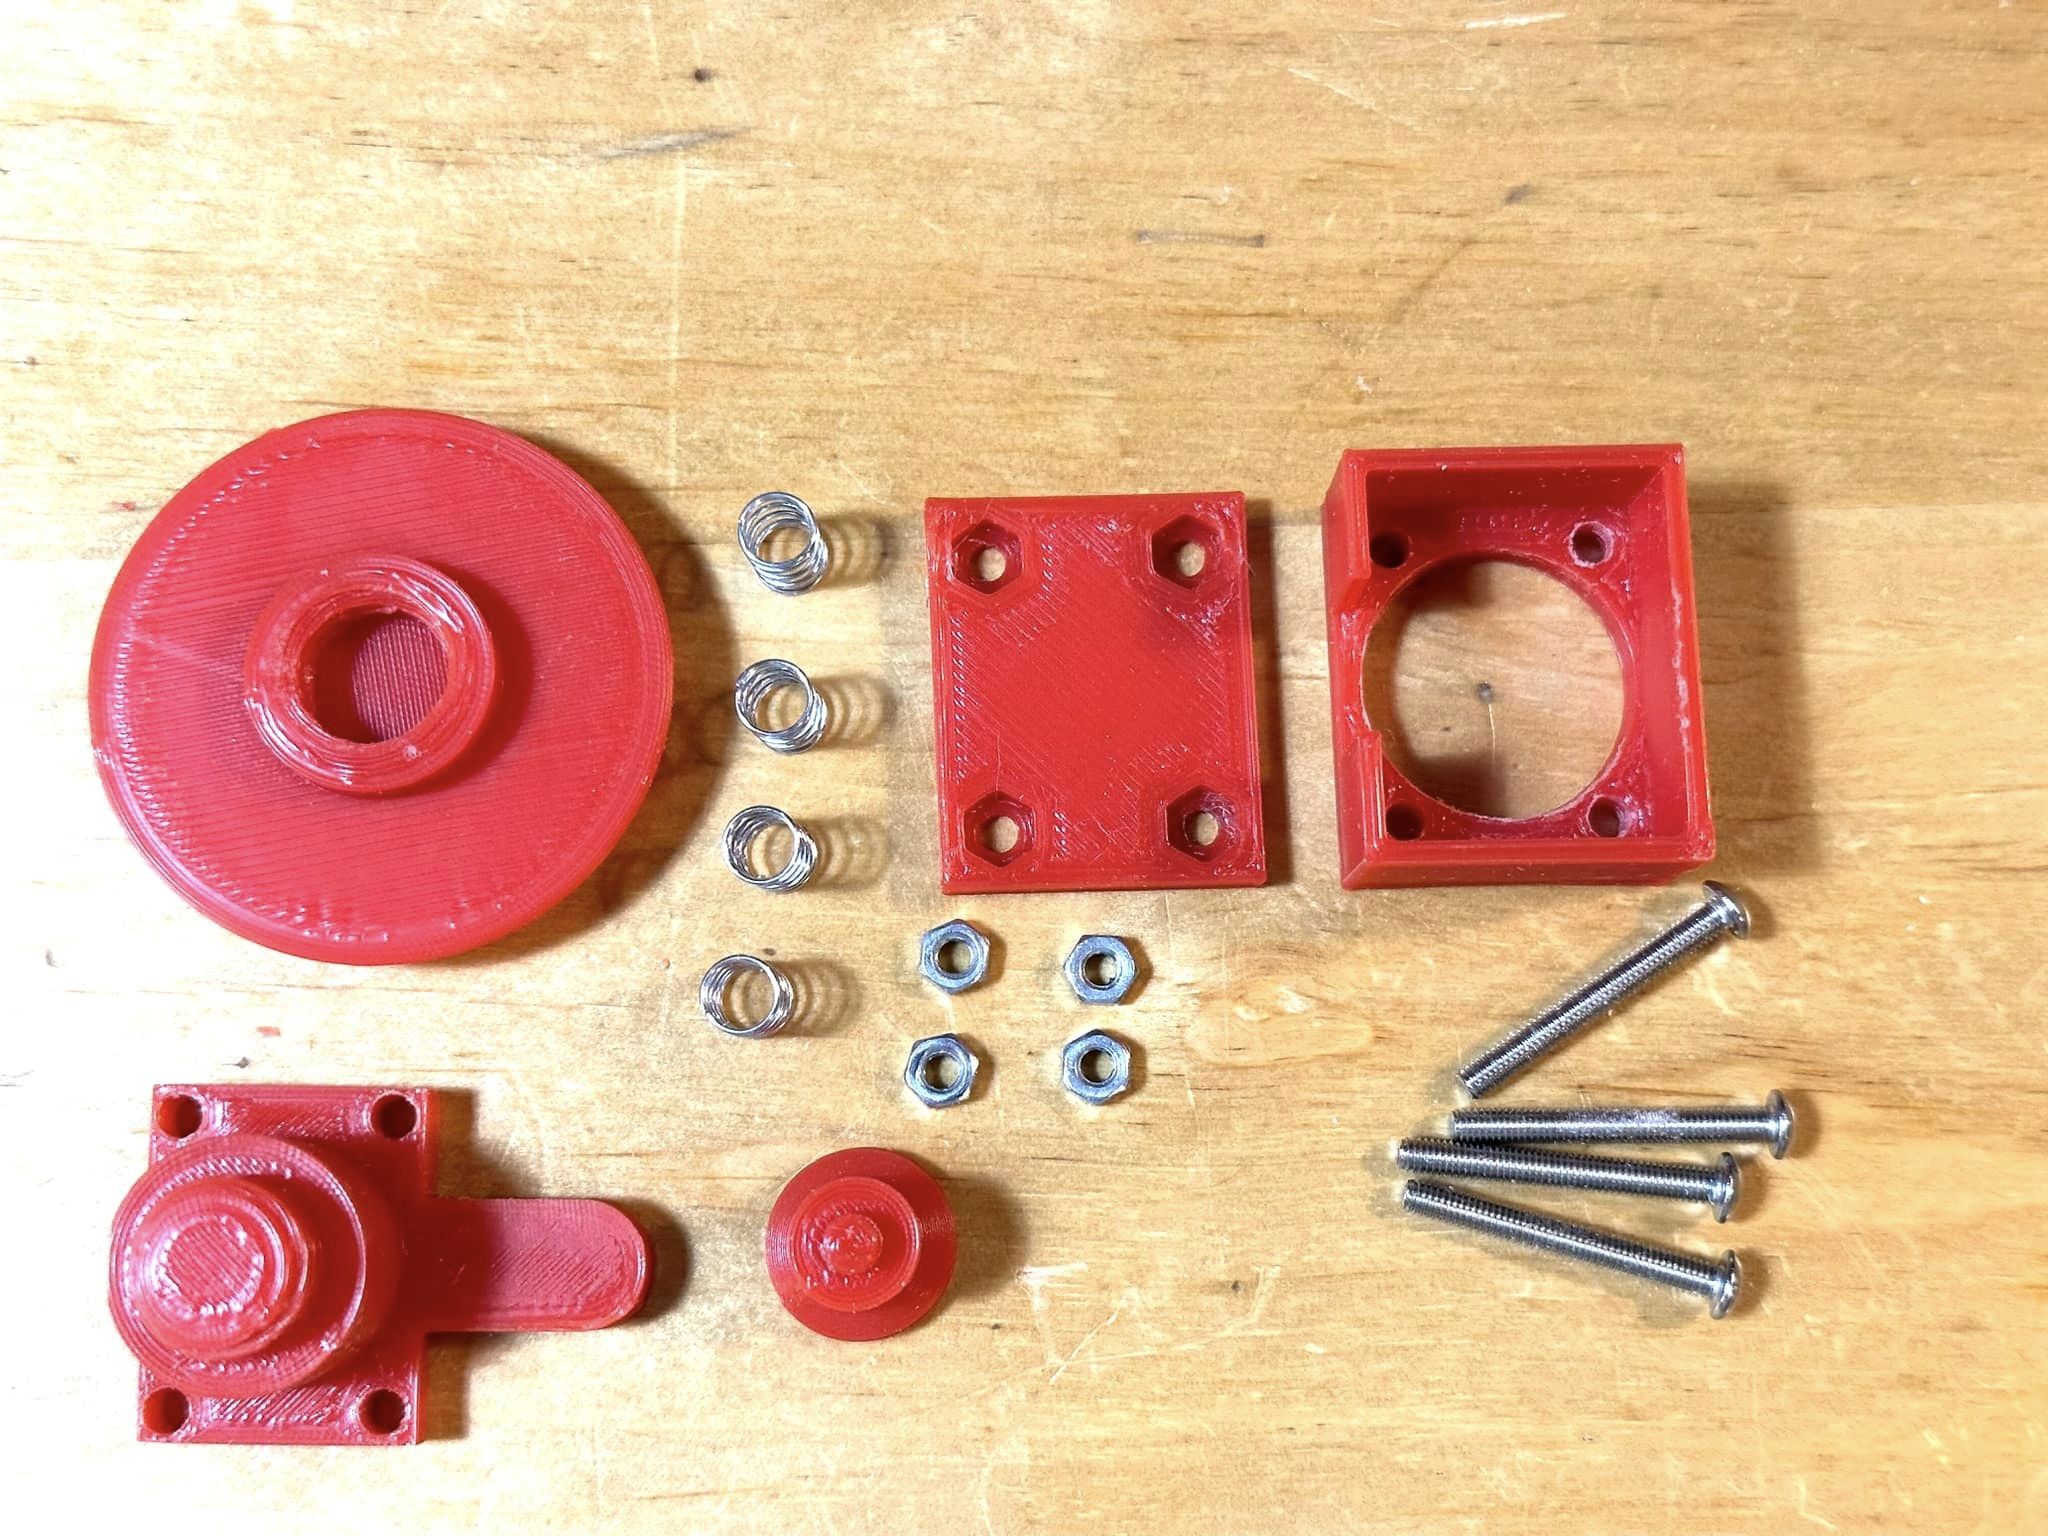
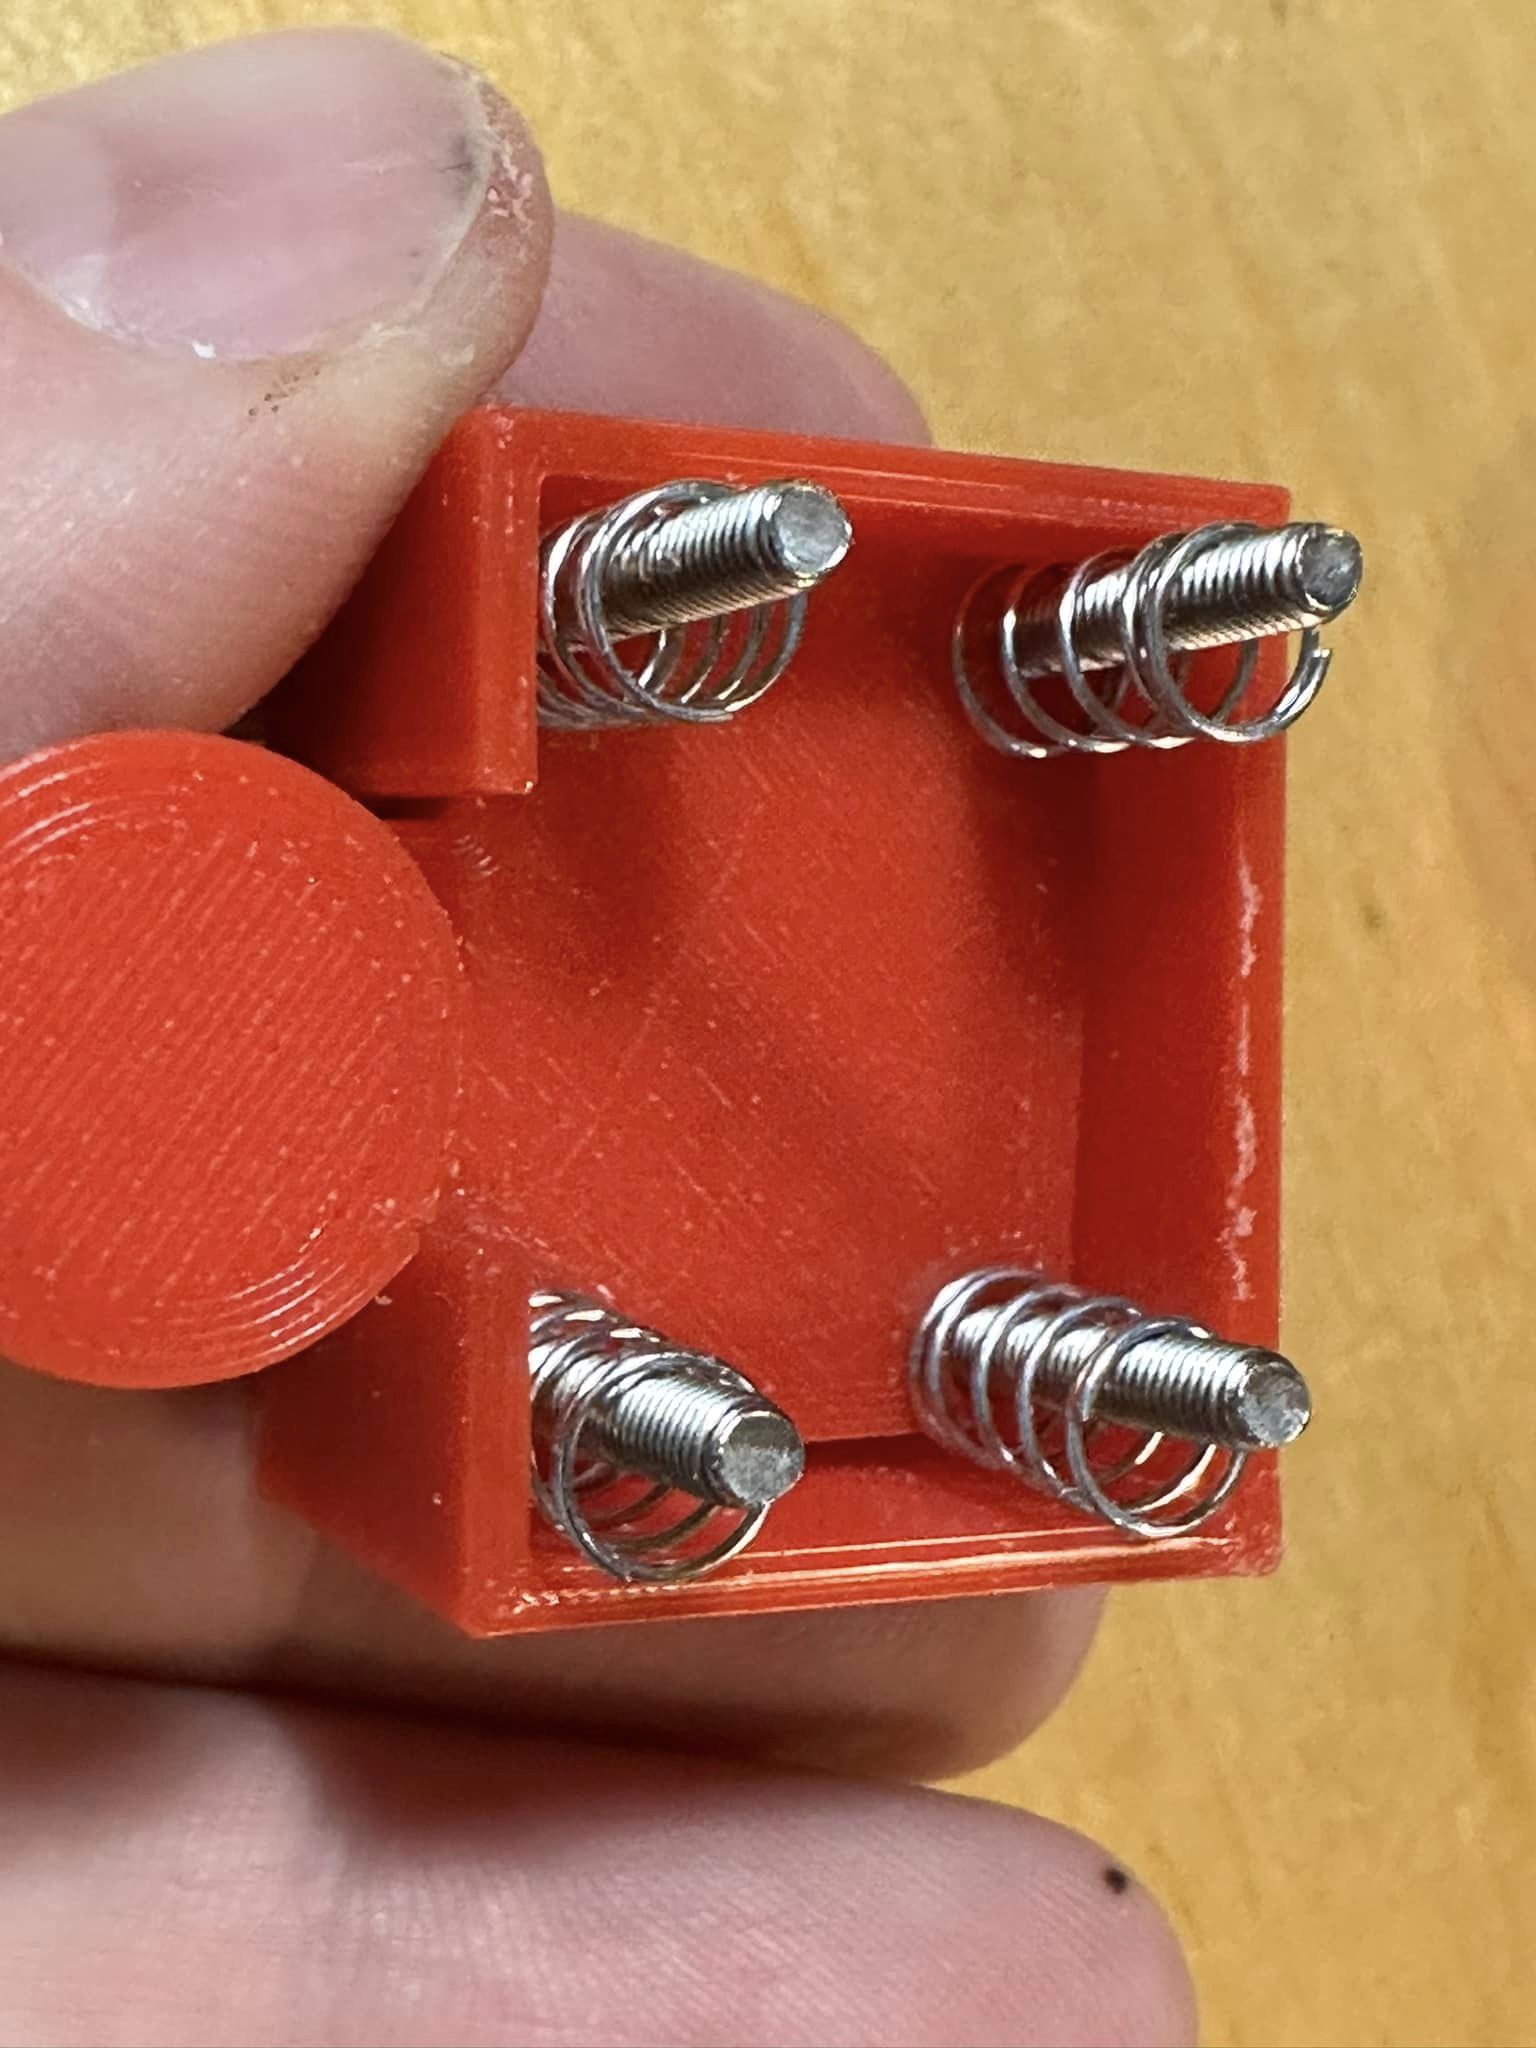
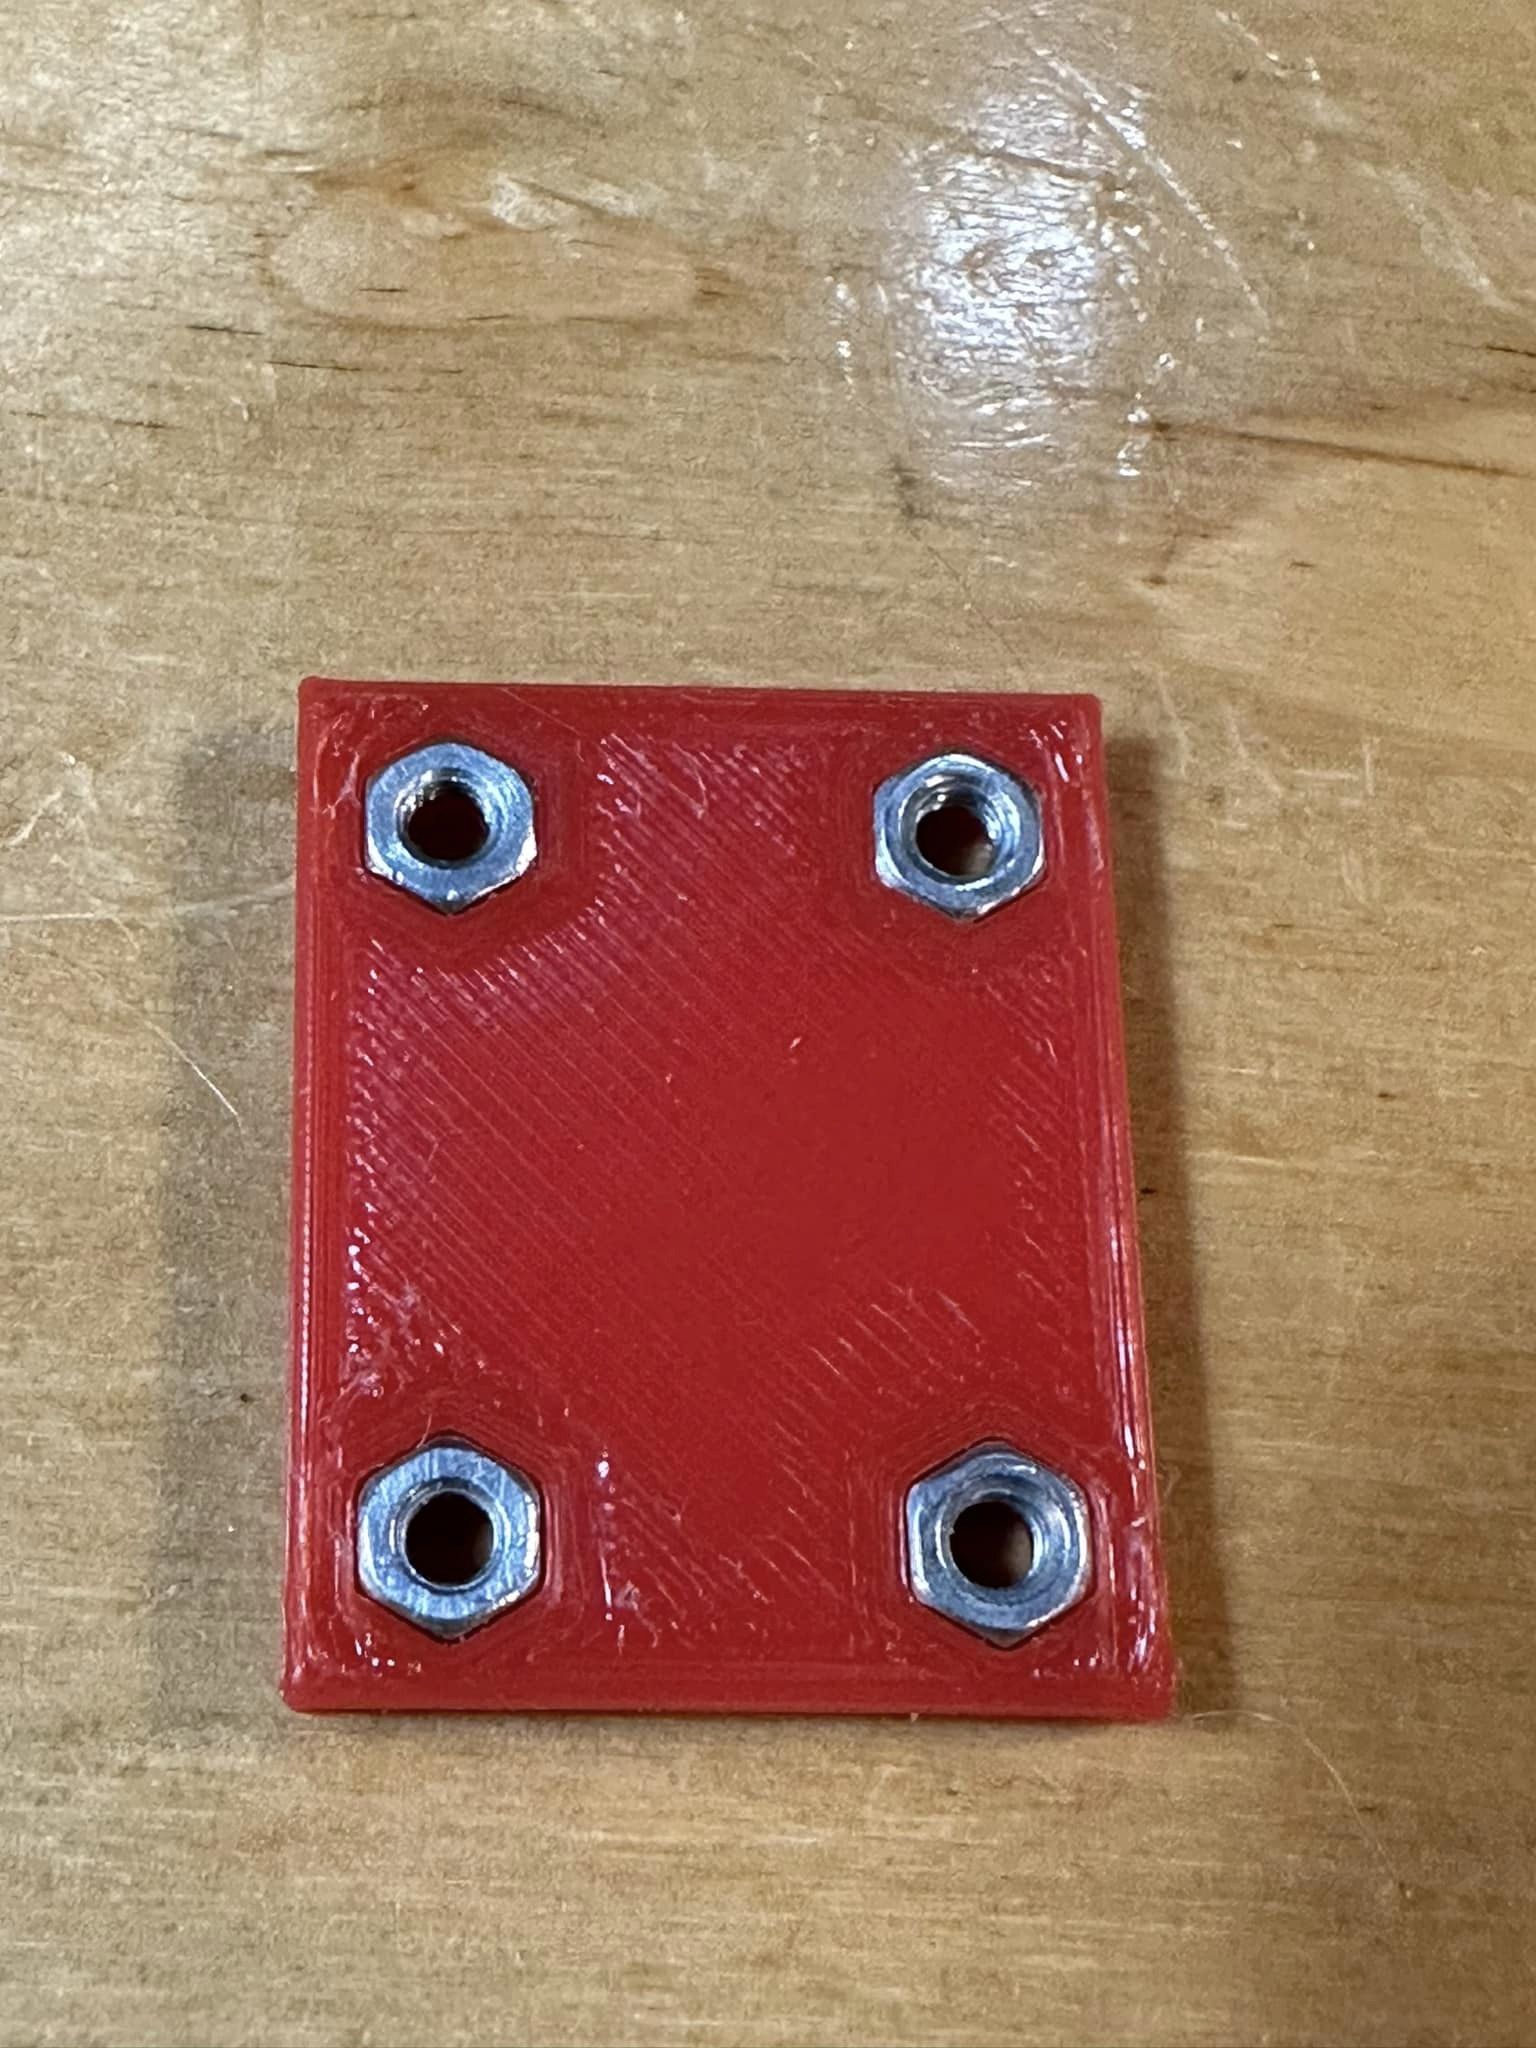
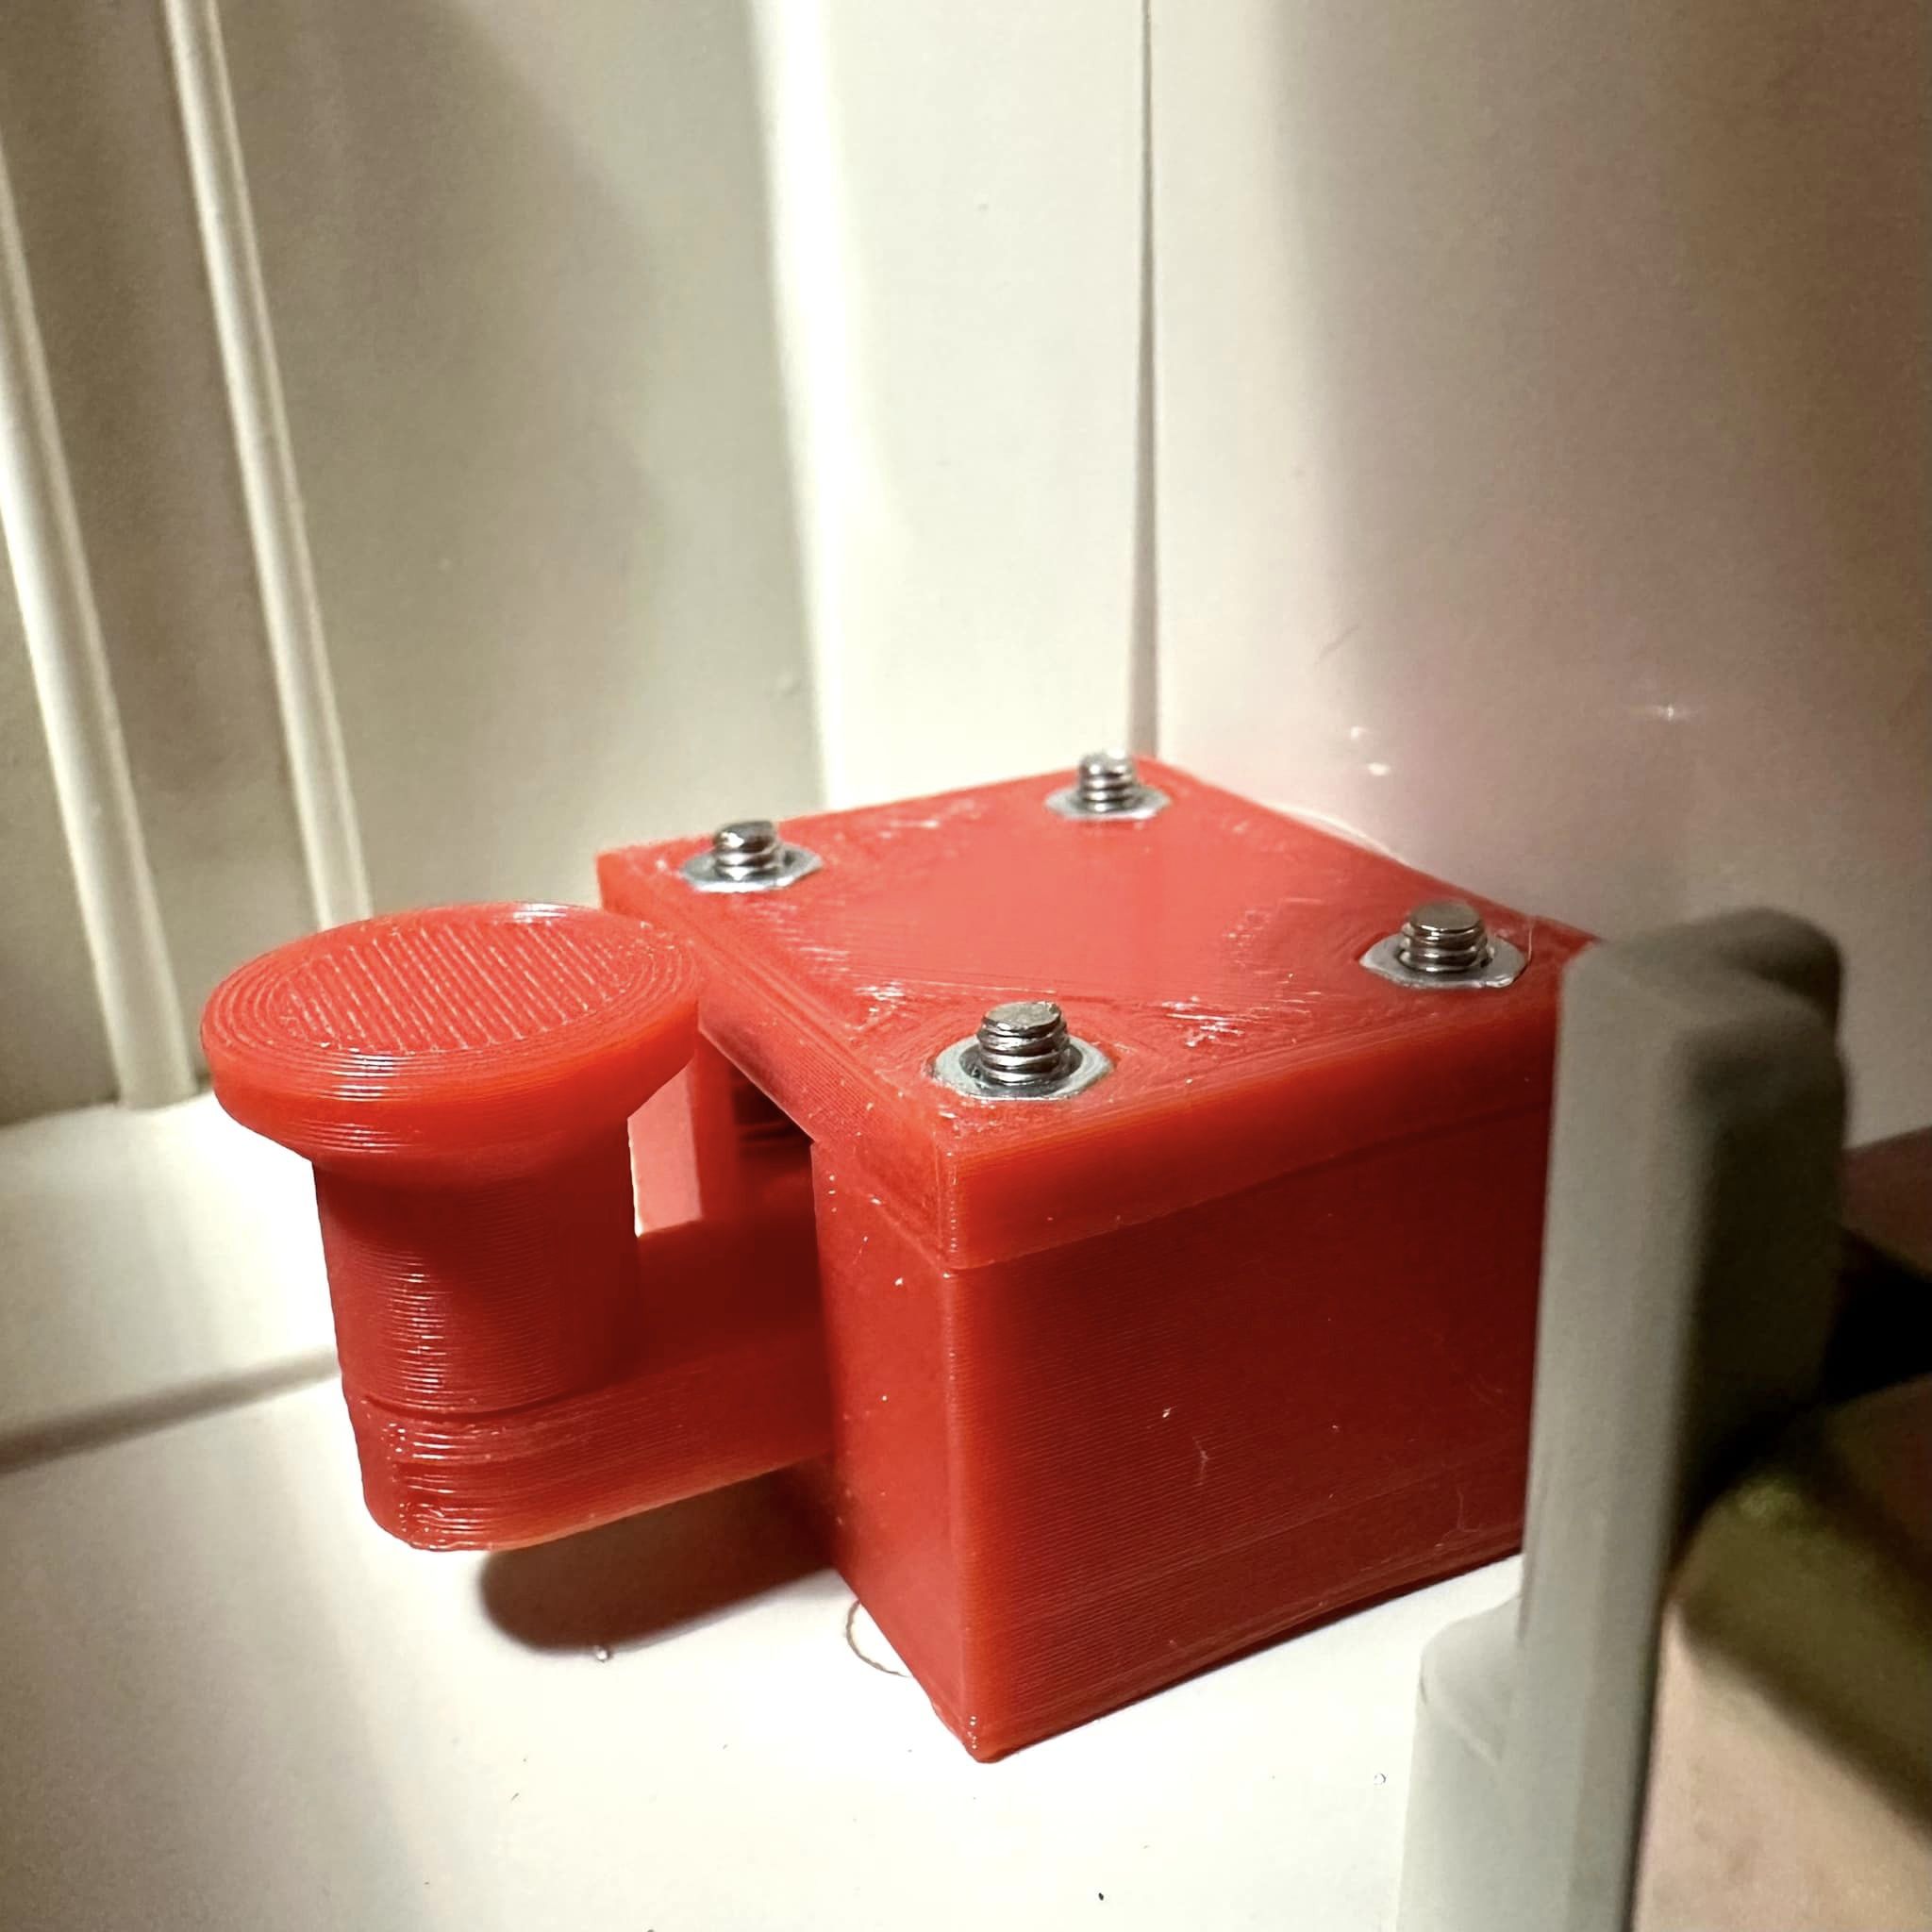
Finally, I only had to drill 4 matching holes in the box cover in order to attach this button unit permanently. So far, so good. The springs give just the right amount of resistance and make the button pop pack quickly. We’ll see how long it holds up but as the forces are pretty small, I don’t anticipate any issues.


Recent Comments