DIY Electric Standing Desk
Now that I’m working from home full-time for the foreseeable future, I decided it was time to upgrade my home office. The previous glass-topped metal desk unit I thought was so cool back in the 1990s was no longer cutting it. Structurally it was fine but it lacked any sort of height adjustment that I’ve come to appreciate in my lab office. The commercial versions of such desks cost above $1,000, however. There are ~$500 electric standing desks offered on Amazon but they look flimsy compared to what I am used to using on a daily basis. I wanted something that will support several monitors, keyboards and miscellaneous equipment and still be able to raise up and down.
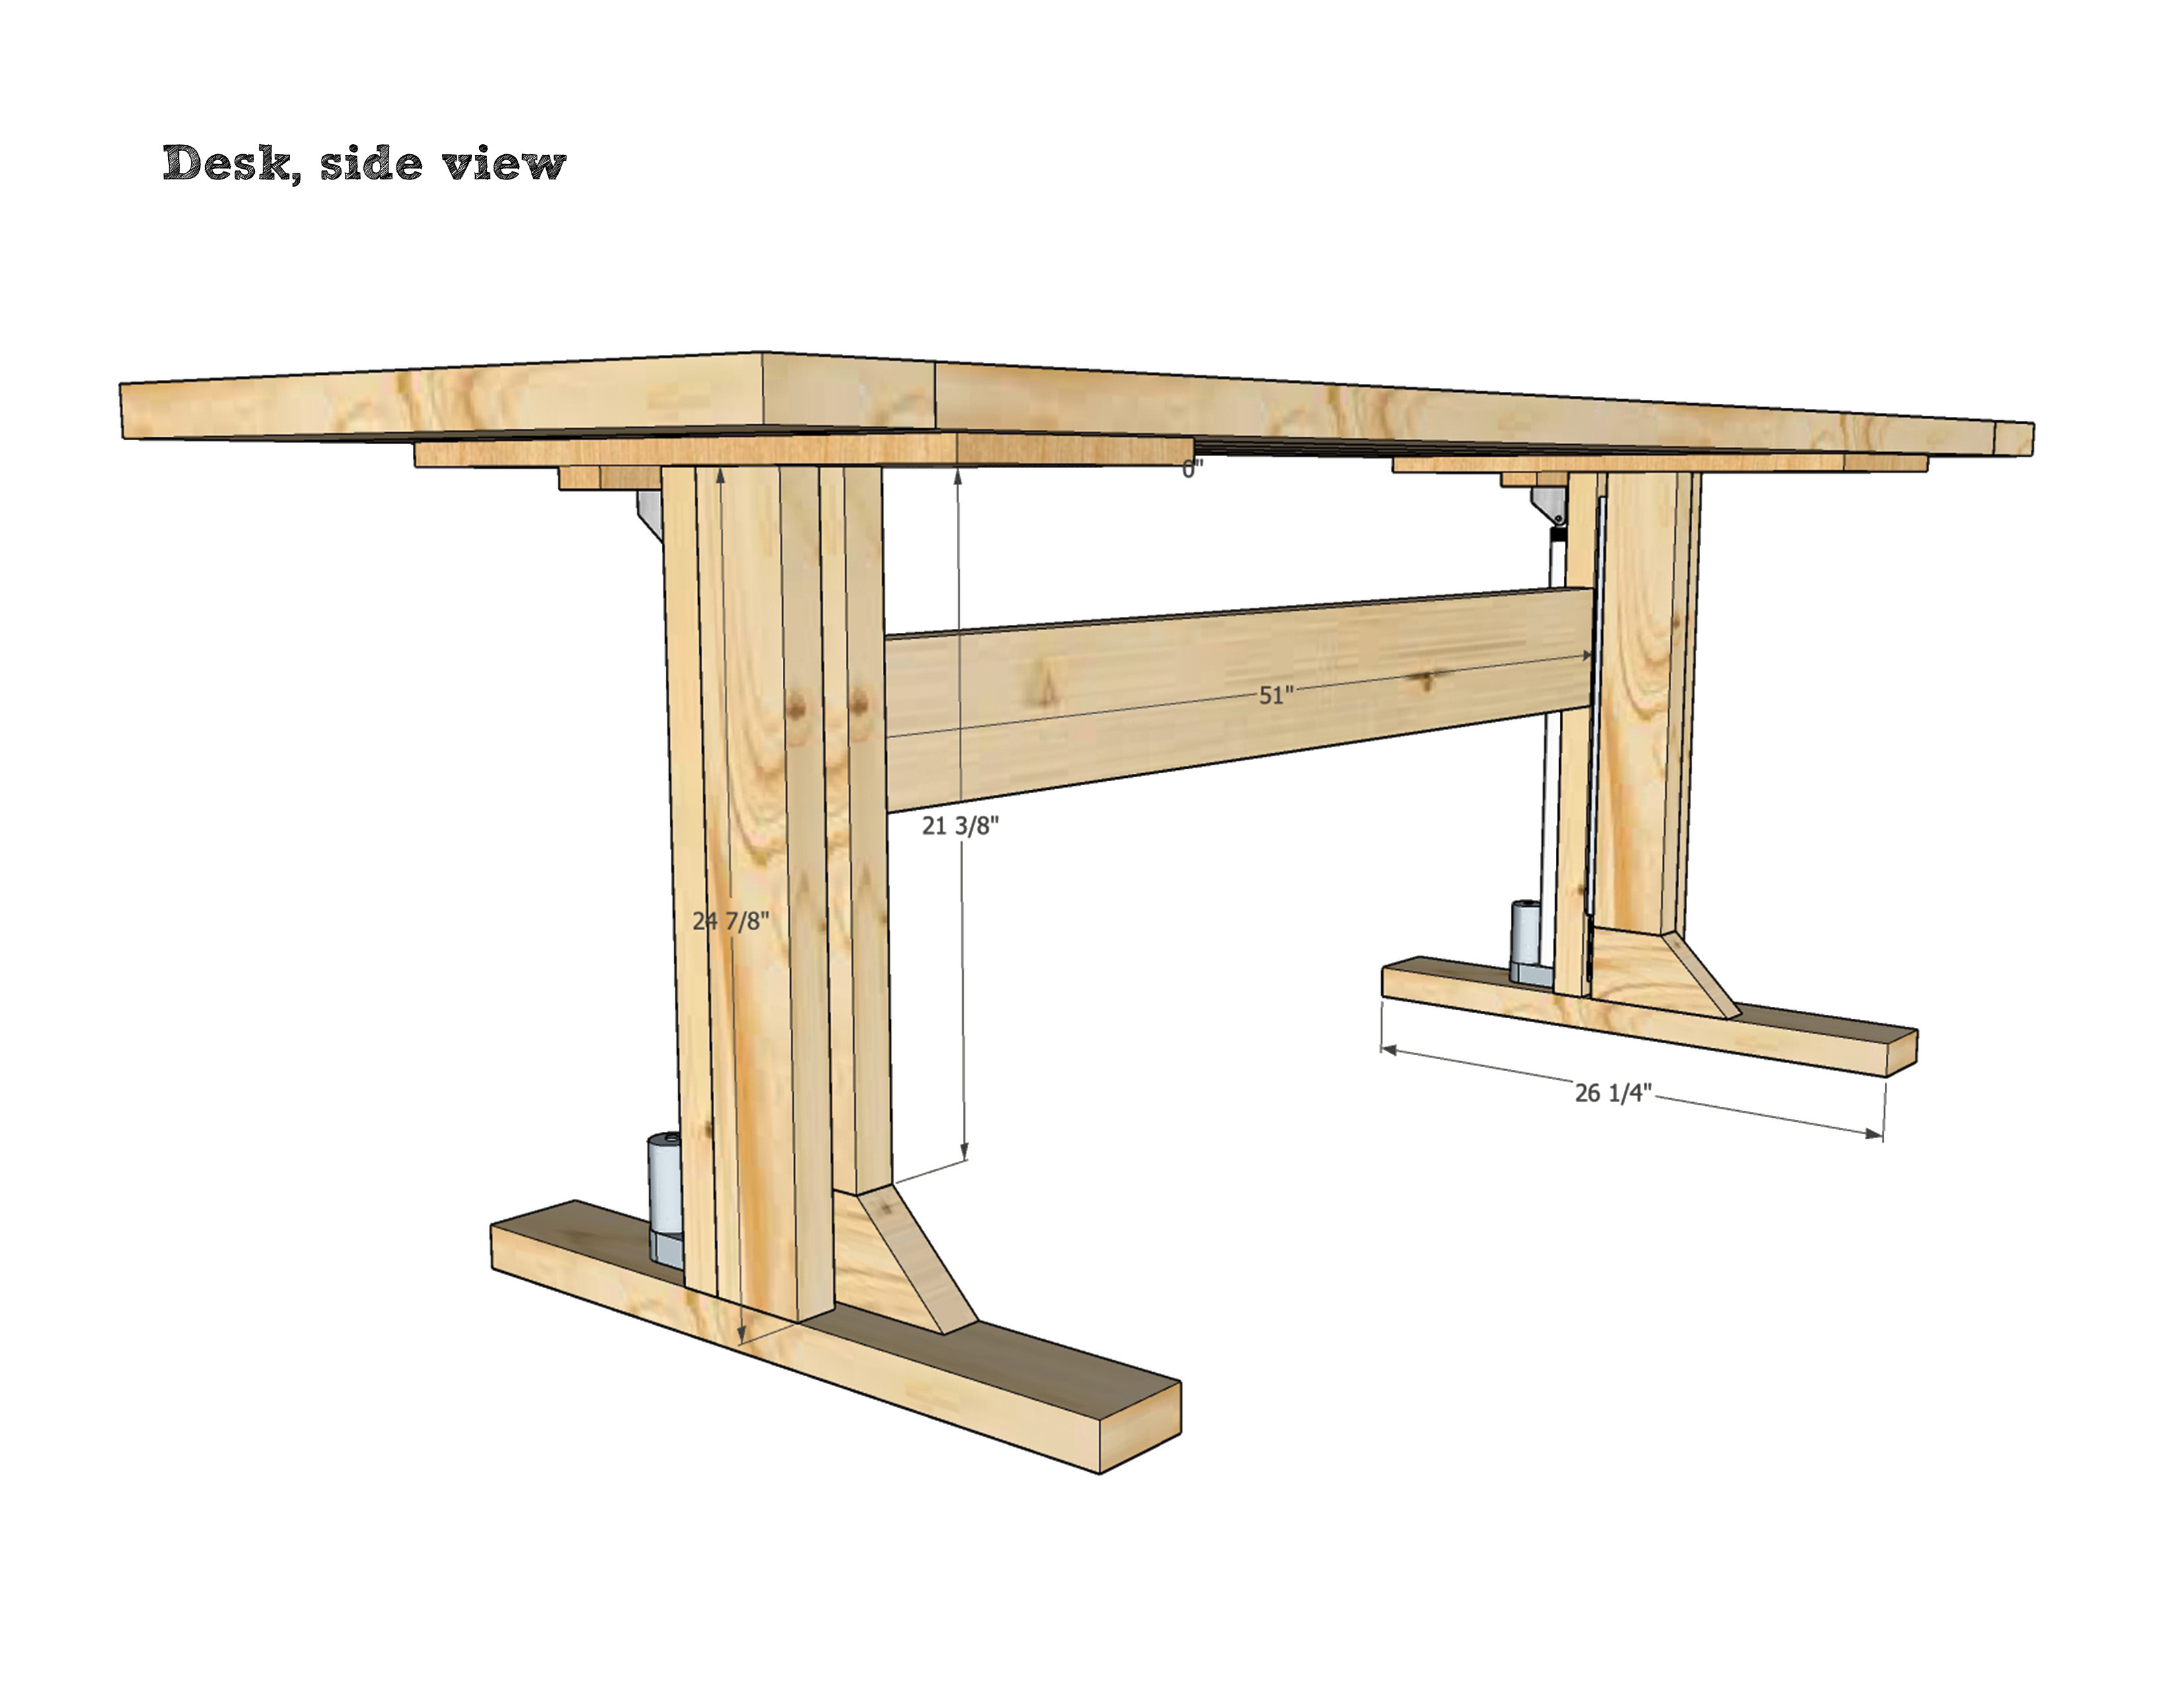
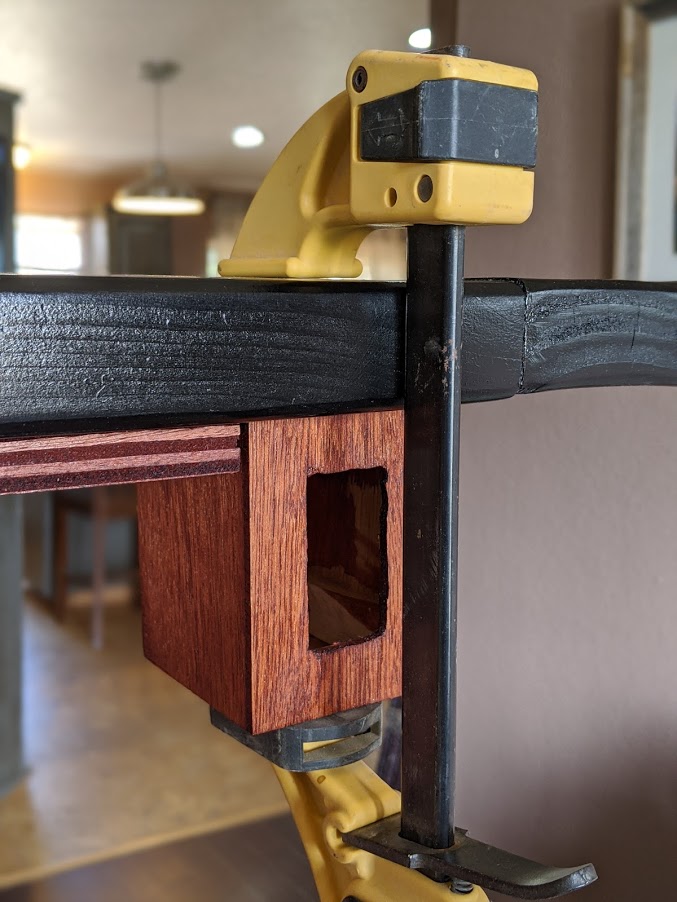
To that end, I decided to build my own electric standing desk using a pair of 18-inch linear actuators I bought off eBay. These devices are 24 inches long and extend an additional 18 inches, powered off of a 12VDC power supply. They are attached to two leg units made up of 2×4 boards as shown below. Each end of the desktop is guided by a single 2×4 that rides along a pair of full-extension drawer slides (a pair of slides per leg). The 3/4-inch plywood at the top is screwed into this leg and provides a good surface for attaching to the underside of the desktop.
One thing worth noting is the small plywood attached to the top of each actuator. This piece is not attached to the plywood top nor to anything else. The reason is that even though these actuators are of the same make/model, they do not necessarily keep in sync with each other. After several up/down movements of the desktop, they might be off somewhat. A way to remedy this is to lower the top completely, which brings the actuators back to their lowest position, resetting both of them. The top bracket and the piece of plywood then move away from the desktop with no other stresses upon them.
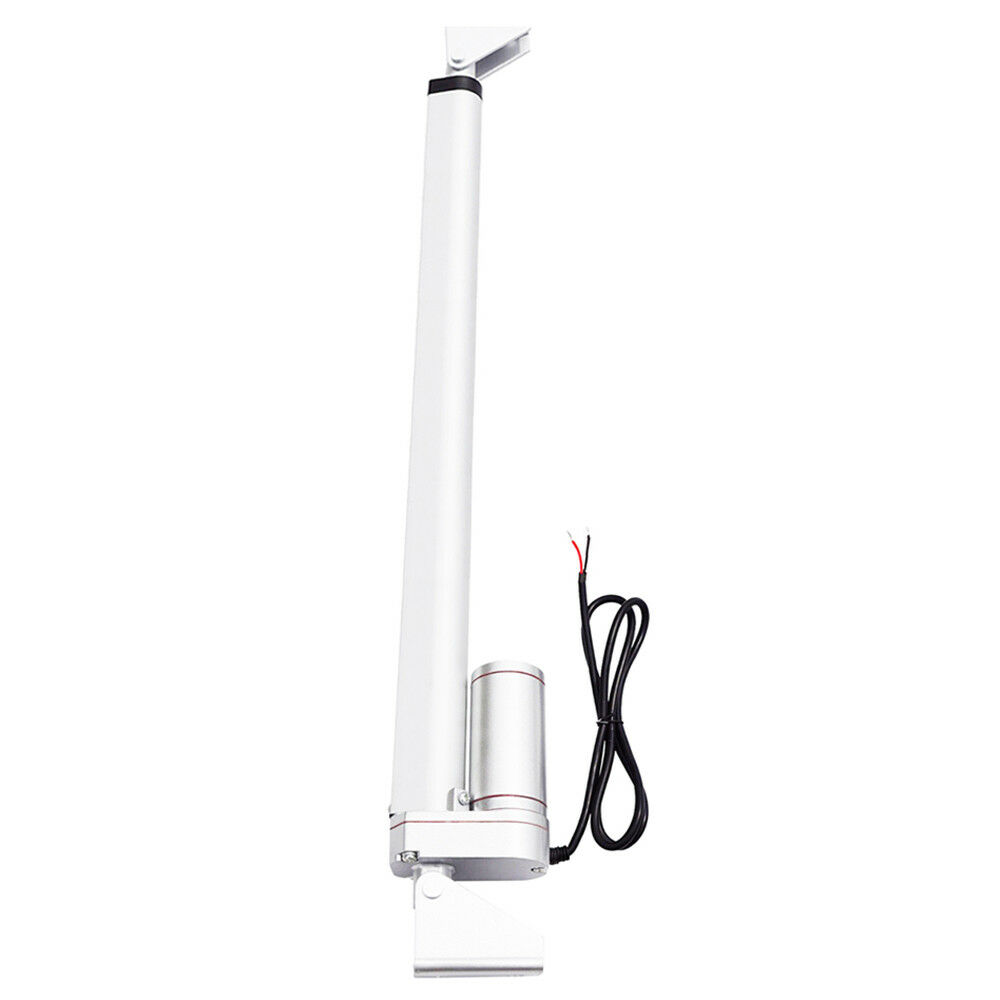
18-inch 12VDC Linear Actuator 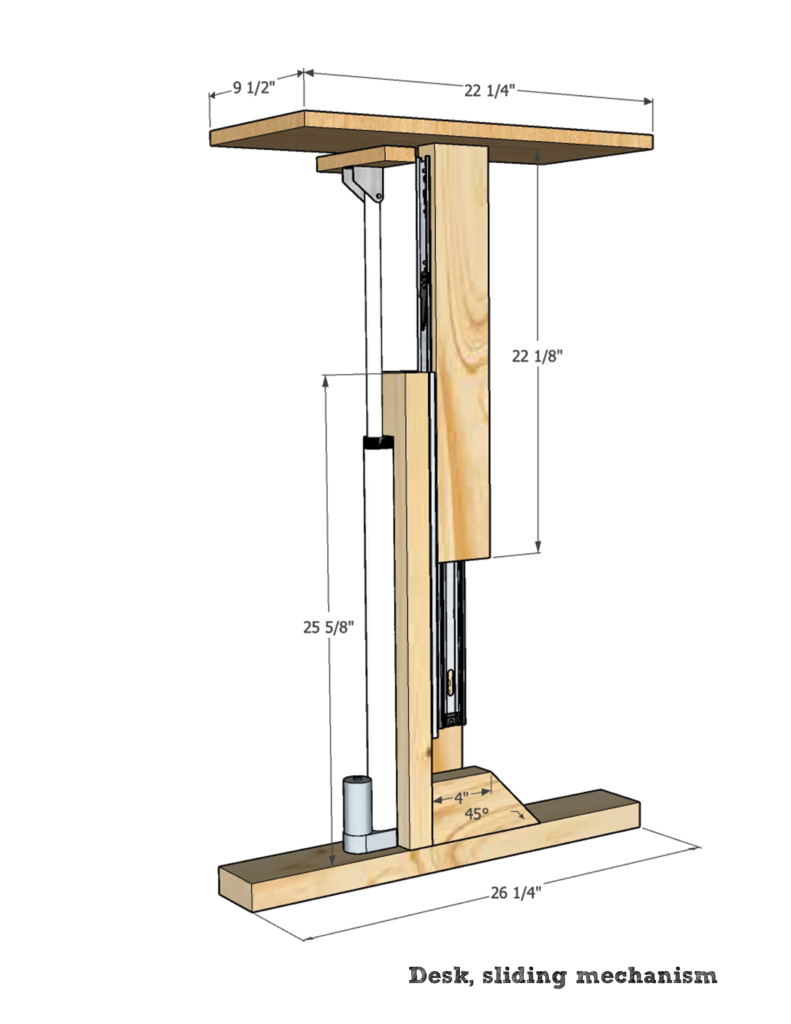
Lifting Mechanism
The desktop is built using 2×6 boards very much like the one I made for the Rustic Outdoor Table. One difference is that I ripped the 2×6s down to 5-1/4-inch wide to eliminate the rounded-over edges. I wanted this desktop to be as smooth as possible. Otherwise, construction was the same as for the table, paying attention to pairing up boards with alternating grain direction for better stability. The edge were attached using 6 pocket hole screws and two biscuit joints. They were glued into place and the pocket hole screws driven in, and then clamps were applied to keep everything flat.
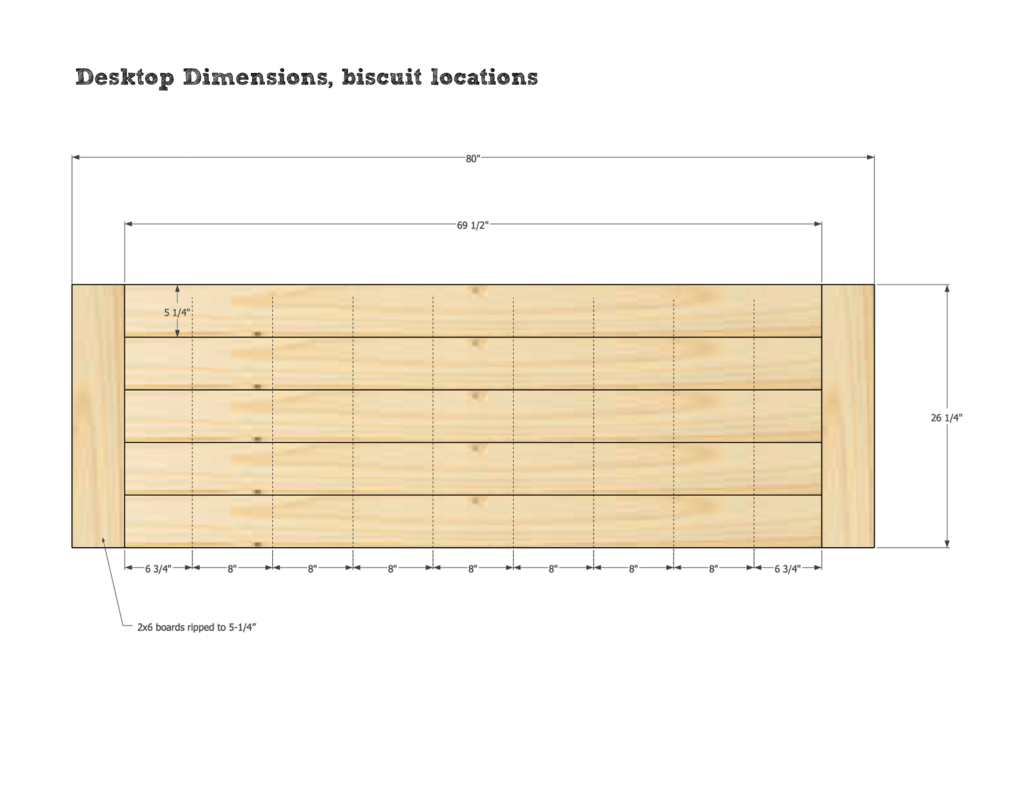
Desktop Layout 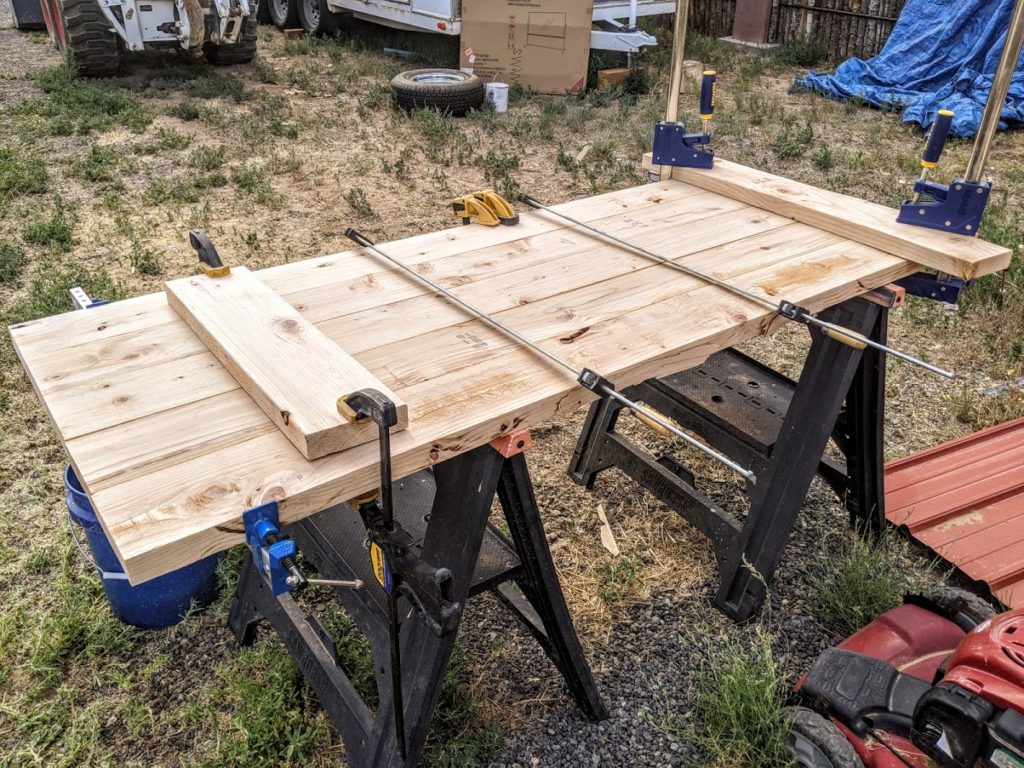
Desktop glueup 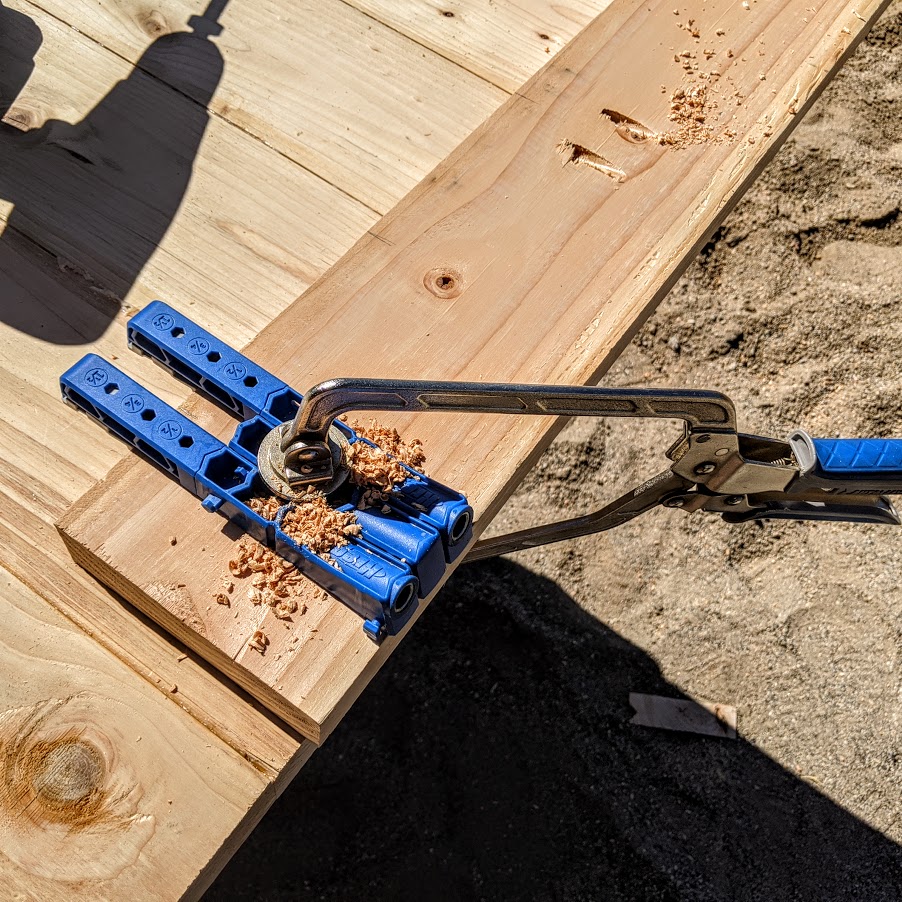
Desktop edge board 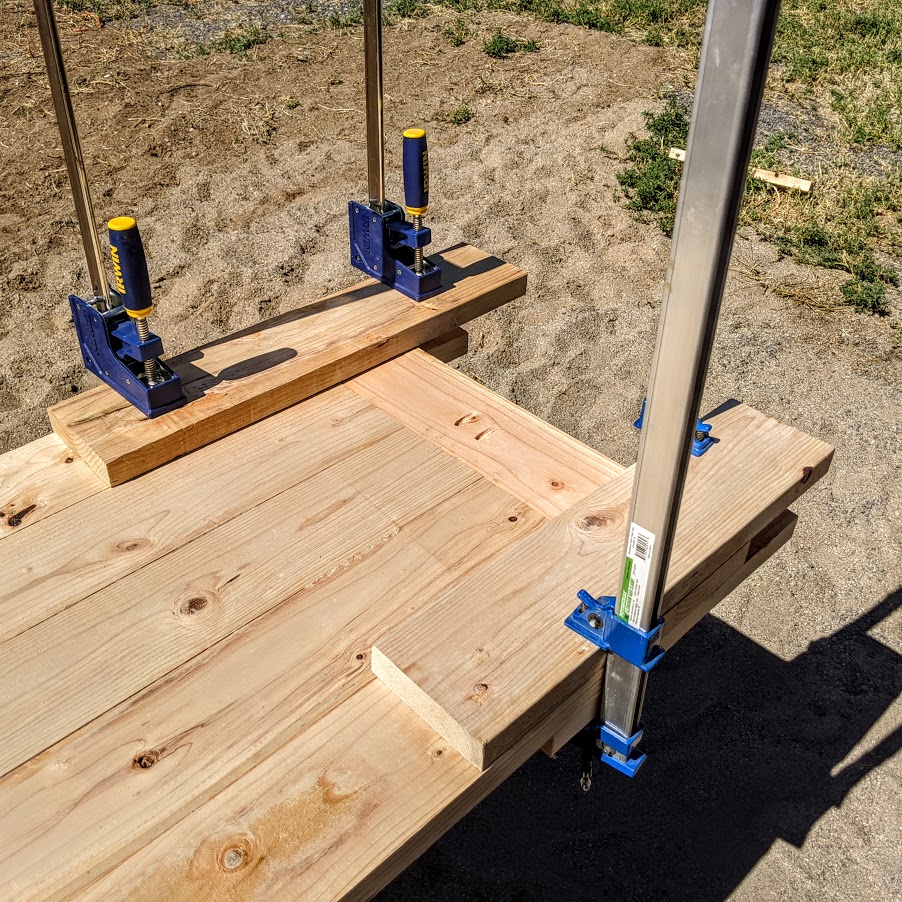
Desktop edge board clamp setup
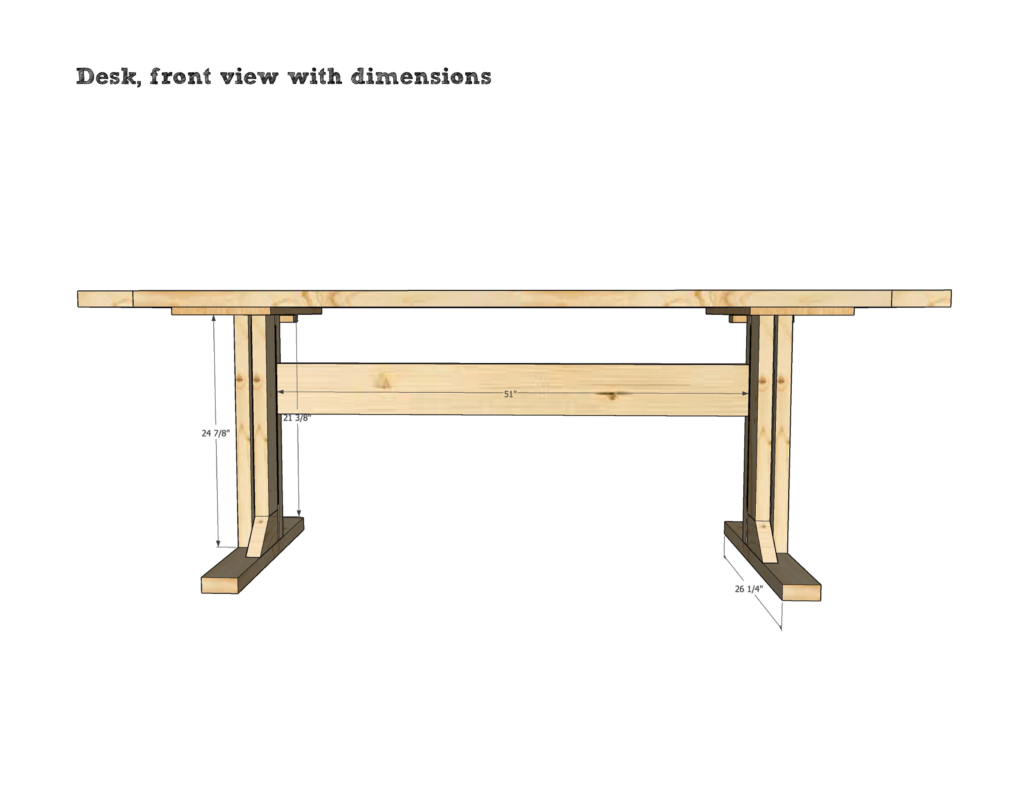
With the desktop built and the leg units assembled, all that was left was to cut a single 2×6 to length to act as a stretcher between the legs. This was attached with pocket hole screws to either side.
To attach the desktop, I drilled four 1/4-inch holes through each plywood support and then drove in 1-5/8-inch washer-head wood screws. The 1/4-inch holes allow for seasonal wood movement.
I assembled all the various components and wired it up for testing. The switch for this is a dual-position dual-throw (DPDT) momentary rocker switch with center-off. This 4-post switch is easy to wire up with one set of posts for the power supply input and the other two leading to the linear actuator wires.
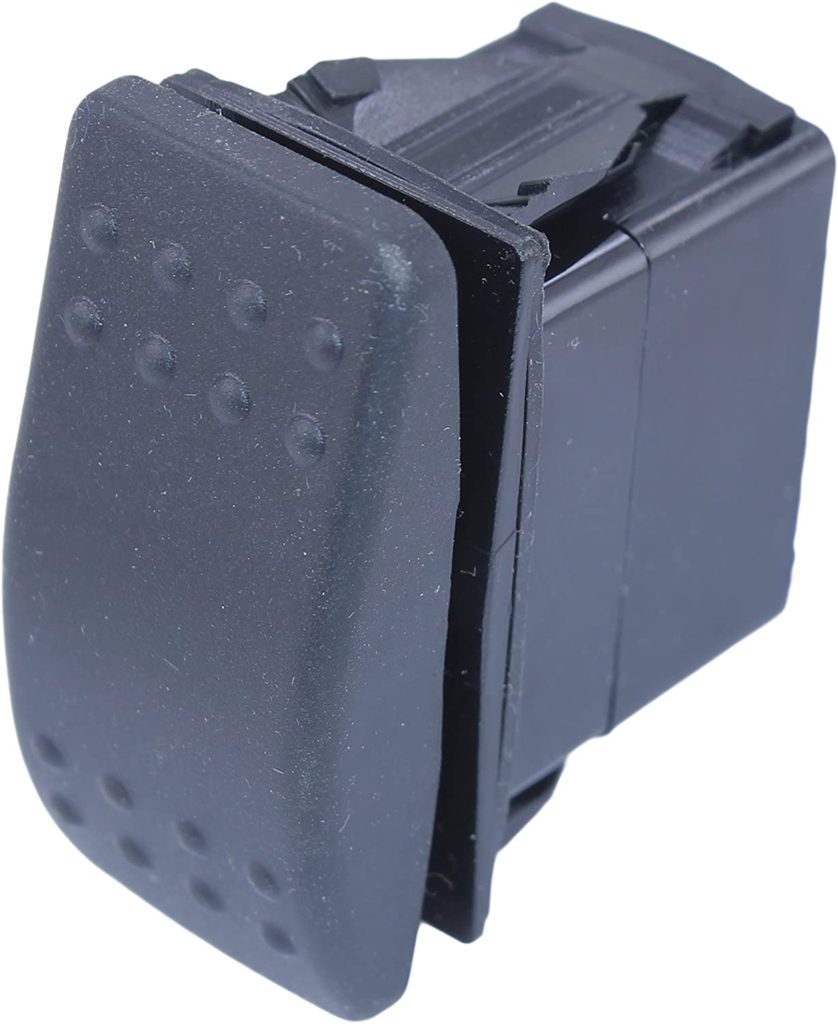
Rocker Switch 
Rocker Switch Diagram
After testing that everything worked smoothly, I removed the desktop and the center stretcher, sanded everything to a smooth finish, and used a dye-stain for a different look. Dye-stains are different than normal wood stains but after seeing a few videos on people using them, I wanted to give them a try. They have an advantage for pine boards that leaves a deep, uniform appearance, unlike the splotchy appearance you often get from other stains. For the desktop I used a deep black India ink, while for the body of the desk I used a cinnamon-colored dye.

Super Black India Ink 

Desktop with India ink applied
Because the stains tend to wipe off after they are dry, a spray-on shellac was used to set them in place before additional coats of wipe-on polyurethane finish were applied. I applied three coats of poly to the desktop and two to all the other surfaces. I made a small housing for the switch and glued it to the bottom of the desktop, and as an afterthought, I made a sliding keyboard drawer from scrap wood and a pair of 14-inch drawer slides.
Switch Box 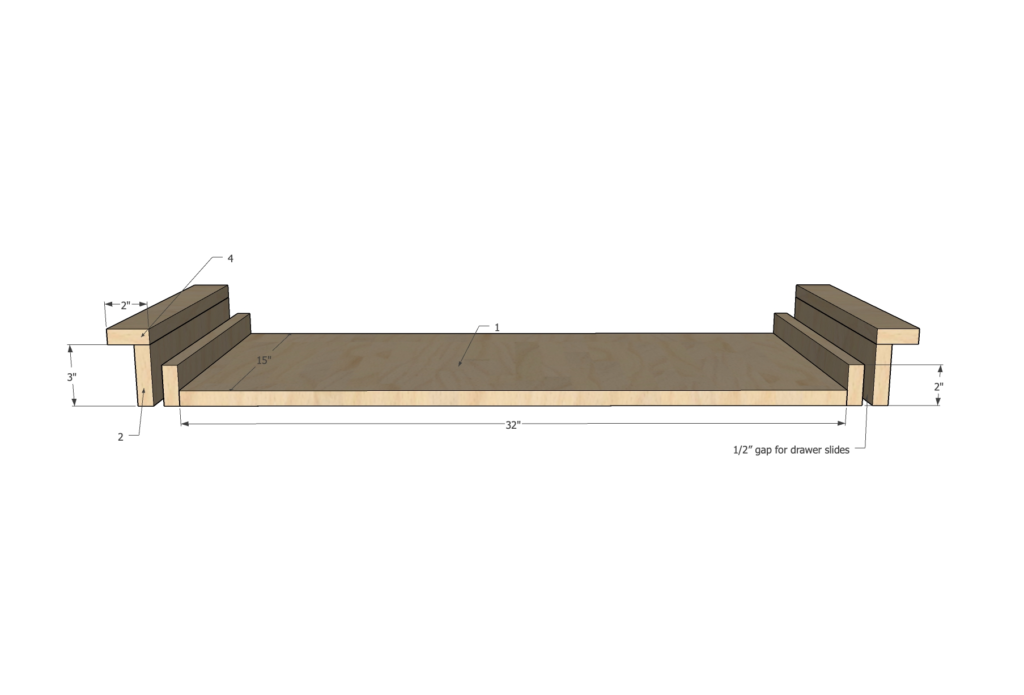
Keyboard Drawer
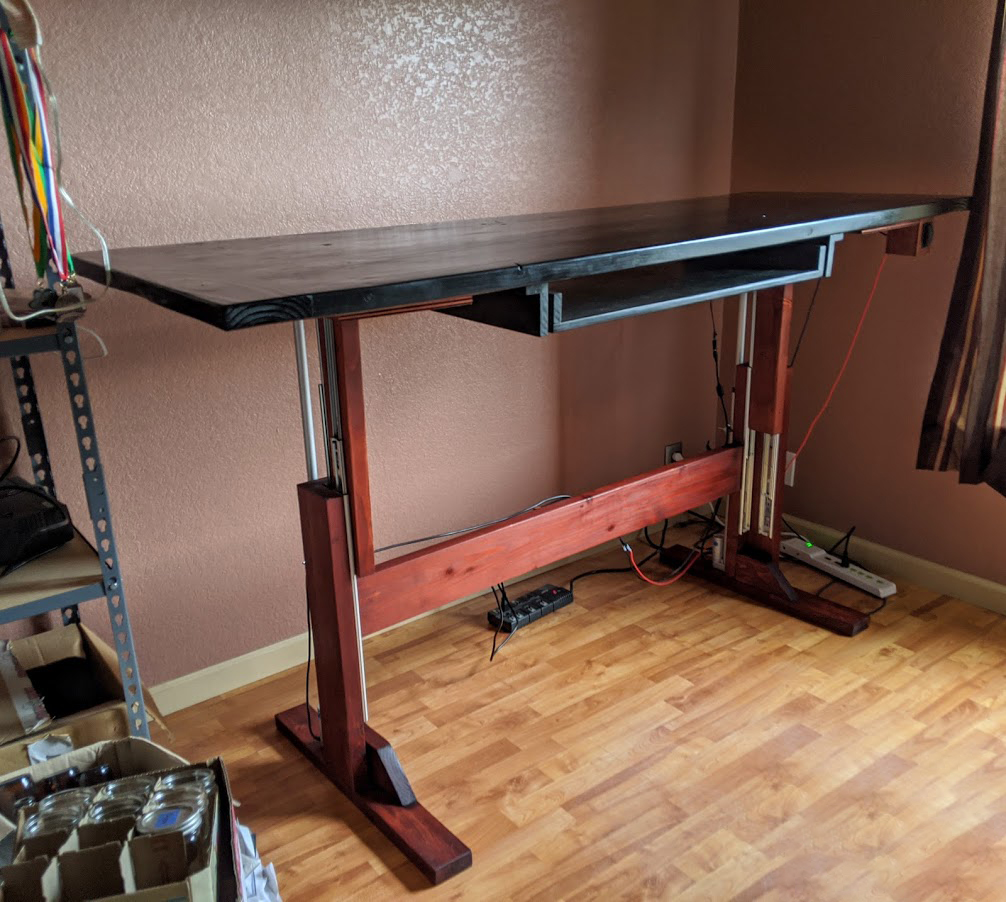
Finally, here is the finished and assembled desk and a video showing the mechanism at work. The actuators are fairly slow but they support an enormous amount of weight. If I were to change one thing for this build, it would be to find a faster pair of actuators.
All of the lumber and miscellaneous parts for this project came in at $300. Total time to build was around 5-6 hours spread out over several days, waiting for glue to set or finish to dry.

Recent Comments