Braun Oral-B Electric Toothbrush Battery Replacement
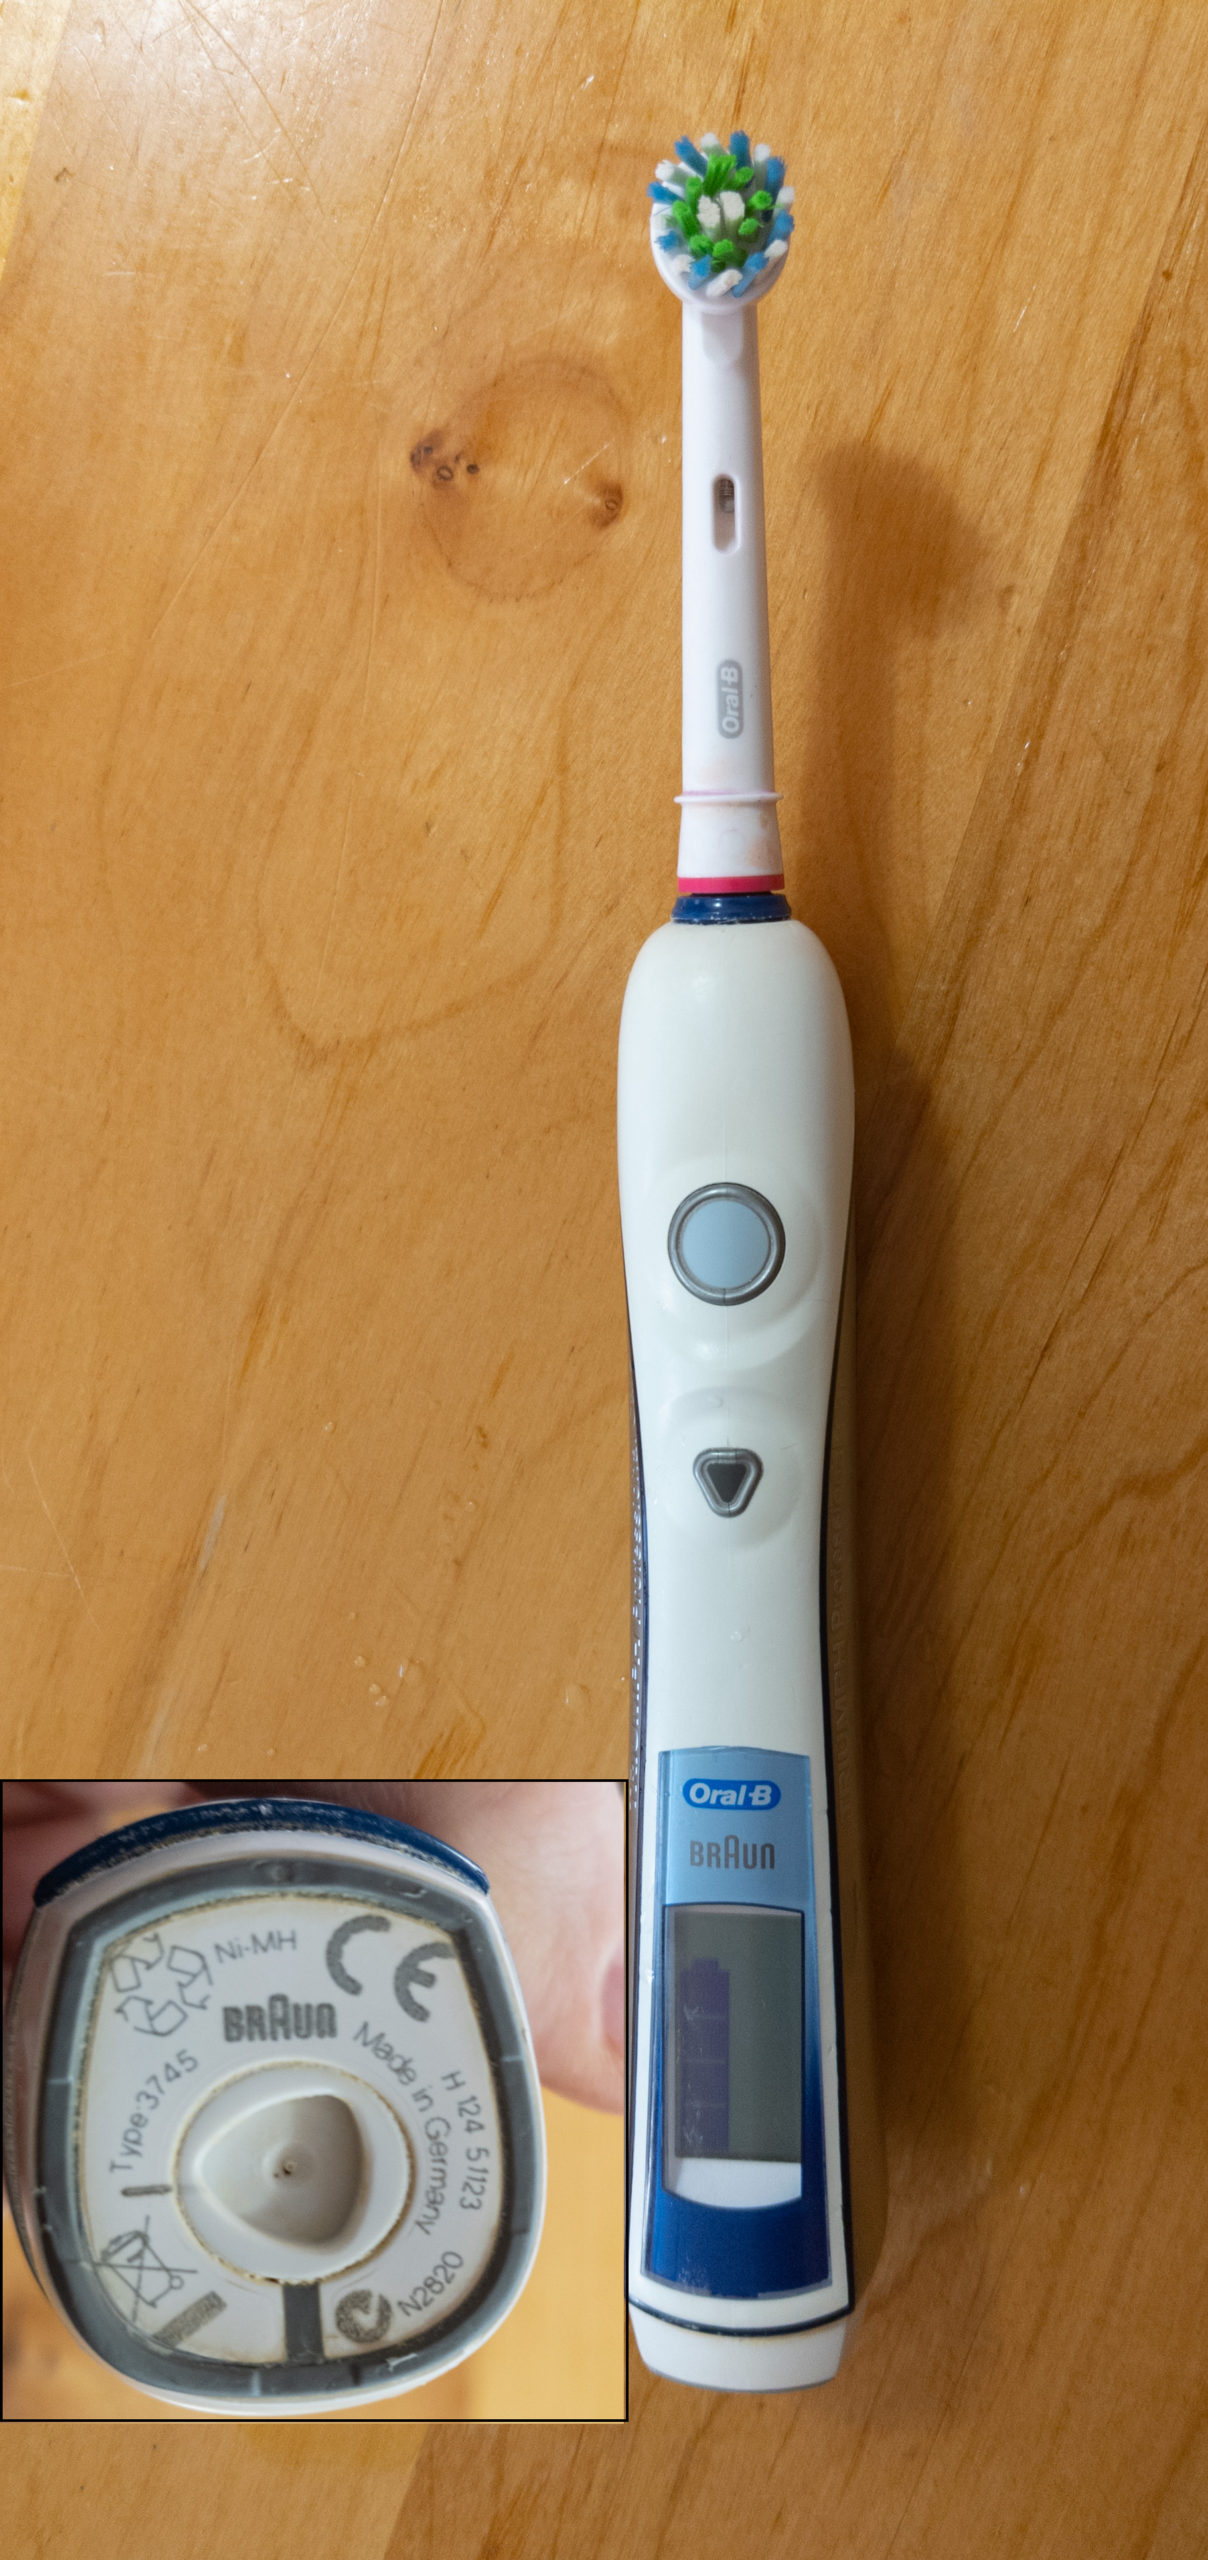
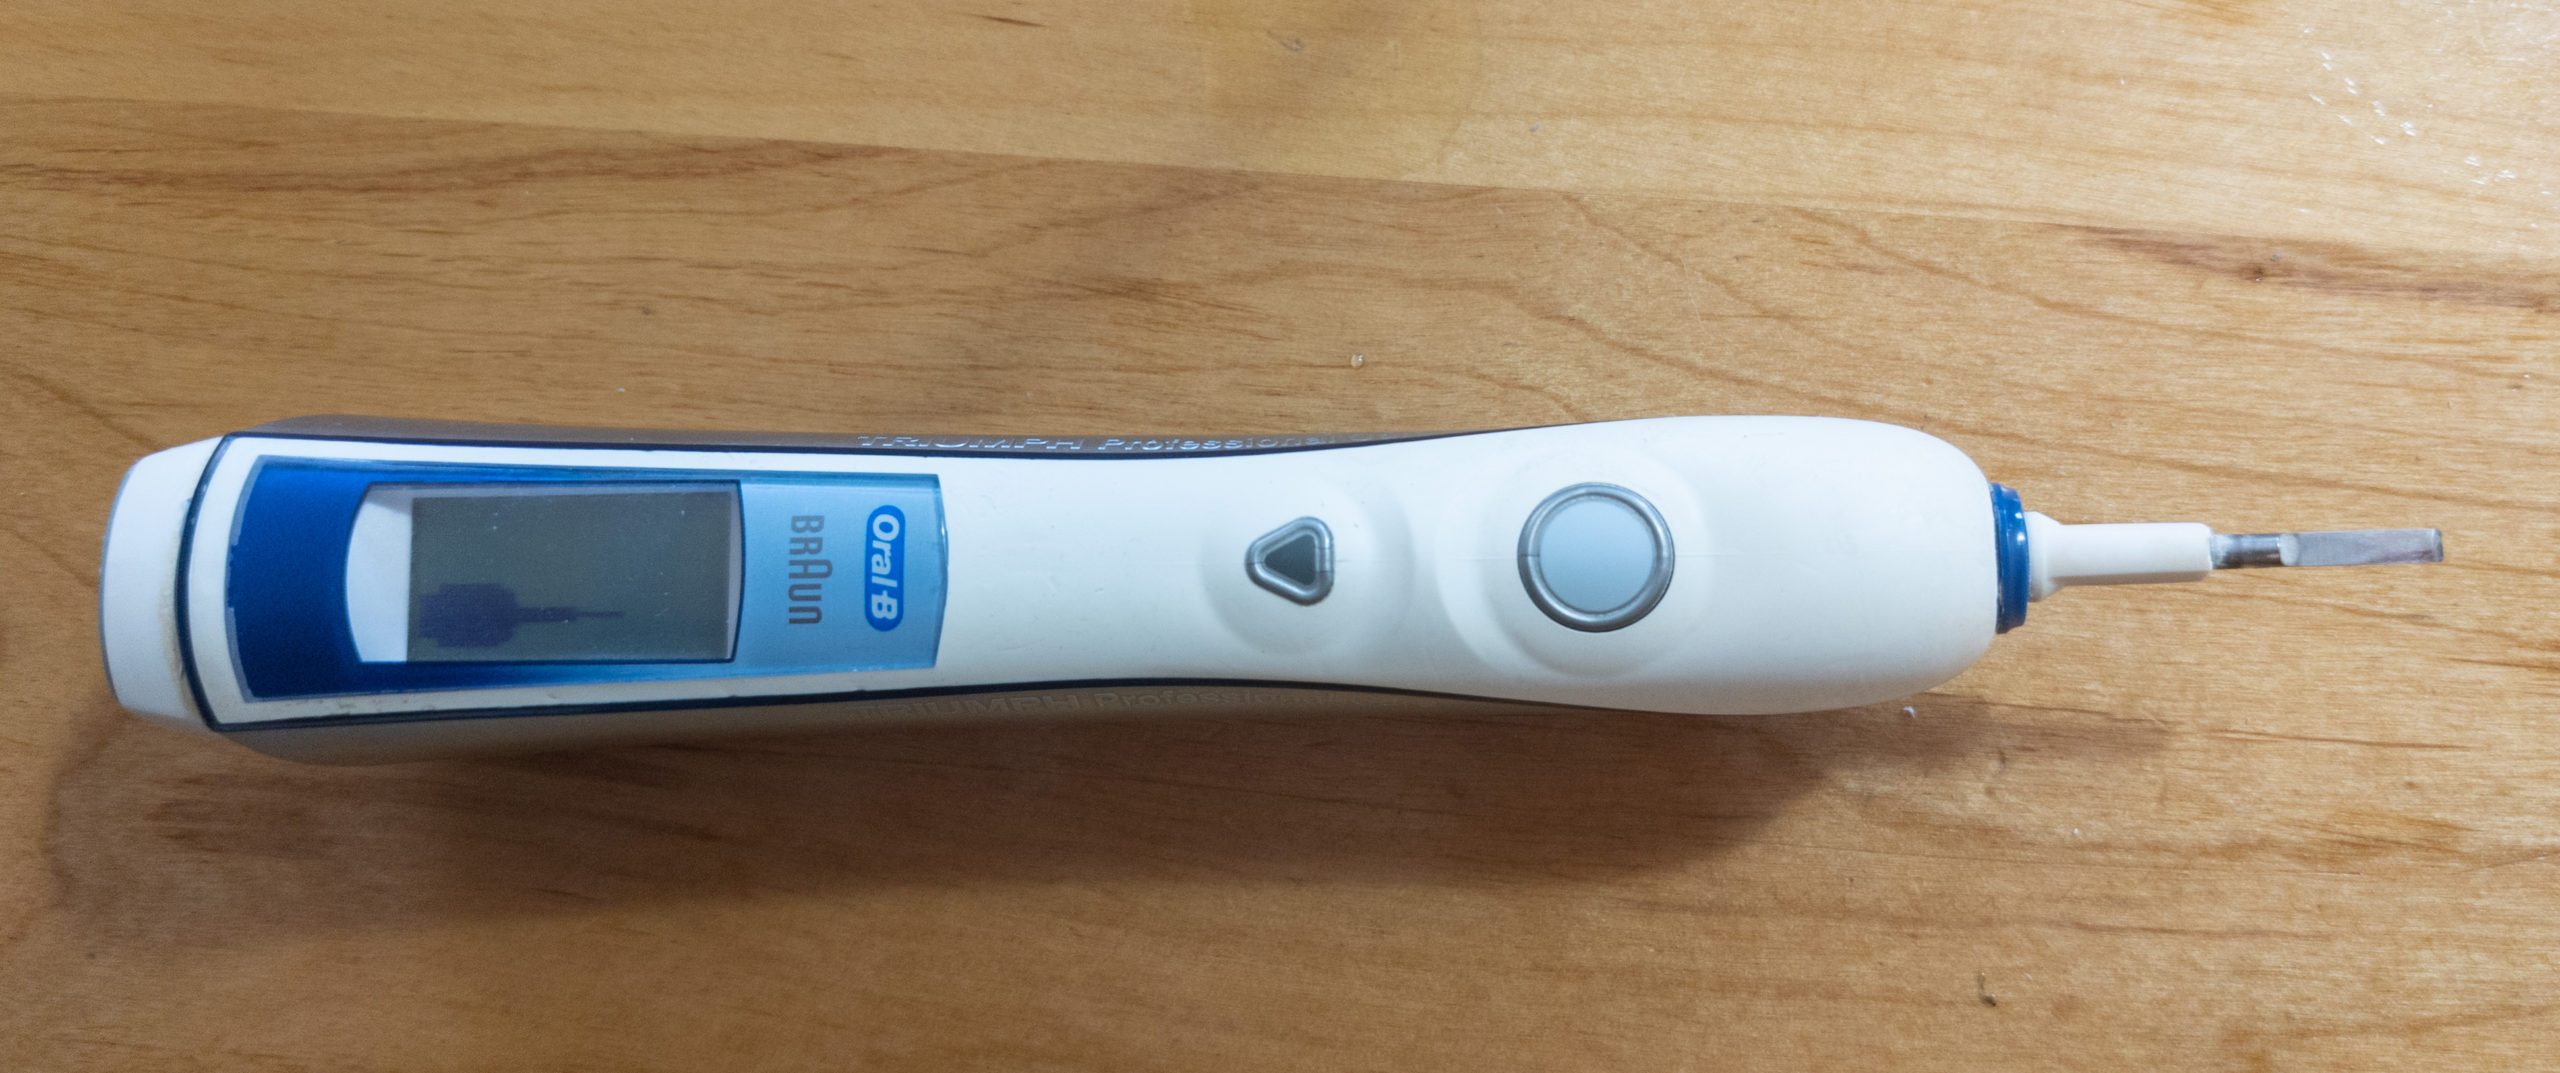
Triumph Professional Care v1
Recently the battery in my electric toothbrush stopped holding its charge, despite the “full” indicator displayed in the LCD built into the handle. The Braun Oral-B Triumph Professional Care electric toothbrush is one of the best ever made. I’ve been using mine for nearly a decade and when I find something that works, I do not like to switch. What I like about this model, aside from its great cleaning ability, is that LCD. It shows both the charge level as well as a time display showing how long you spend brushing your teeth. It may be just me but I like knowing this information. It keeps me honest on days where I may be in a hurry. Unfortunately Braun no longer sells this model. The newer Oral-B electric toothbrushes use the same technology to clean your teeth but they incorporate Bluetooth technology that allows you to use your phone or other mobile device to keep track of how often and how long you brush your teeth. This would be fine if it was the only option but the $120+ price tag to upgrade to a new toothbrush isn’t worth it in my opinion. Instead, I purchased a replacement battery from Amazon and brought mine back to life for at least a few more years. If you are in the same situation (why else are you reading this?) then read on.
Tools and Supplies
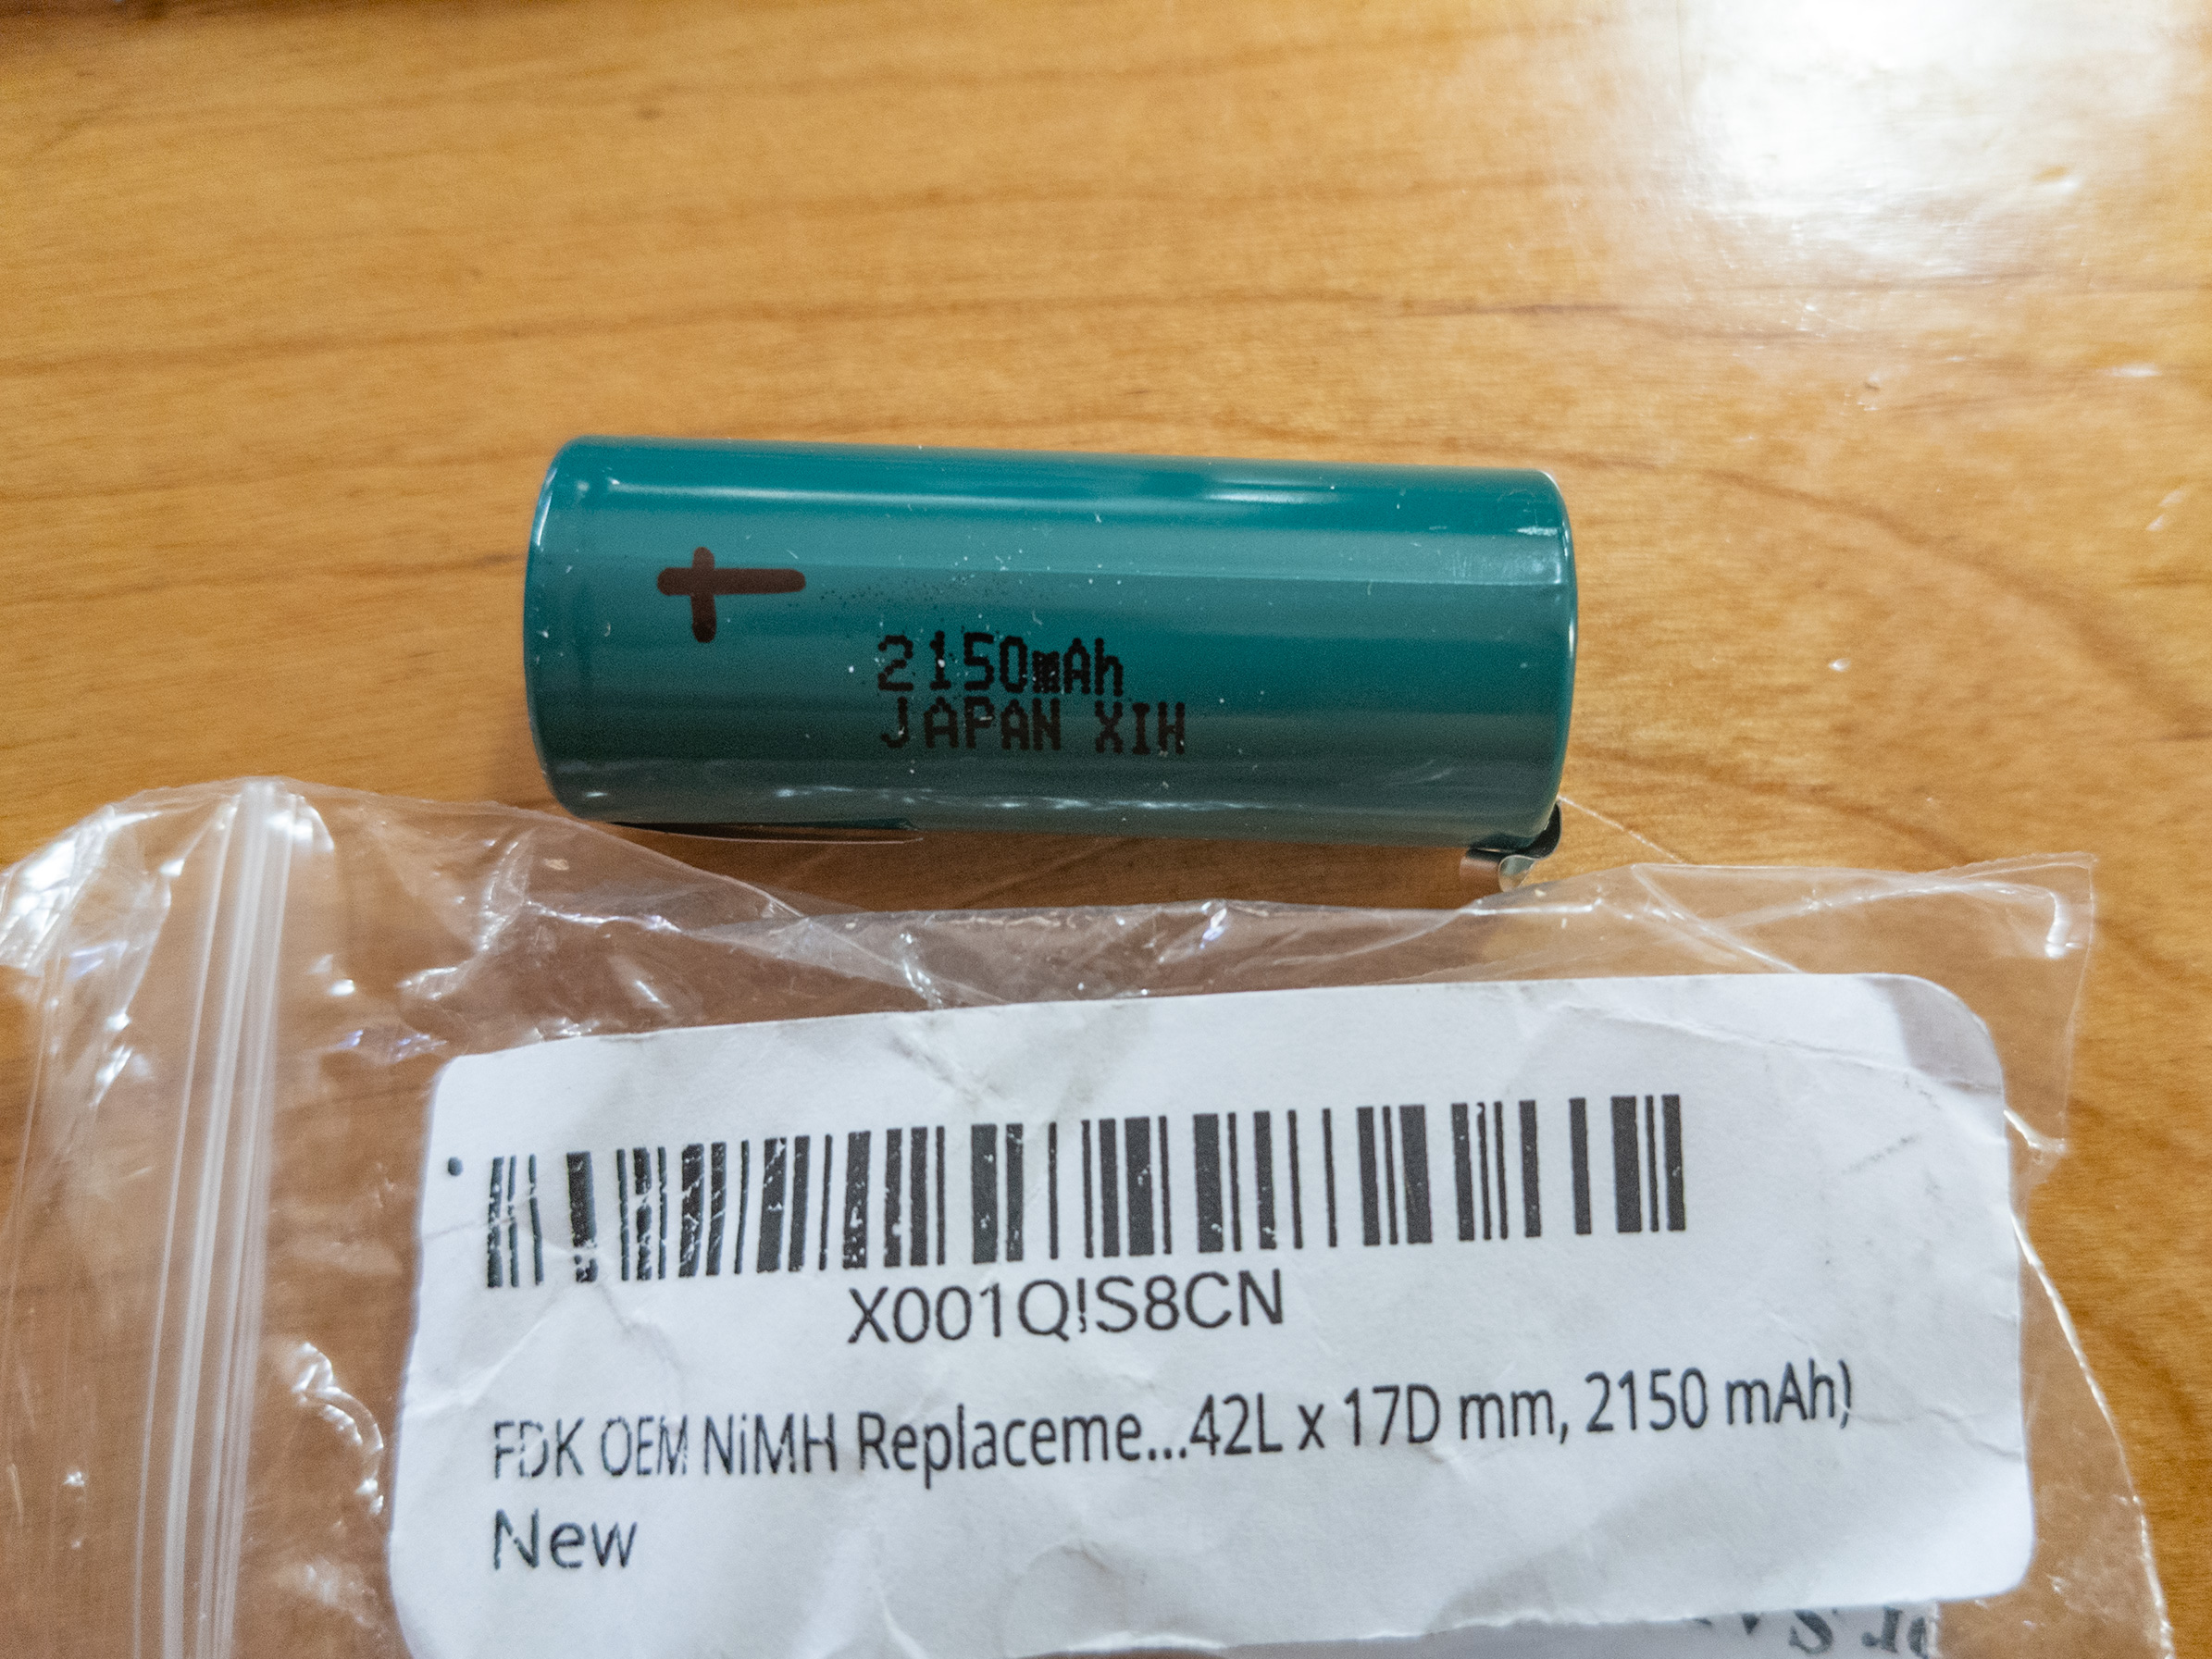
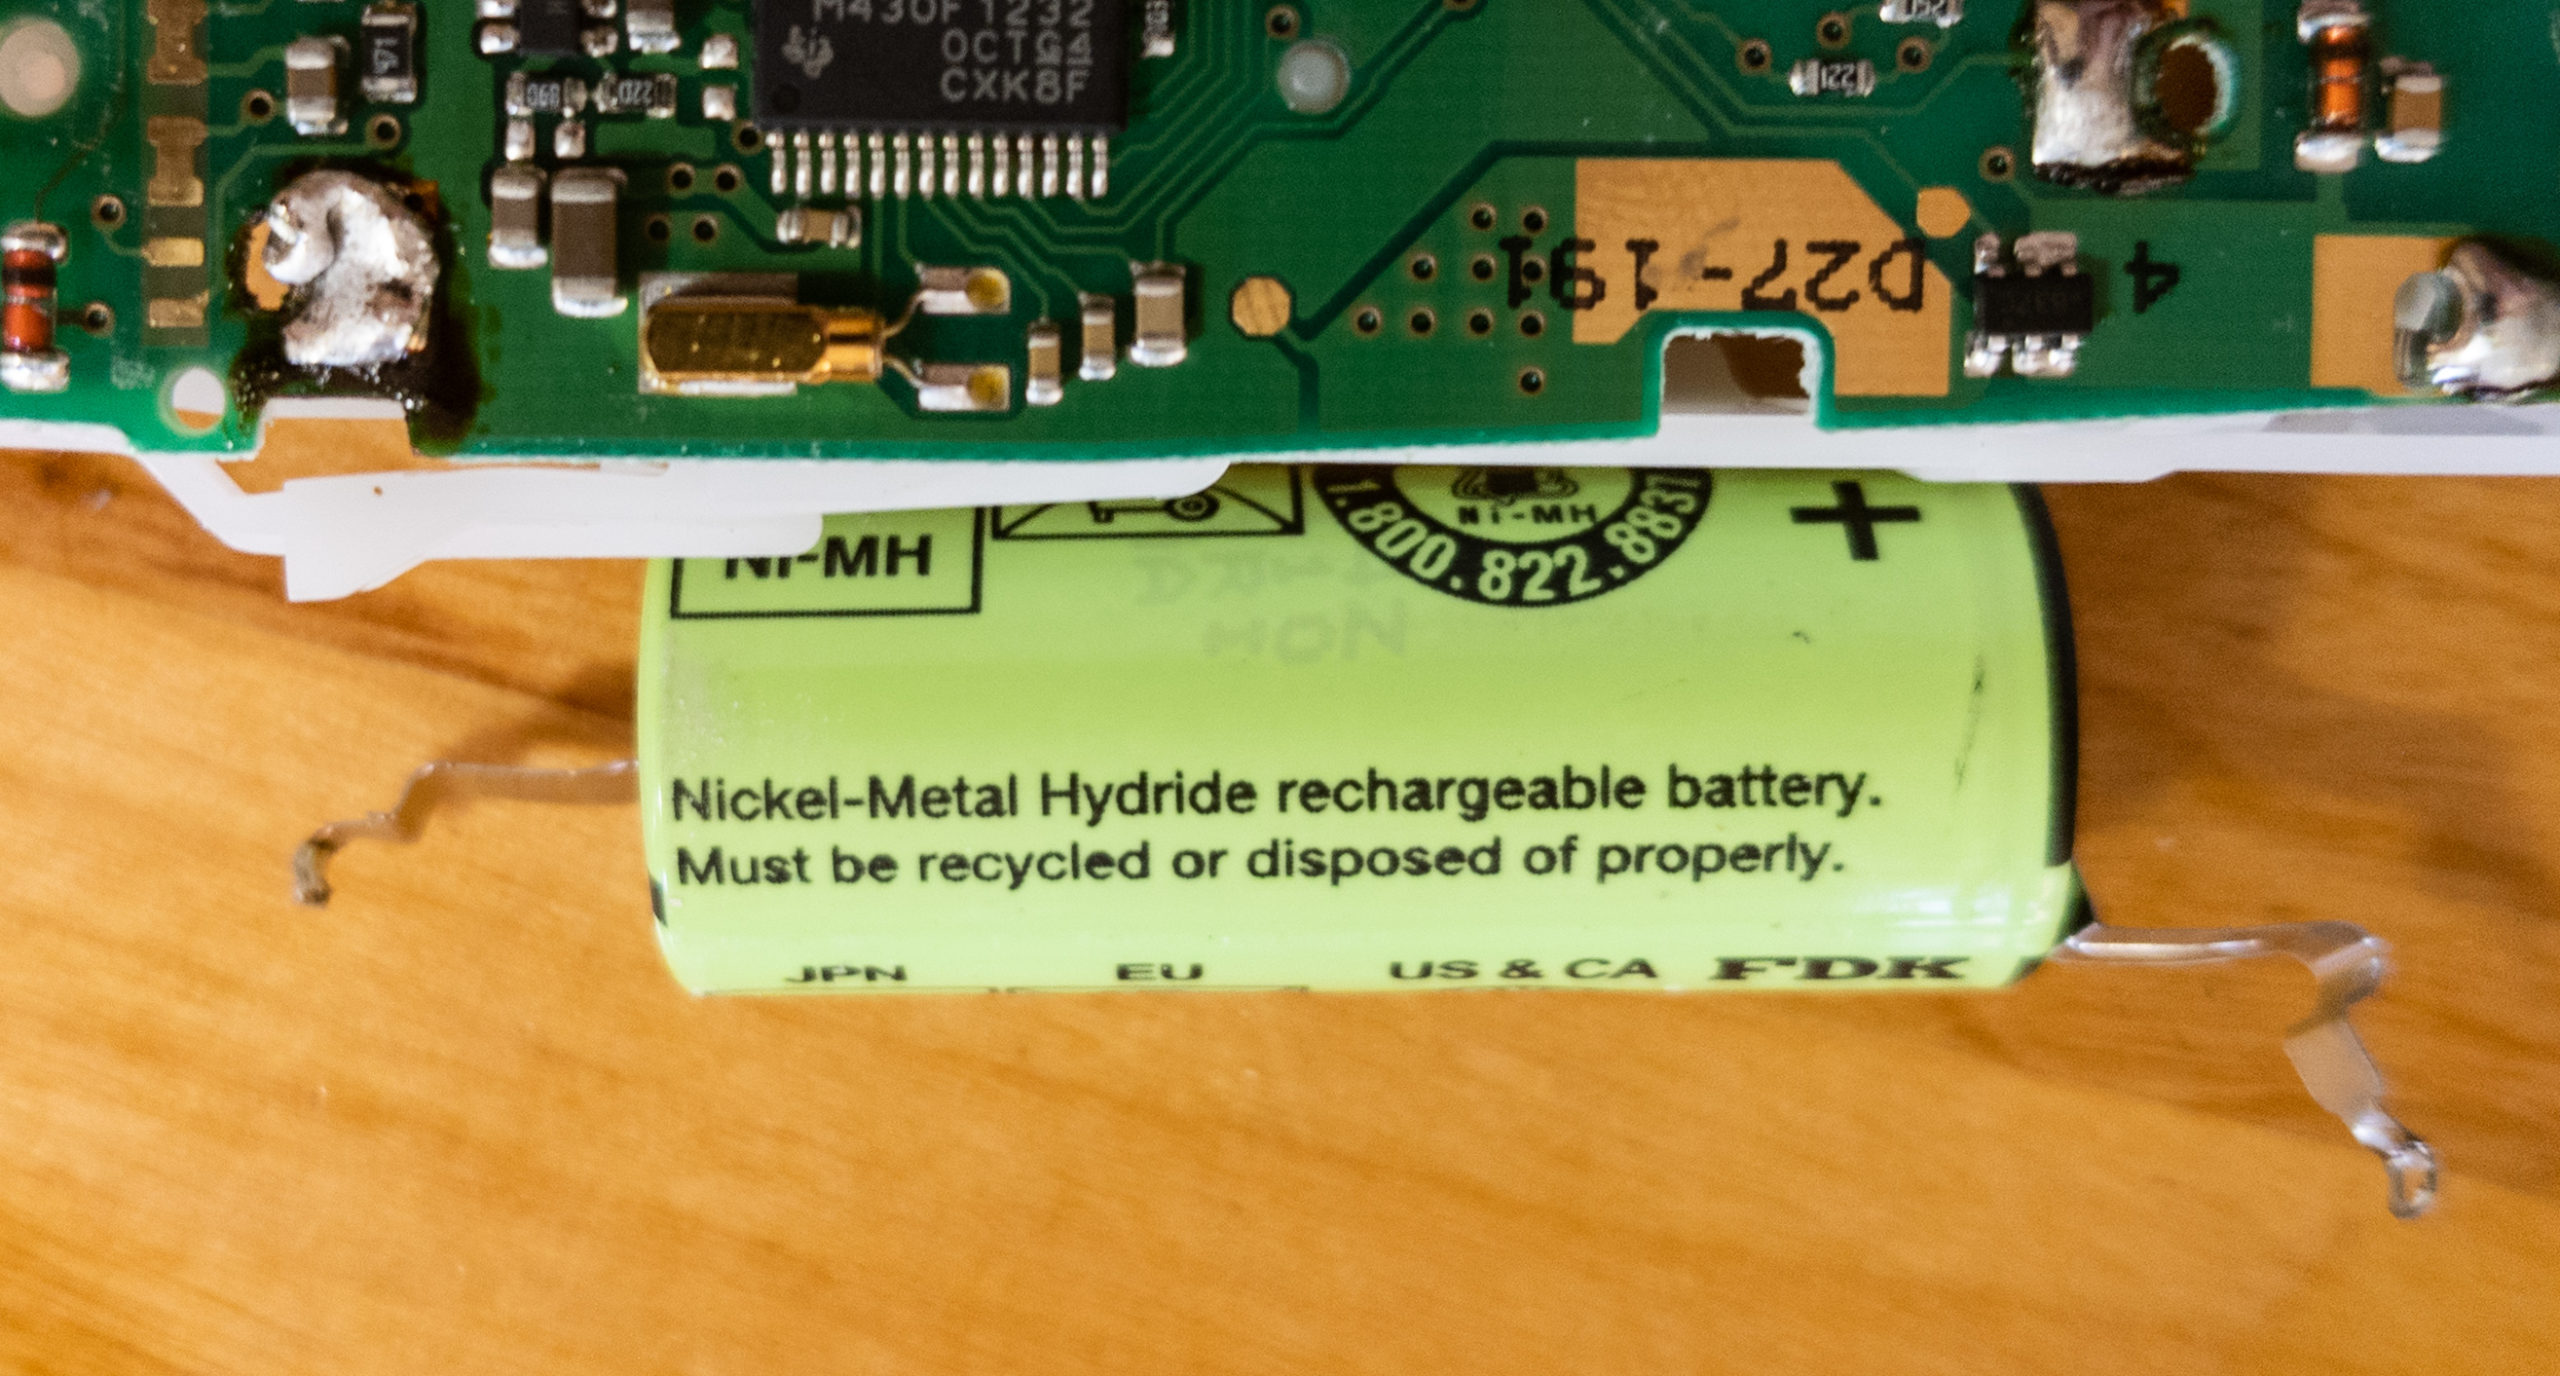
Before getting started you will need a few things. First, you will need a replacement battery. The original is a 2150 mAh cell 42 mm long and 17 mm in diameter. I found this one from Amazon for $18 at the time of this writing. After reading other reports on the Web, it seems that some units were made with higher capacity and longer 49 mm cells. You might want to follow the instructions to open up your model to see which battery you have first. Or, if you simply want the larger capacity battery, then purchase a 49 mm long cell. You may need to adjust a spring (shown below) but it will fit in the 42mm models.
Next, you will need an electronics-grade soldering iron (18—25W) and some soldering braid to remove solder. You’ll also need suitable electronics solder to attach the new battery. Lastly, and optionally, you might want to get a plastic prying tool to help with opening up the toothbrush. You can use a flat-bladed screwdriver but it will leave marks. I used a prying tool from a mobile phone repair kit I purchased from iFixIt.
Removing the internal toothbrush assembly
The internal assembly is held in place by a snap-in ring on the top of the toothbrush and a screw-in cap on the bottom. Remove the toothbrush head and then remove the snap ring with a plastic prying tool or similar flat-bladed tool. Be careful not to leave marks. It may be easier to first soak the end of the toothbrush in hot but not boiling water for 5 minutes.
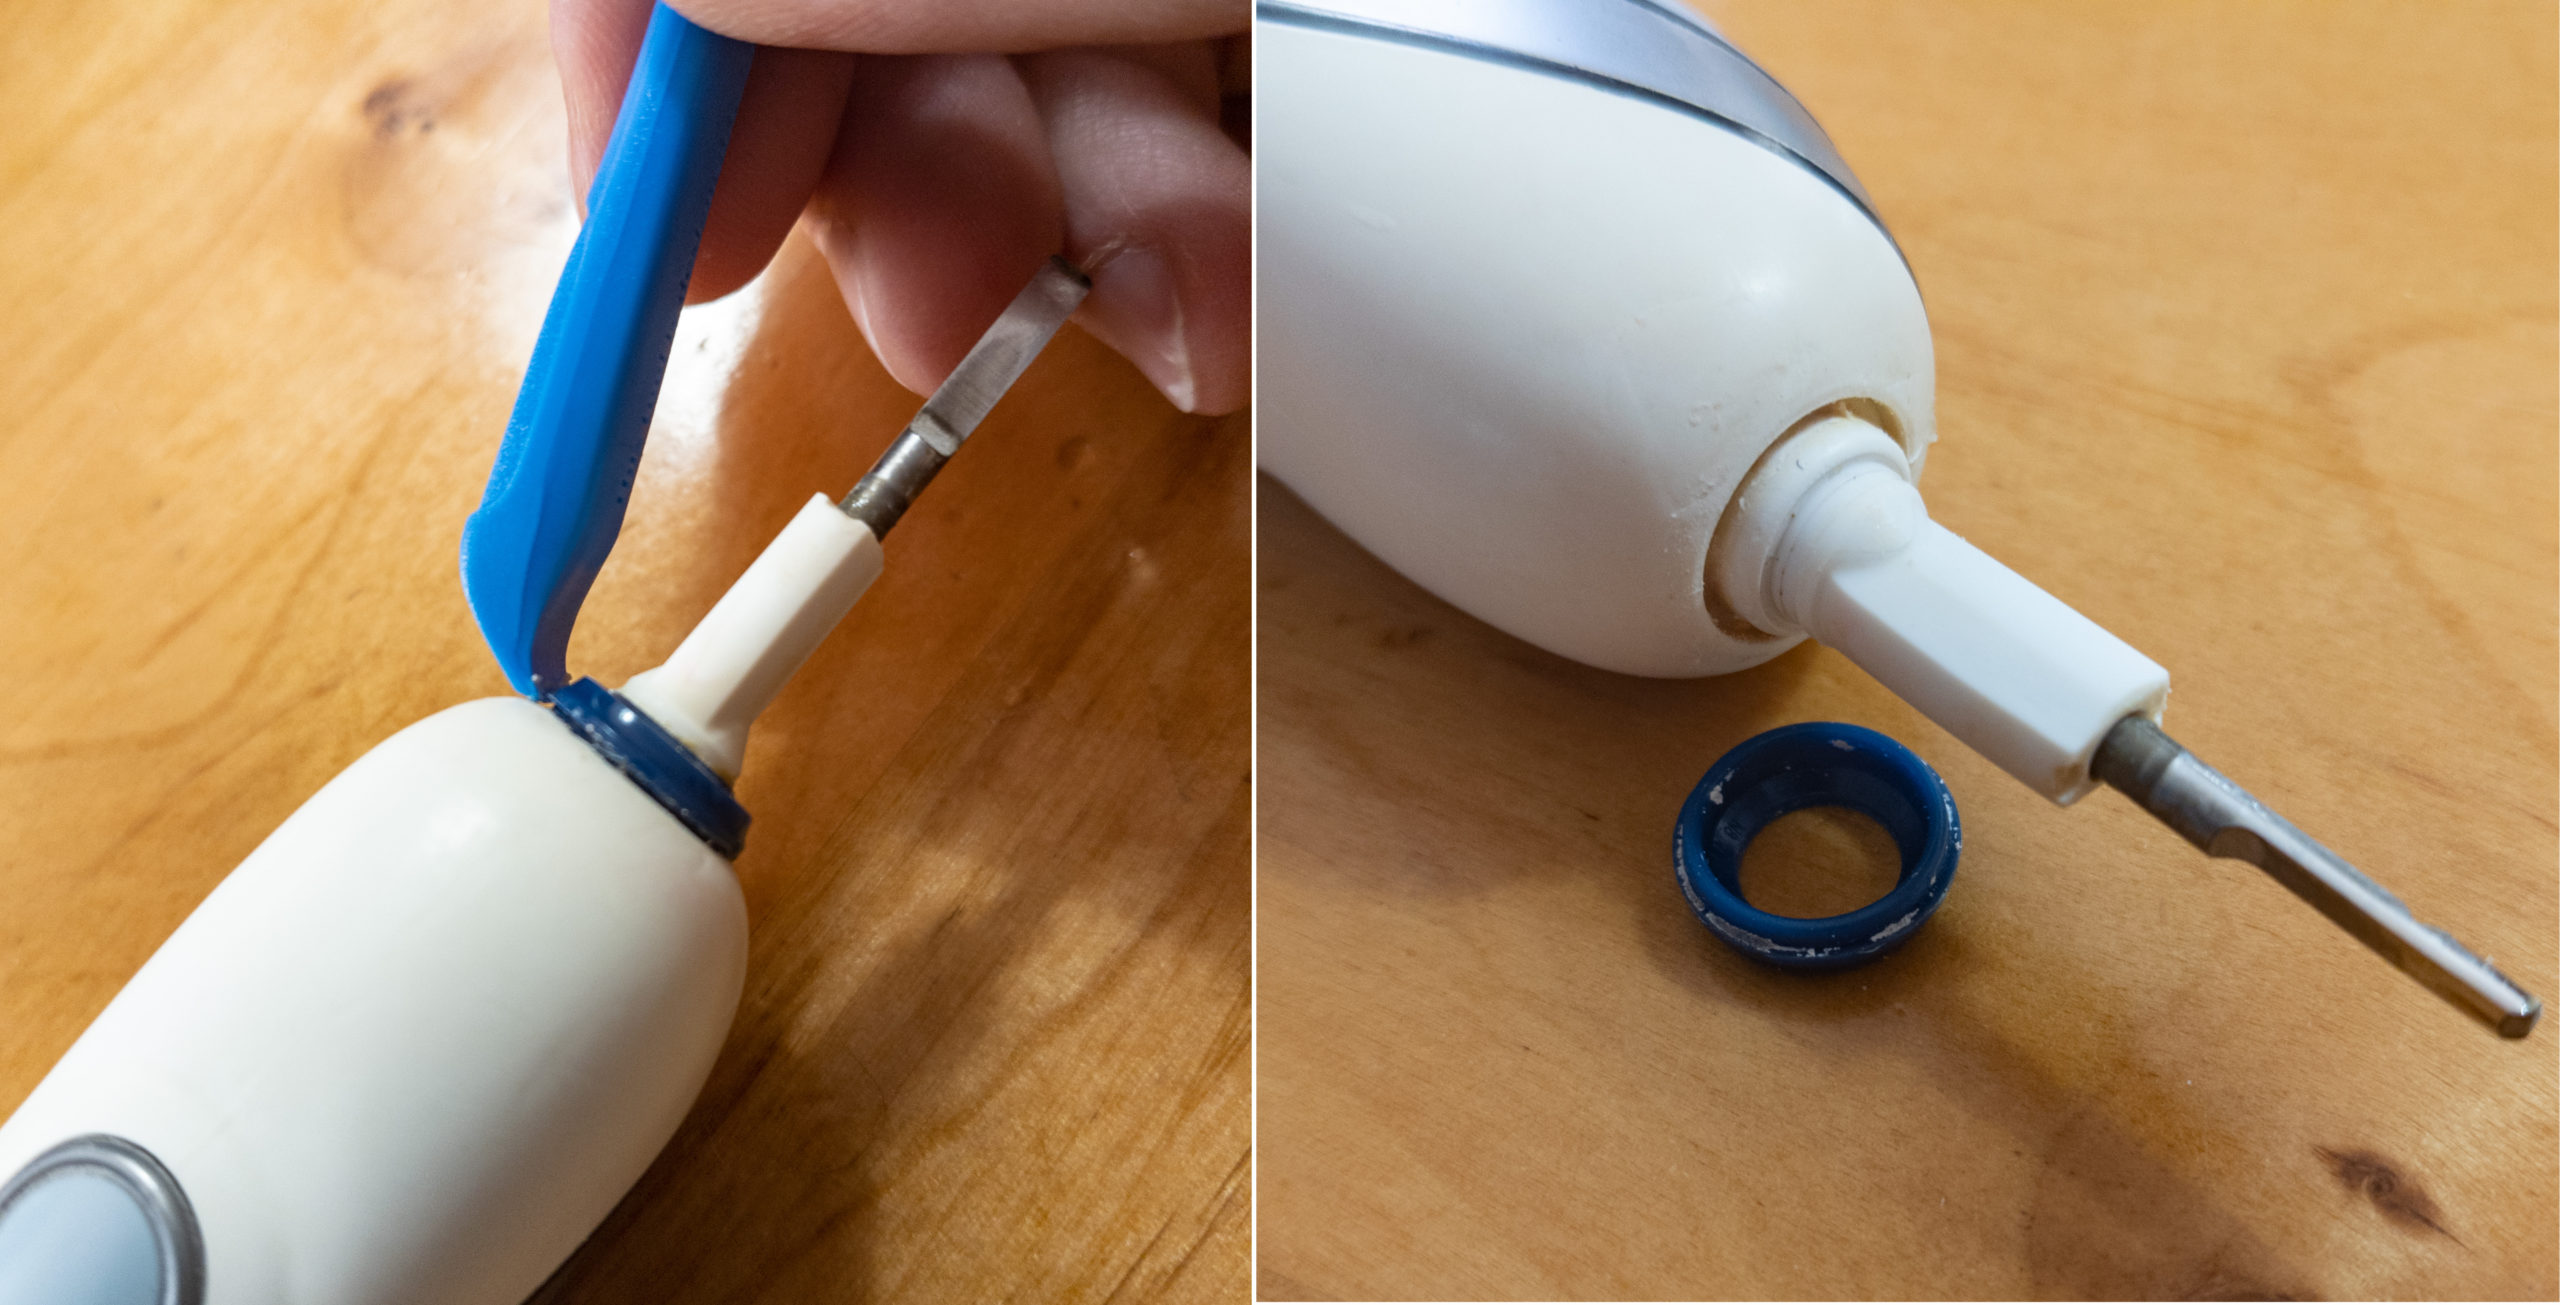
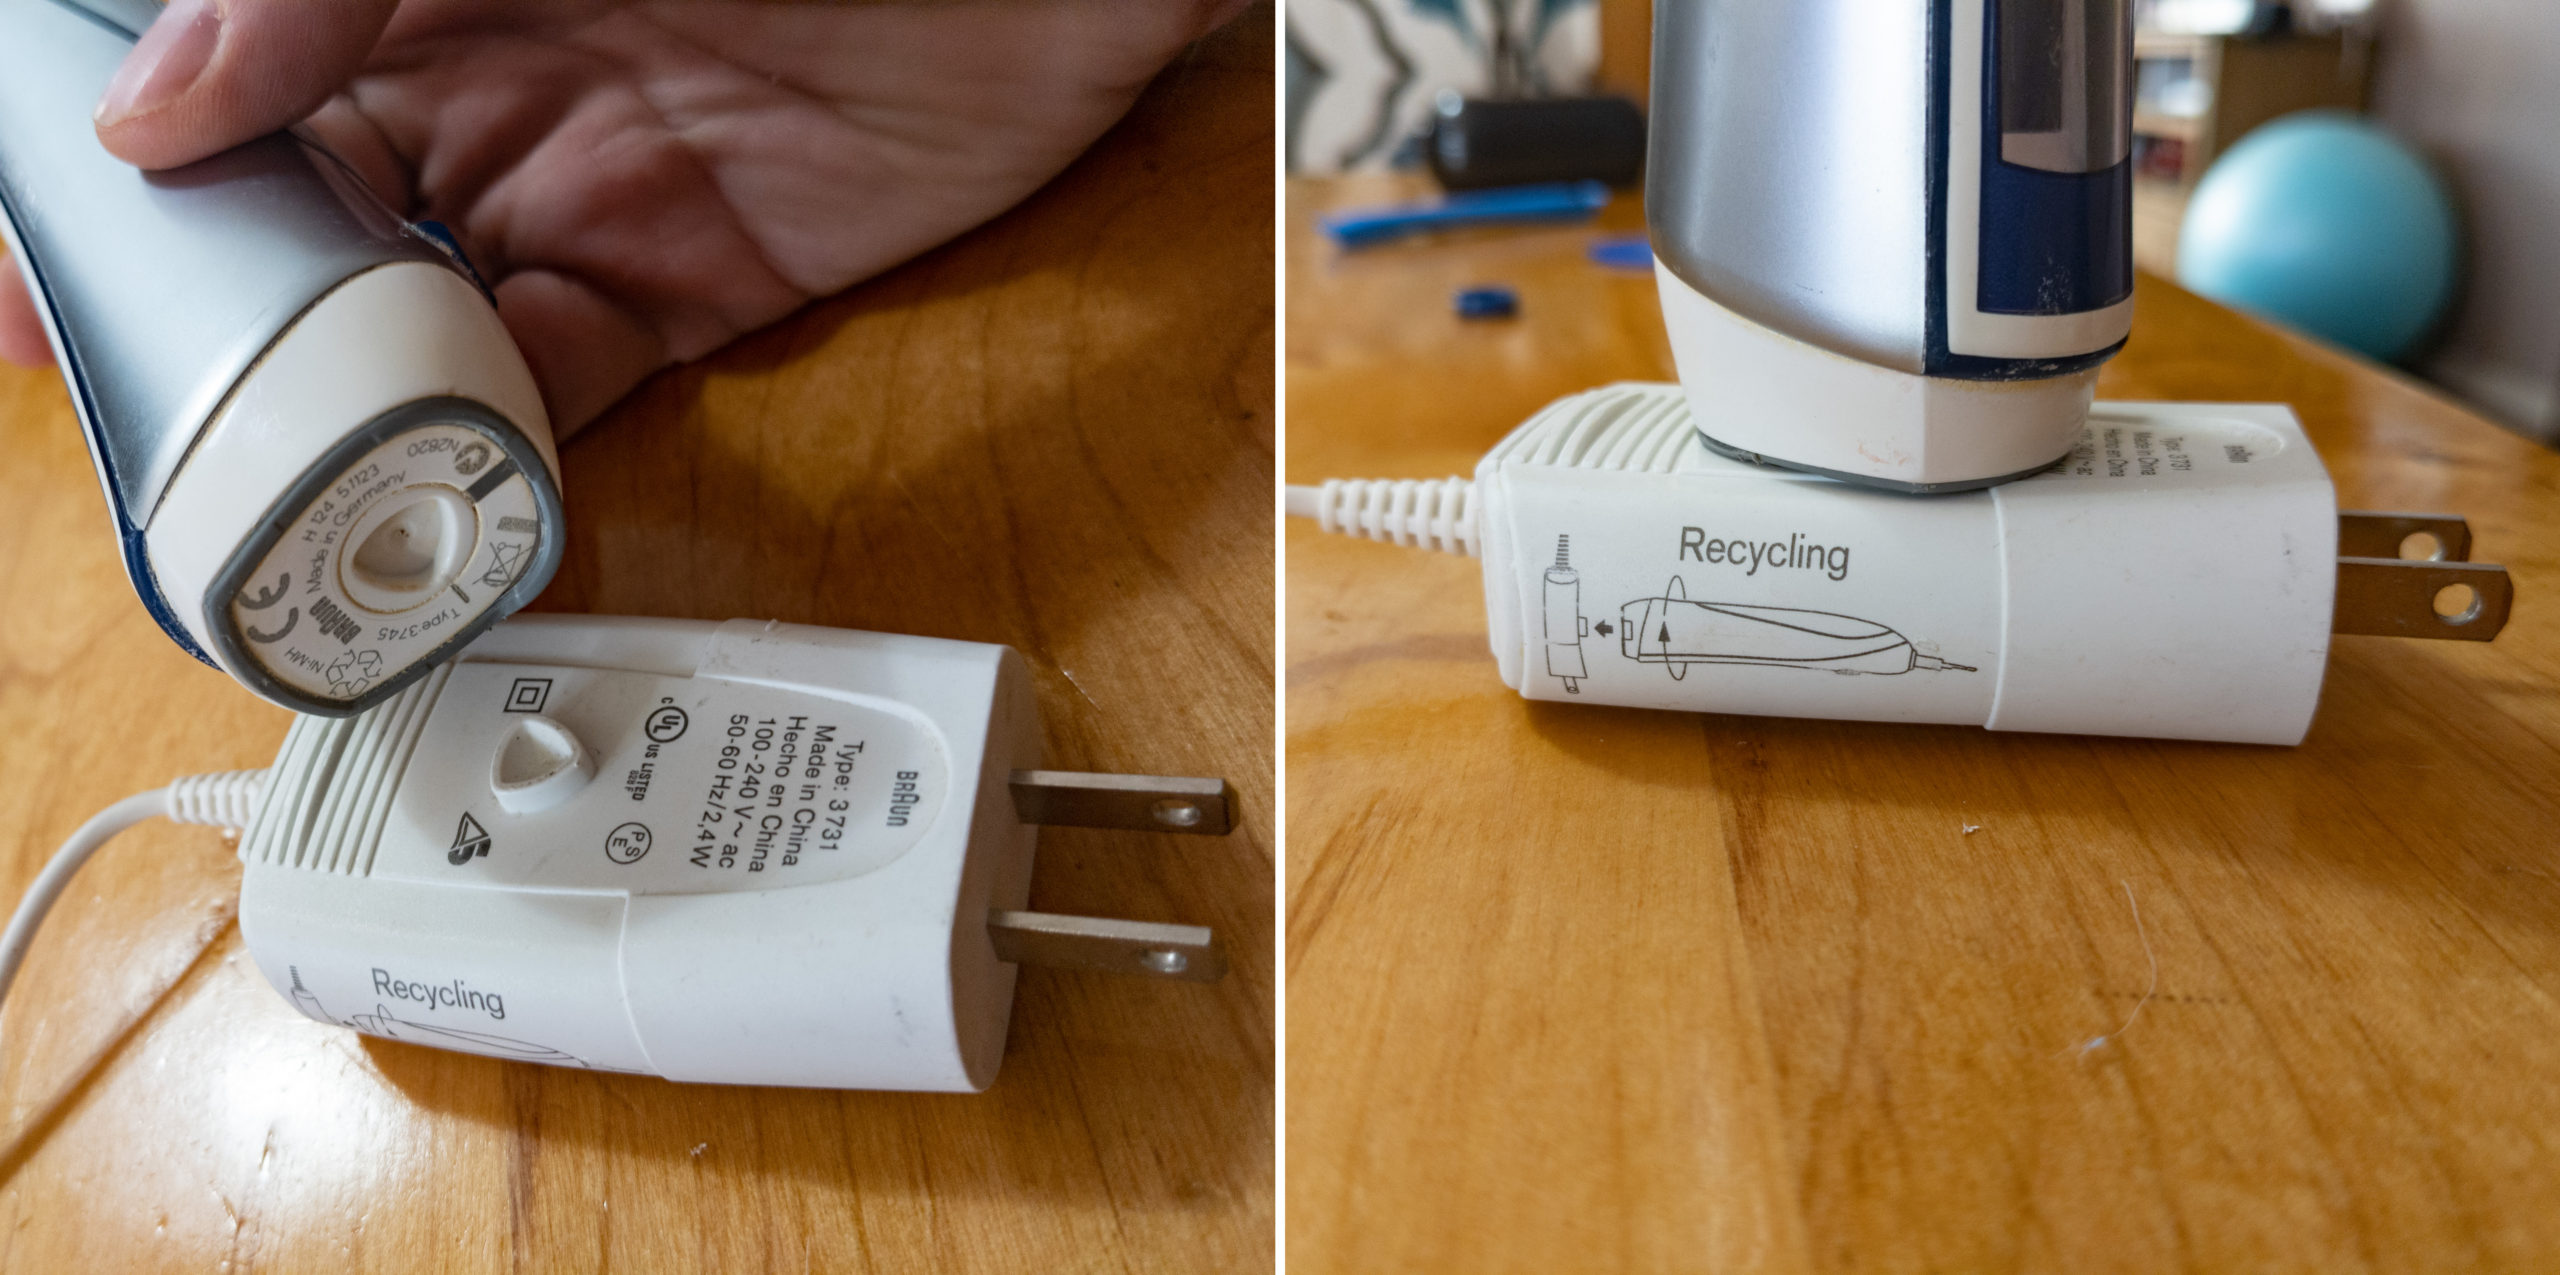
The triangular lobed screw holding the bottom cap in place can be turned using the plug on the charging cable that came with the toothbrush. This was specifically designed so European owners and other environmentally conscious users could remove the battery before tossing old units into the trash.
After loosening the screw, the cap should pull off without too much effort. You will need a small flat-bladed tool to gently push in the tabs that lock the internal assembly in place. Then gently pull on the rear unit while applying some pressure to the top to slide the assembly out of the toothbrush body.

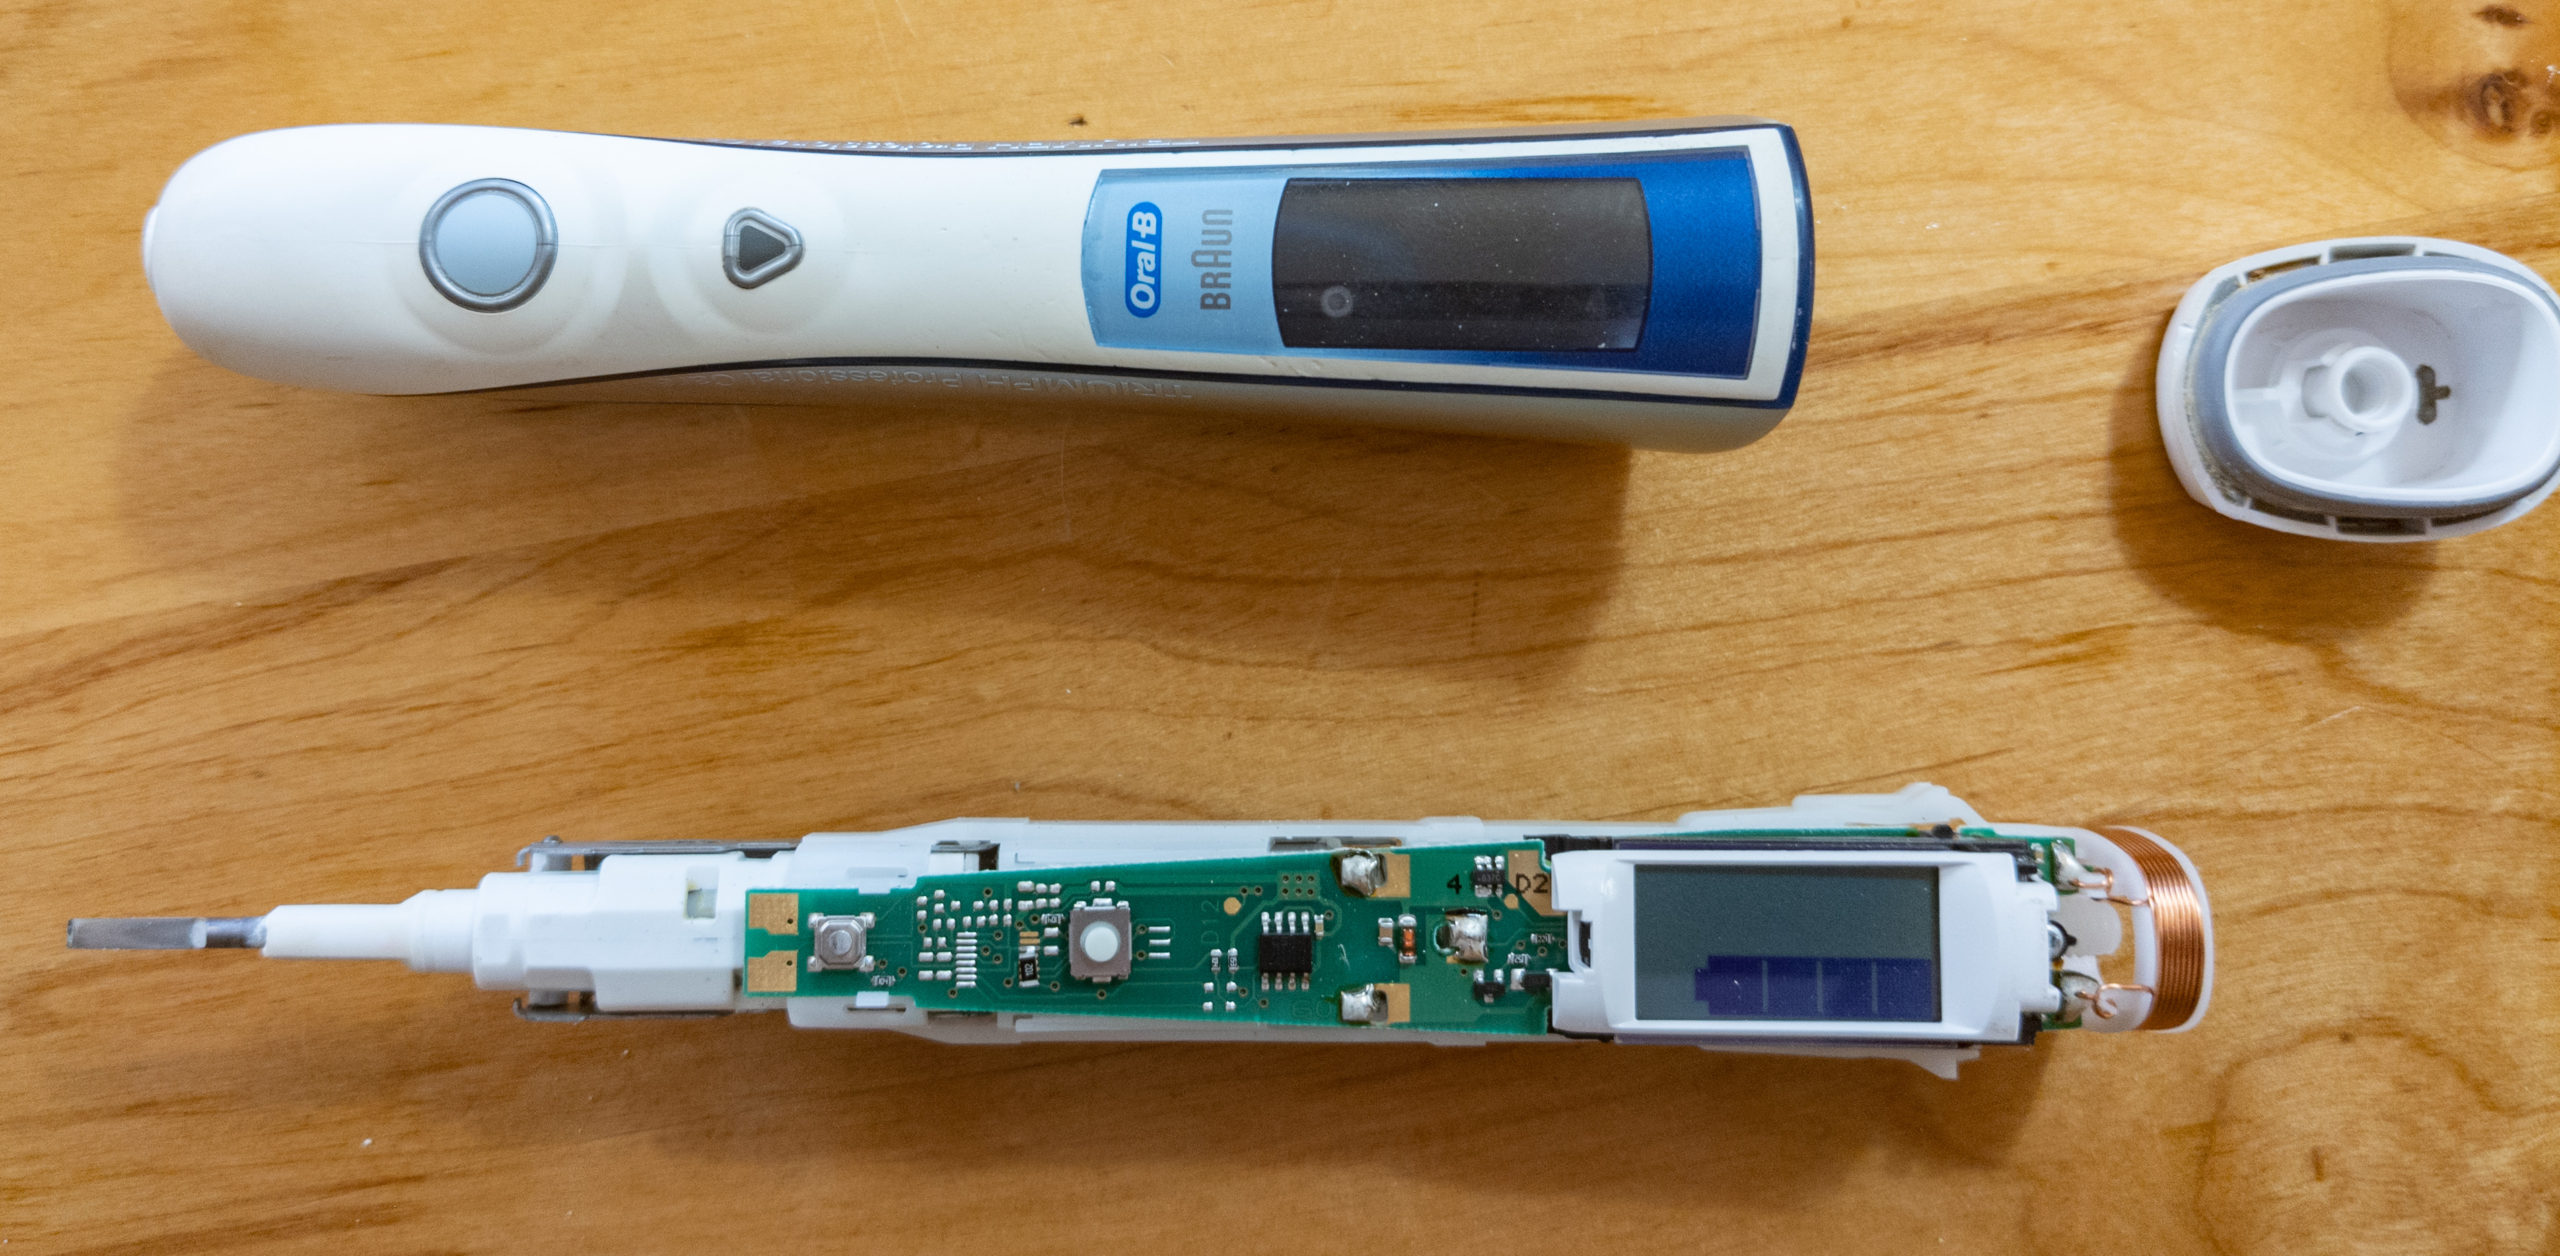
Bottom cap removed 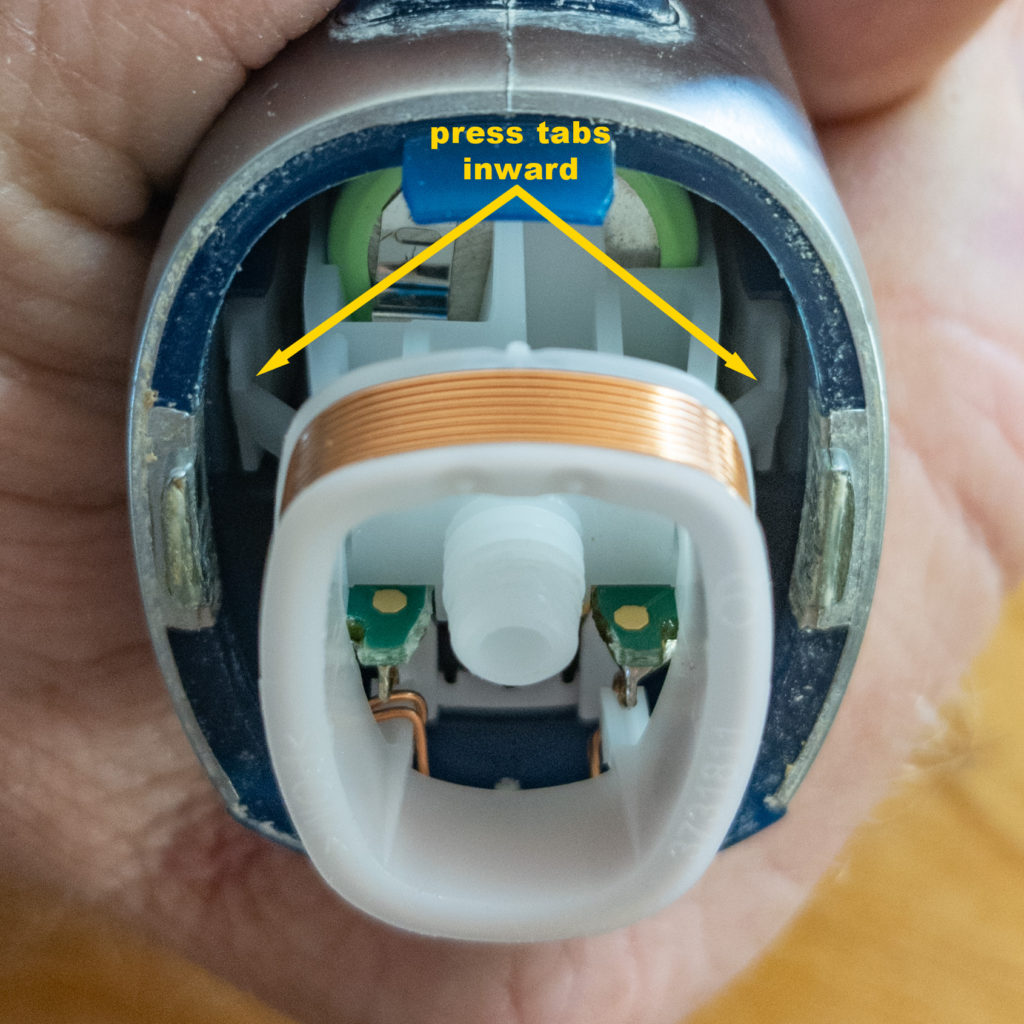
Removing the internal assembly 
Internal assembly removed


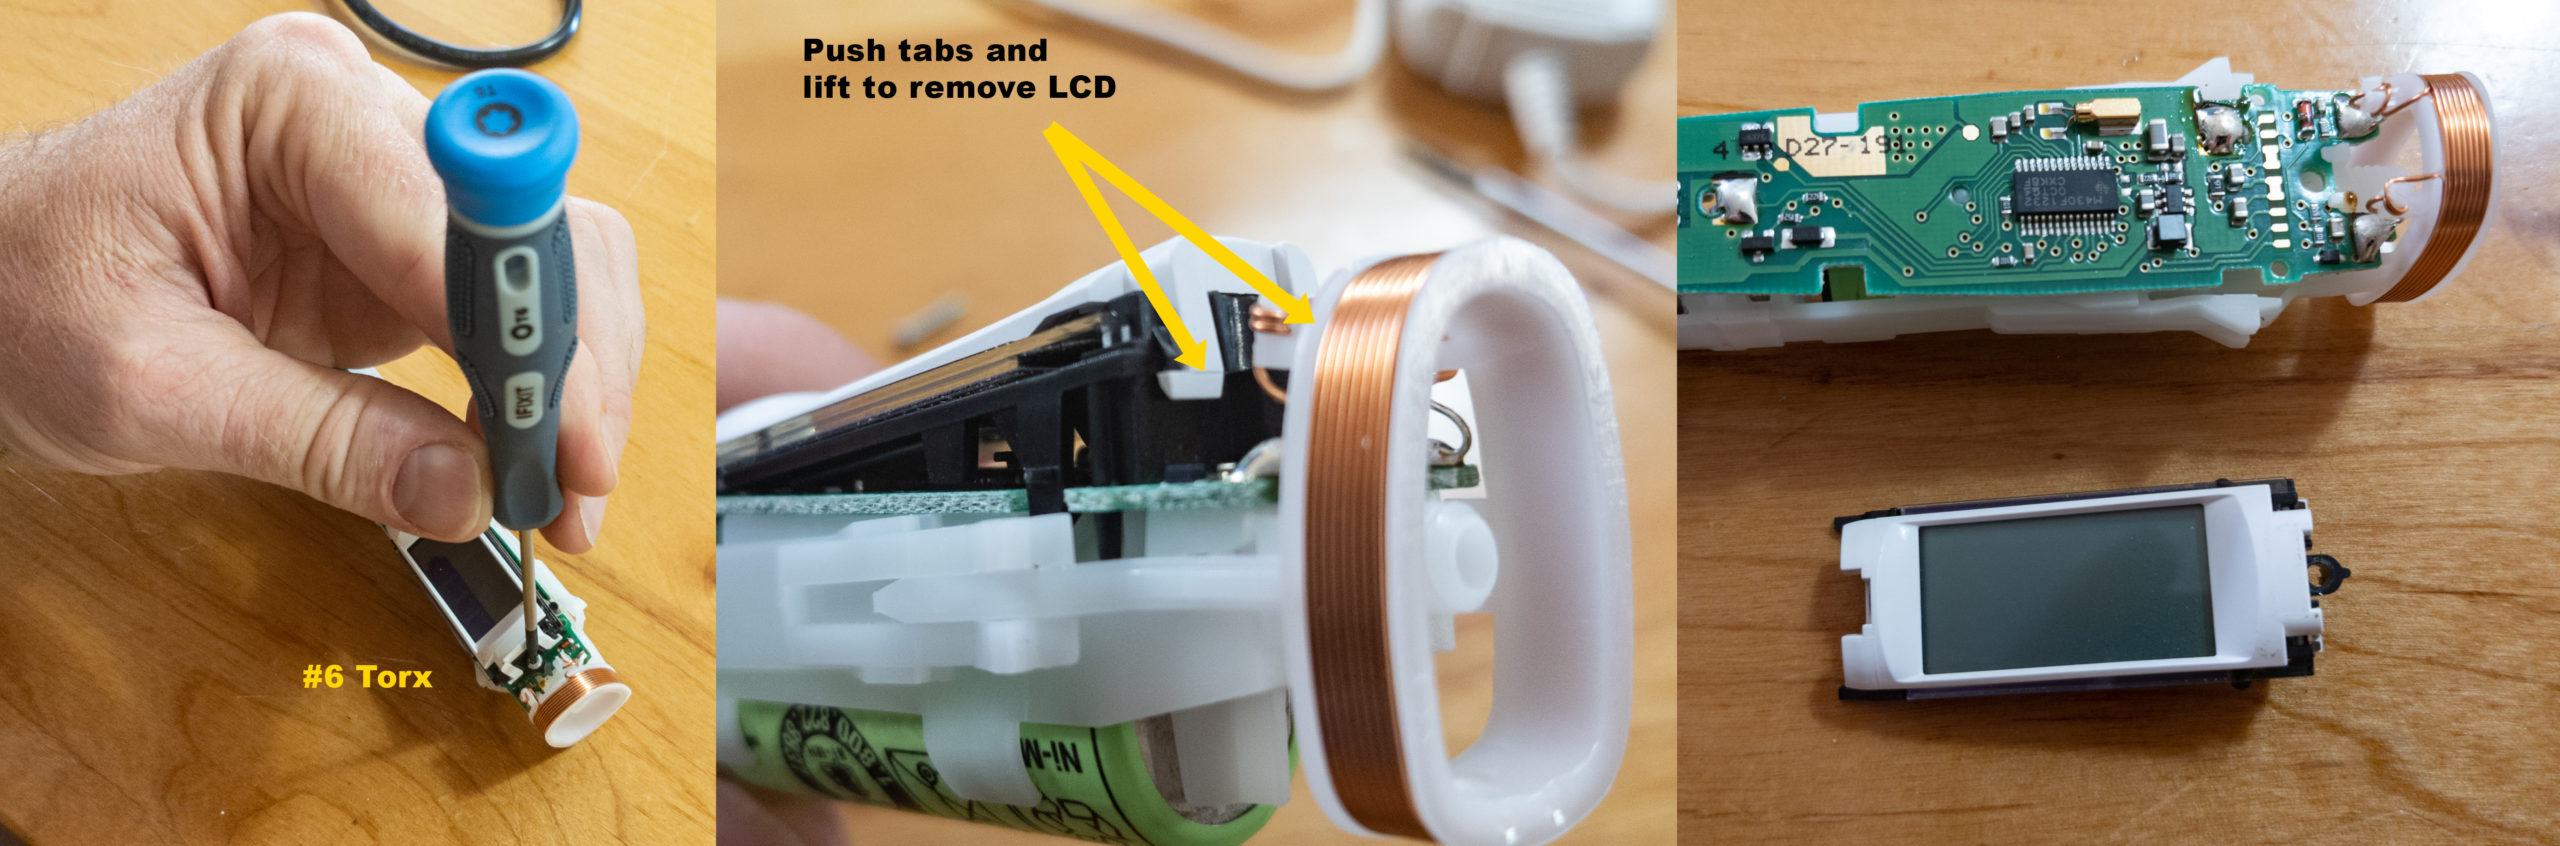
The next step is to remove the LCD assembly. It is held in place by a #6 Torx screw and two tabs. Remove the screw and press in the tabs to lift up the LCD assembly and move it out of the way.
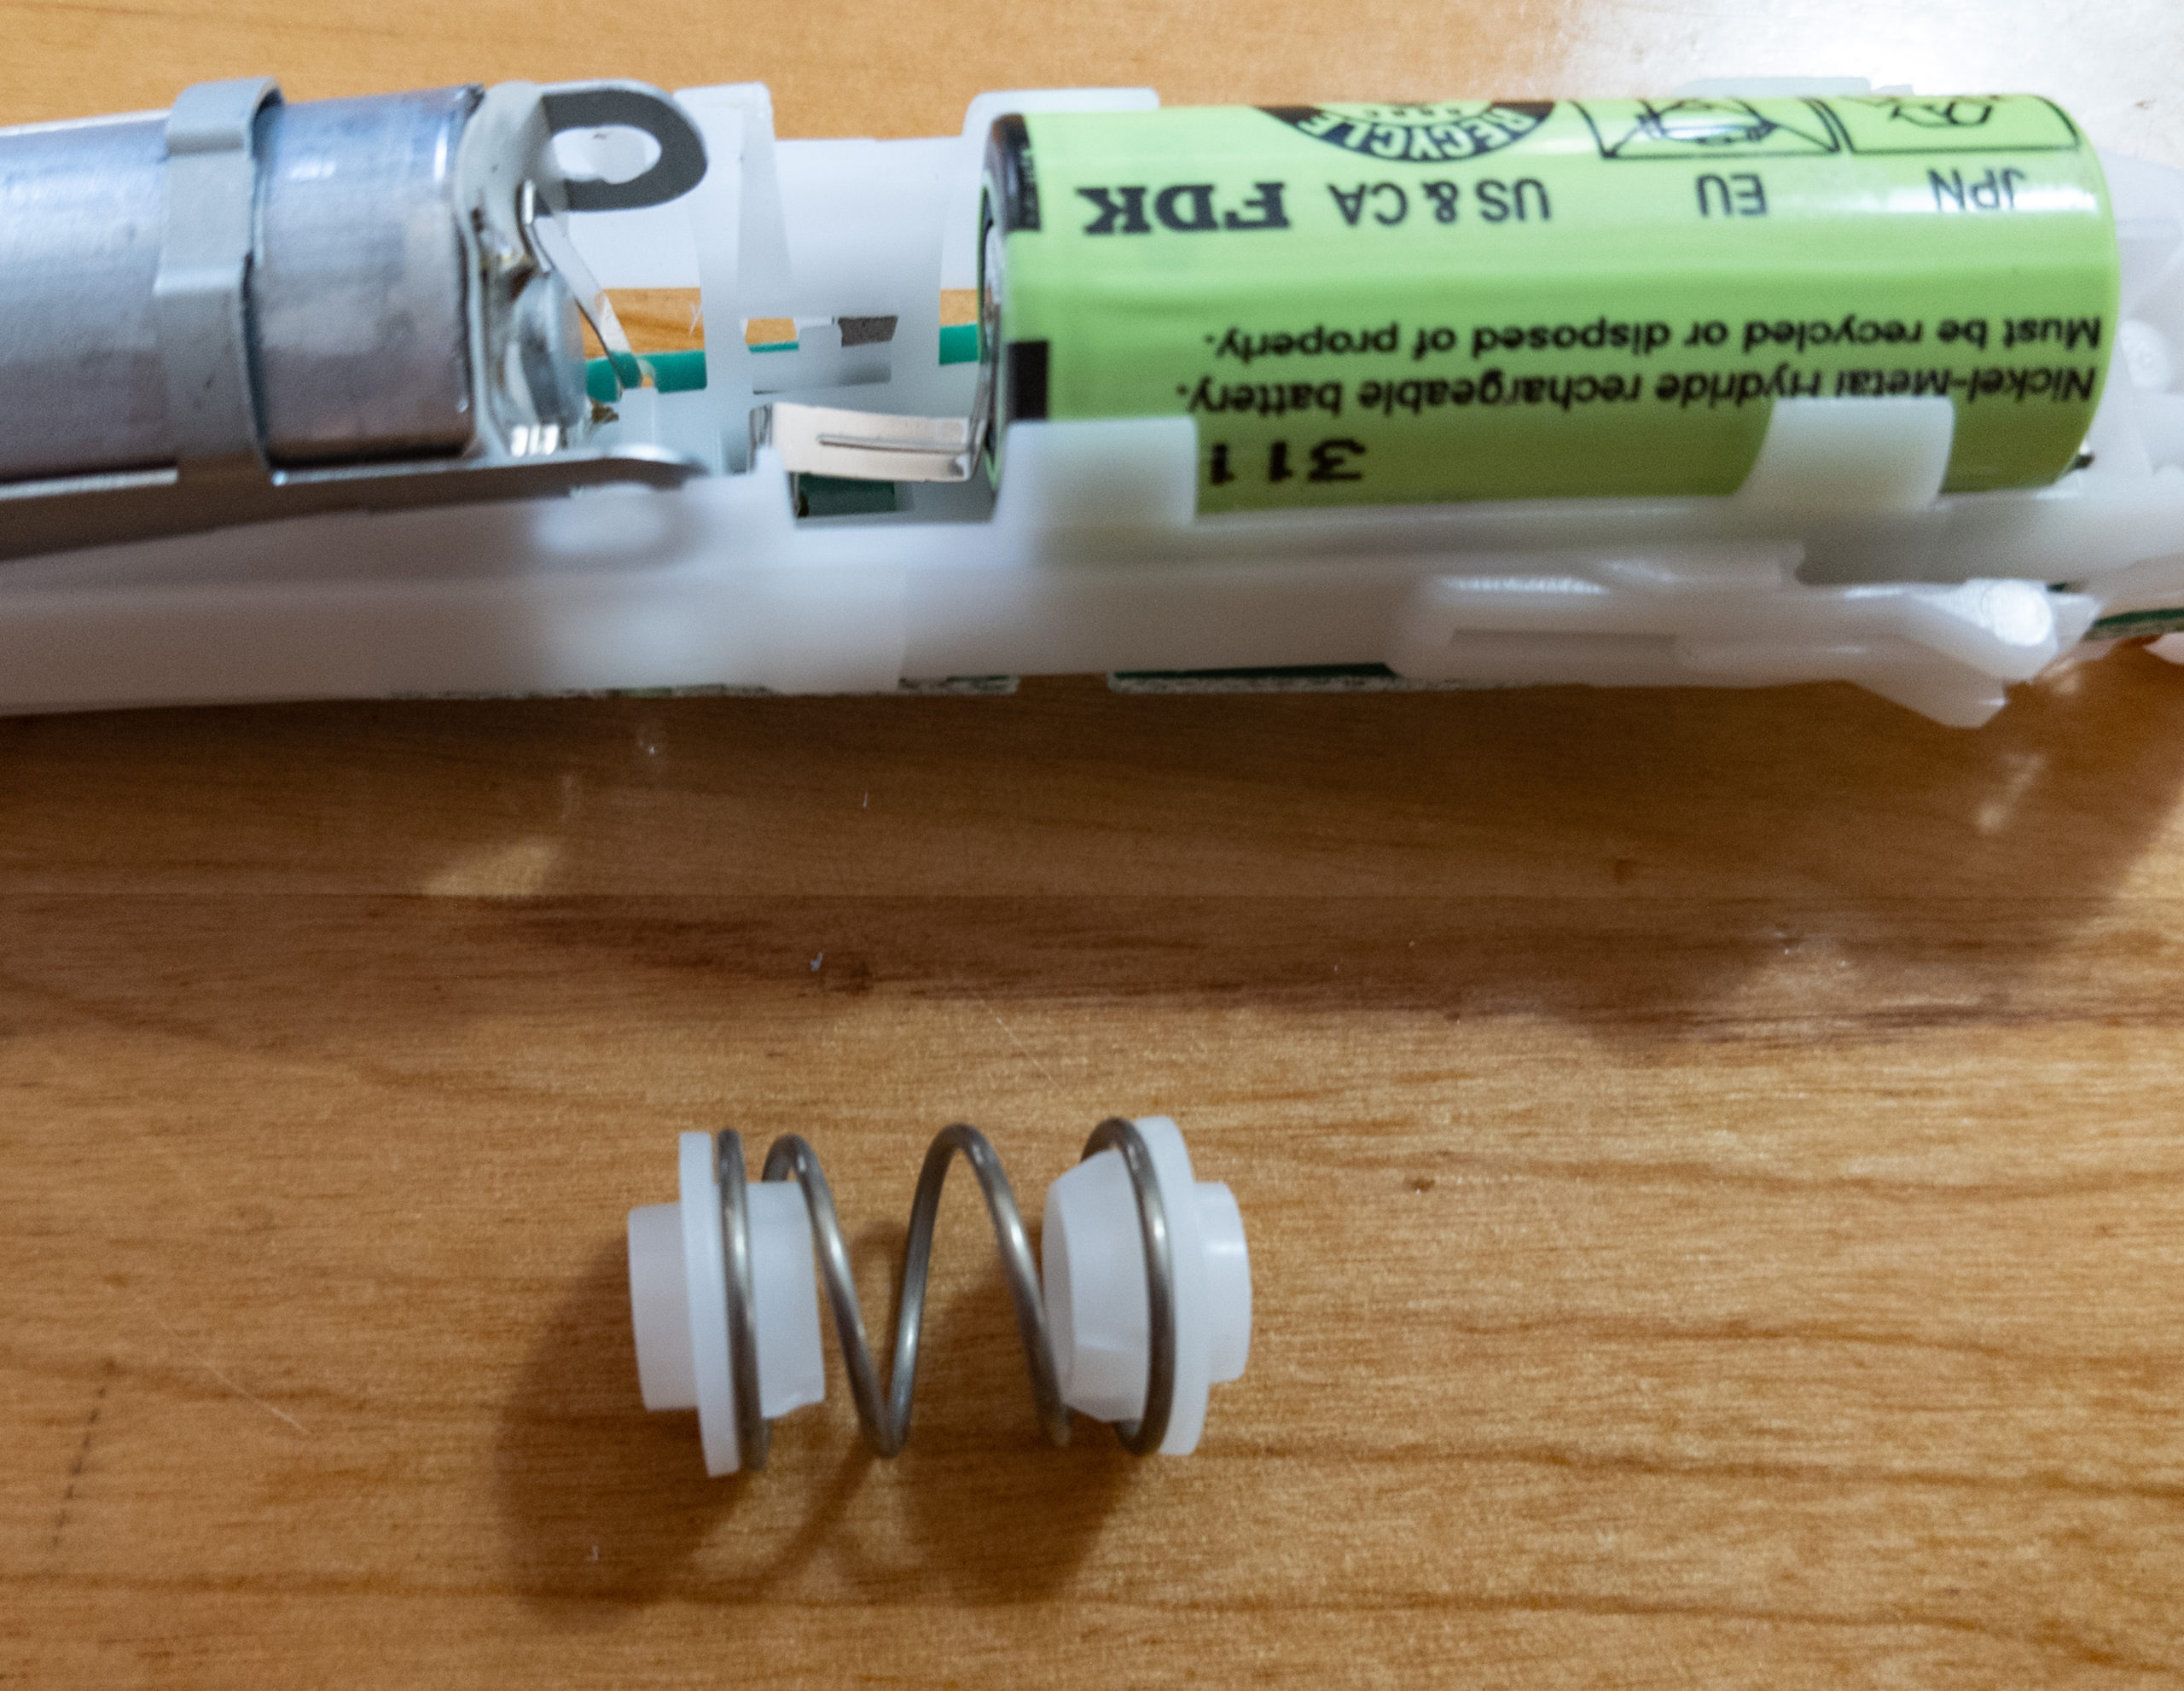
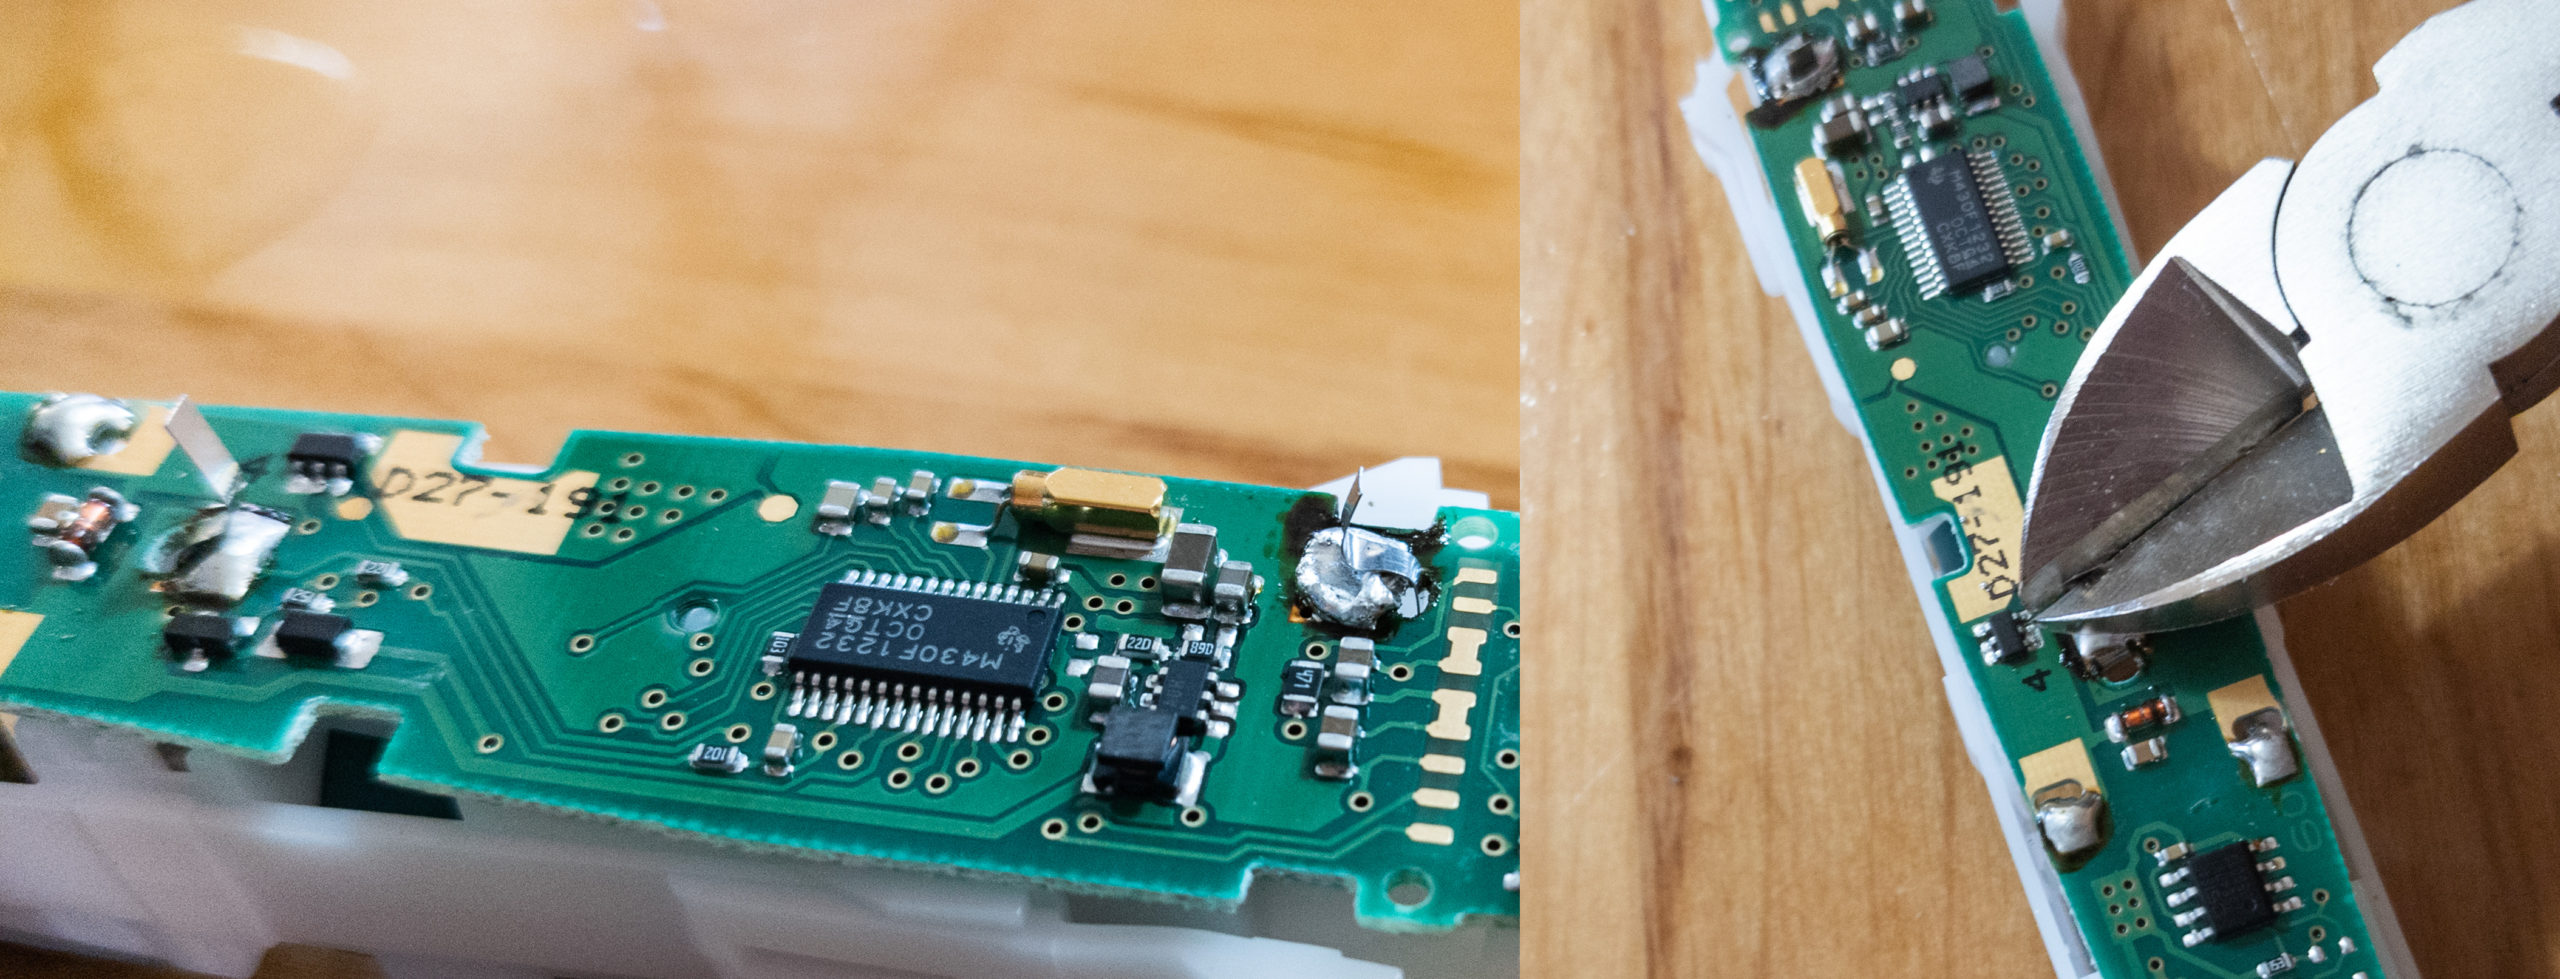
Now turn the assembly over and remove the spring located between the battery and the motor. This spring is 20 mm long in models that came with a 42 mm long battery, and 13 mm for those that came with a 49 mm long battery. If you are upgrading from a 42 mm to a 49 mm larger capacity battery, then you will need to trim this spring down to 13 mm.
It’s time to remove the old battery. Begin by heating up and removing the solder on the positive and negative terminals, as shown in the photo below.
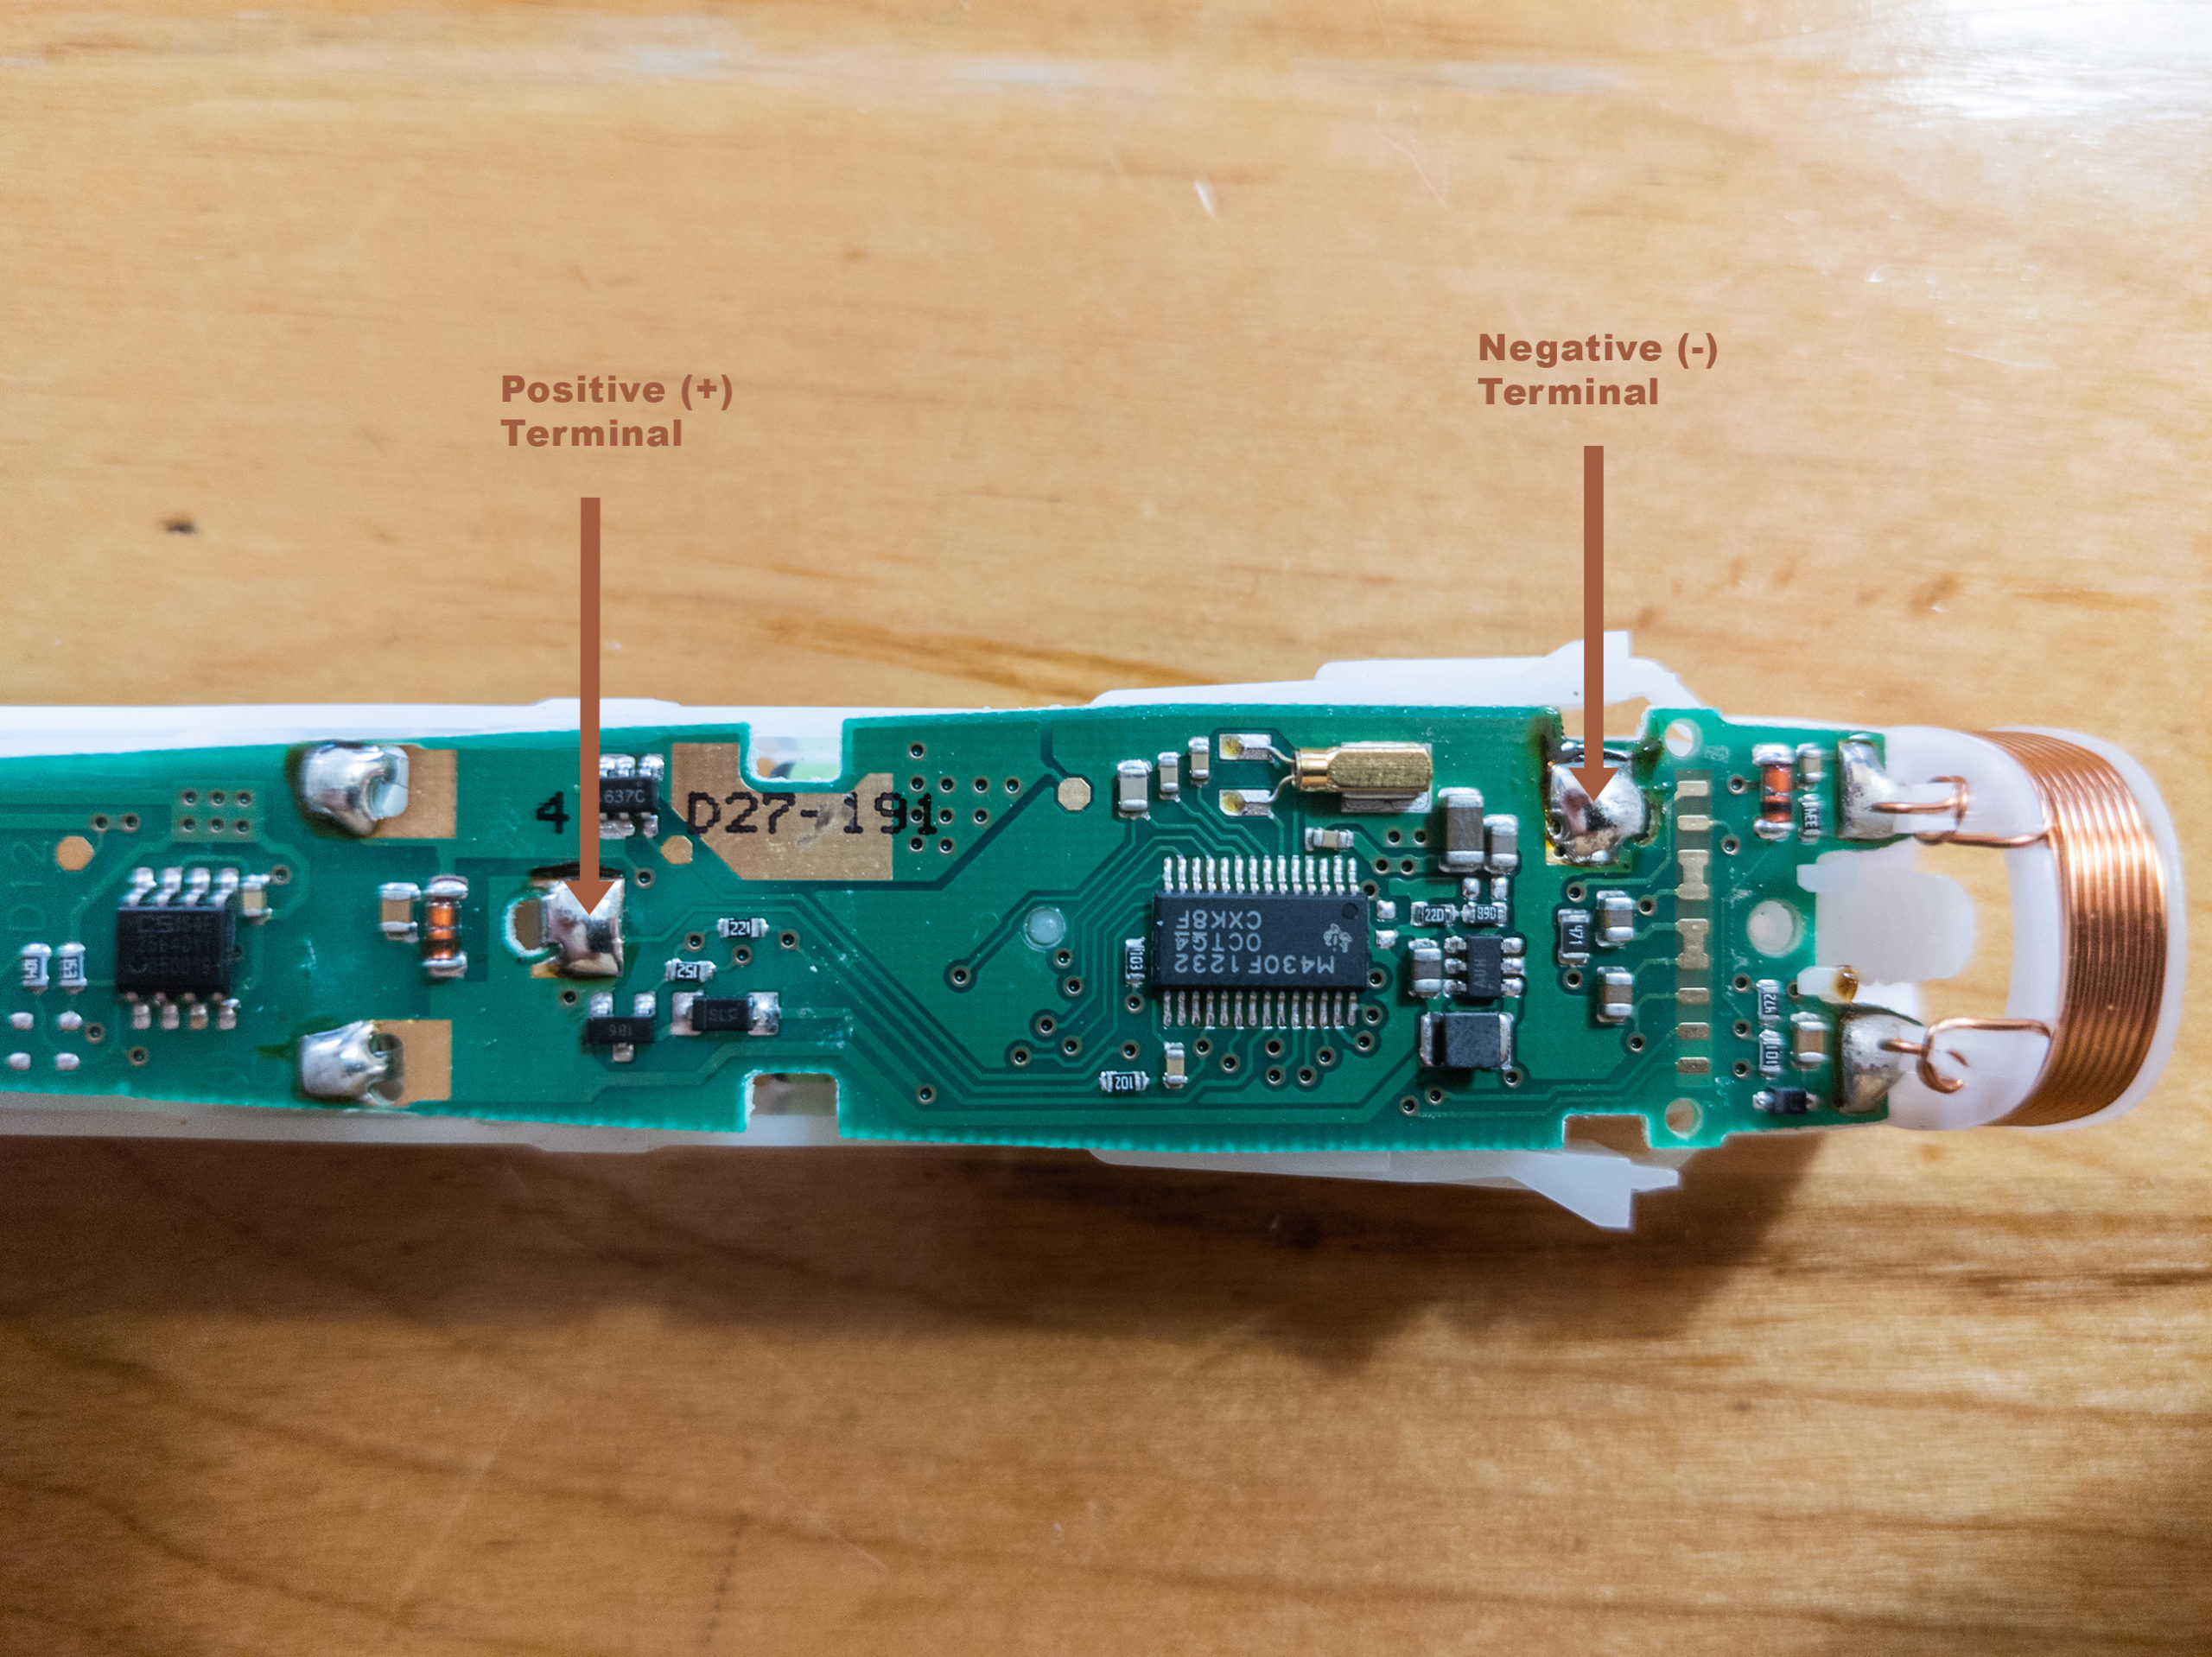
After the solder has been removed, flip the assembly over and pull the battery from the clips holding it in place. Look at the shape of the tabs coming off the battery. You will want to try and bend the leads on the new battery to match this basic shape.
The main thing is to allow the positive lead to connect to the board and not get in the way of the spring. The leads attached to the replacement battery are longer than they need to be so you can trim them after soldering. Install the new battery with the leads through the cleaned terminal holes. Re-insert the spring to make sure the positive lead is not interfering. Then apply new solder to connect the battery. Finally, clip the extra lengths of the leads off. You can also use scissors for that since they are quite thin.
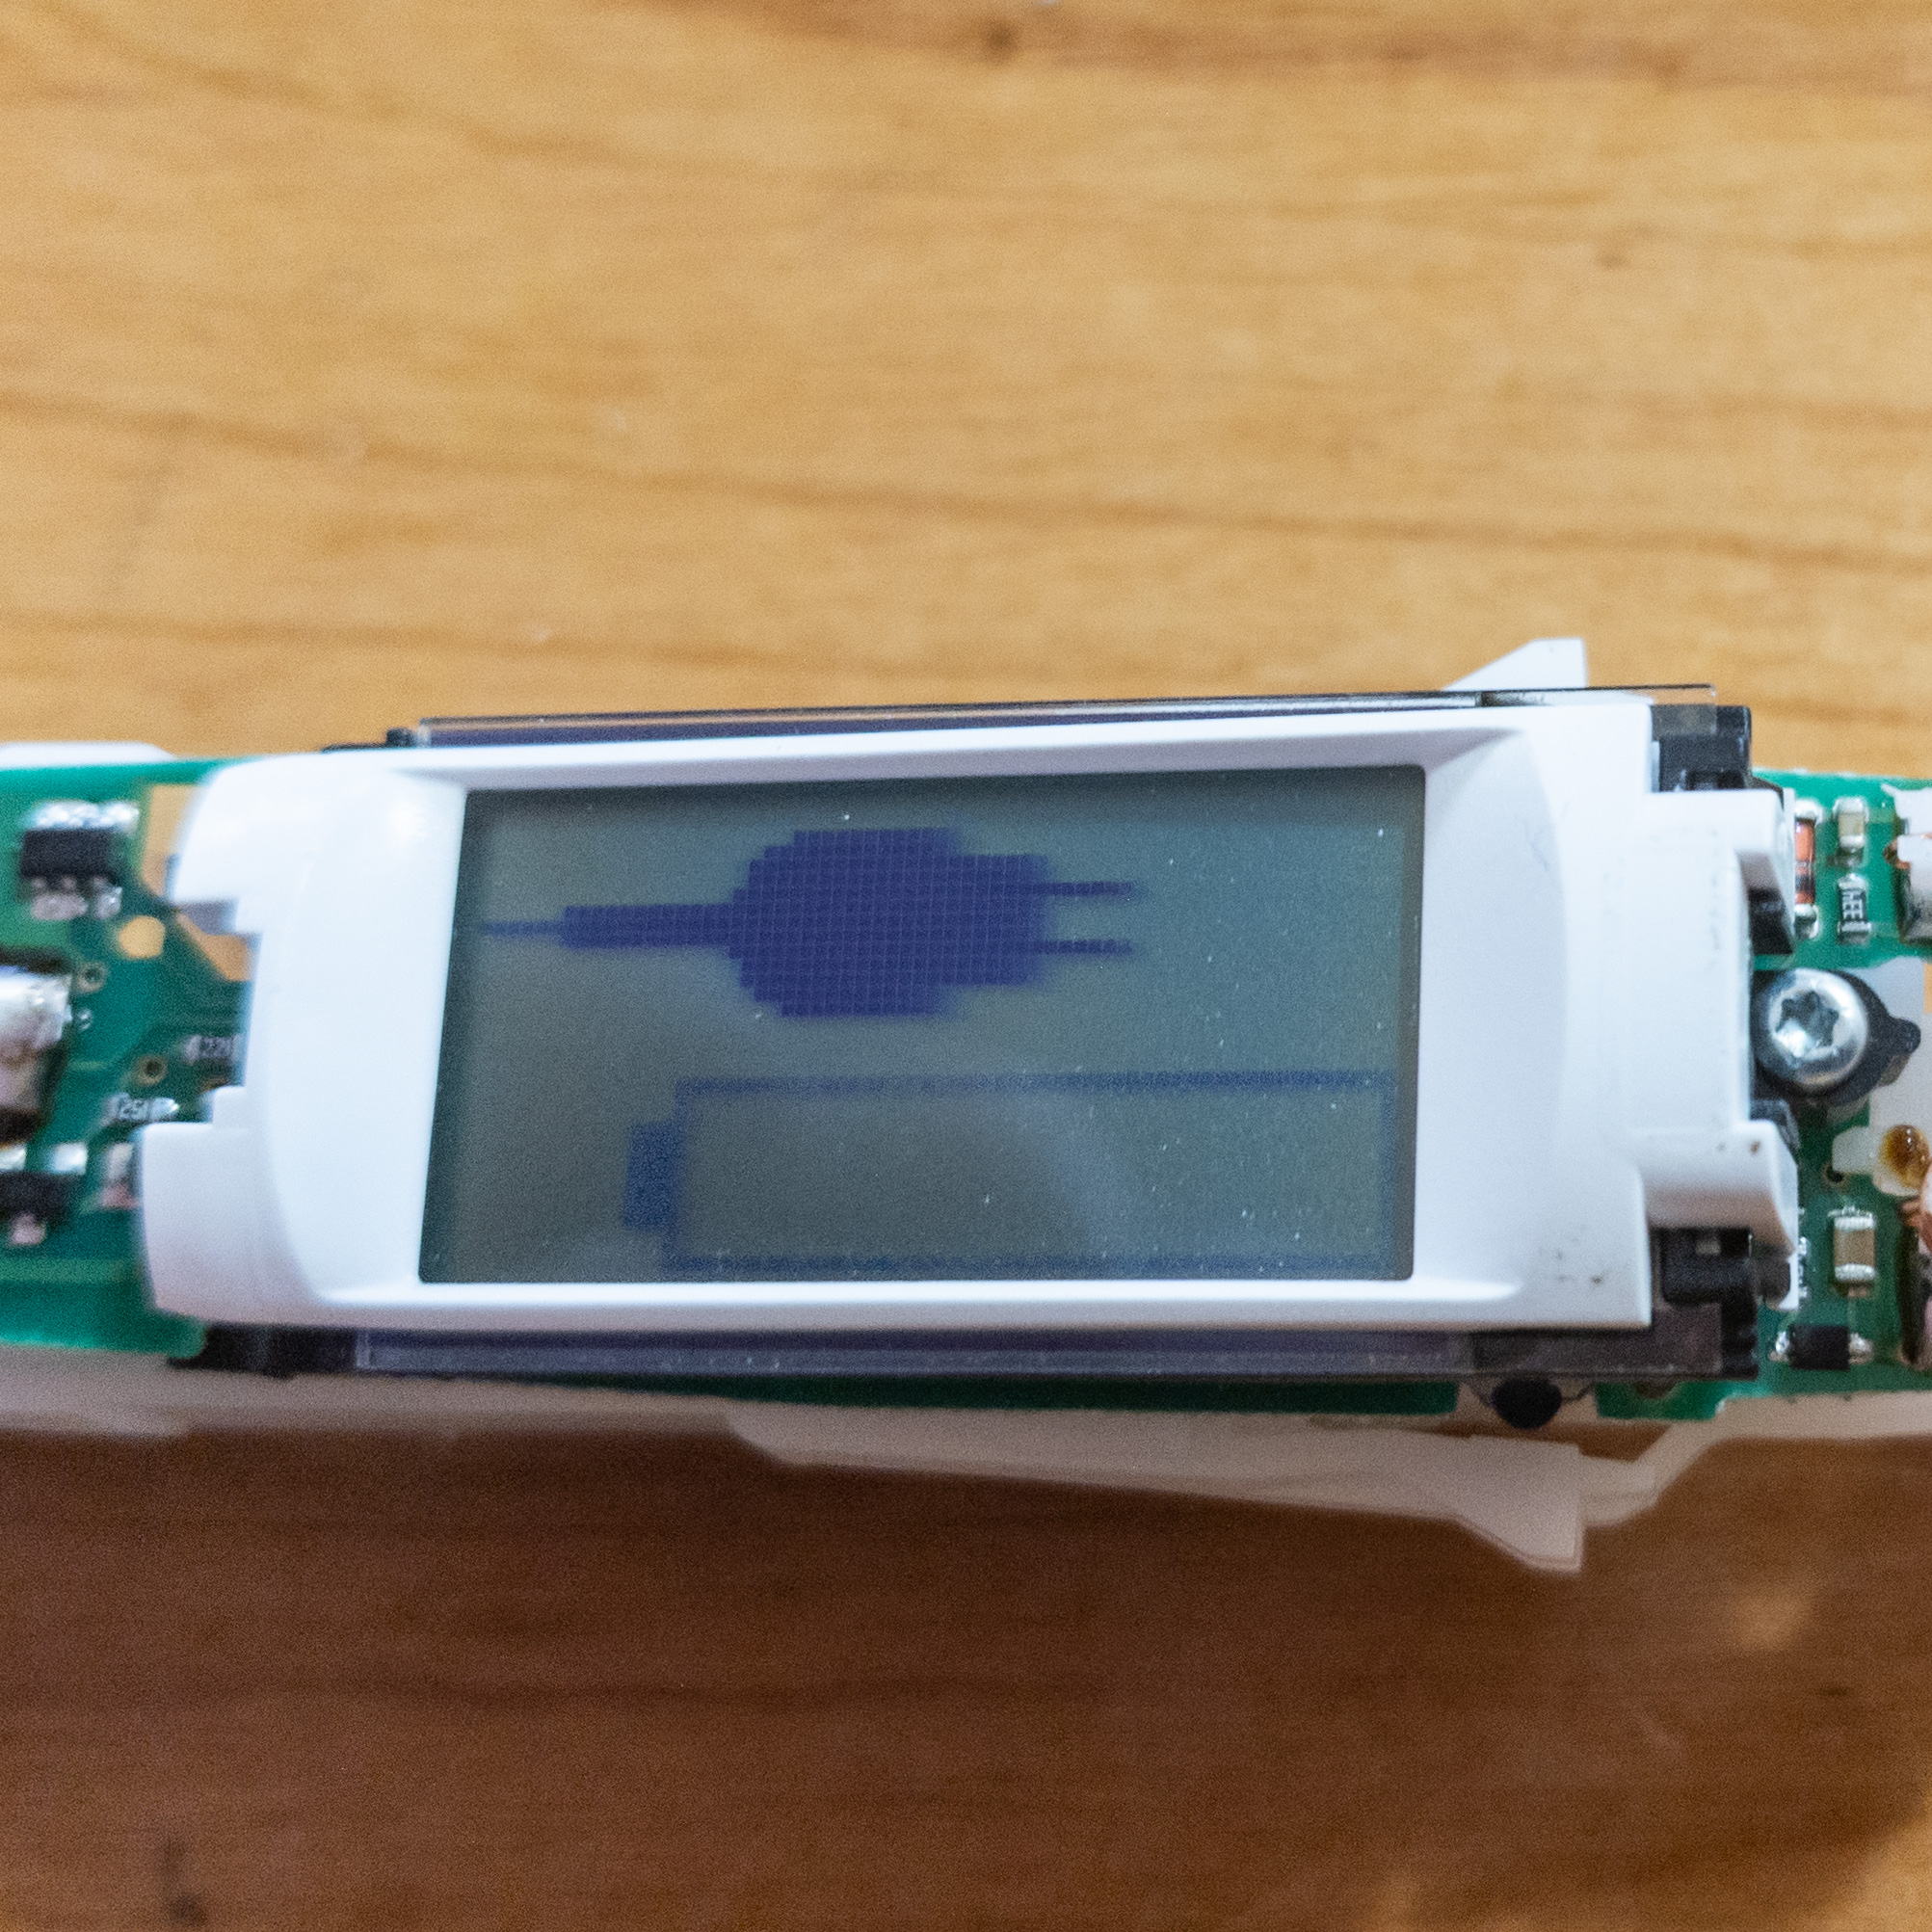
Reattach the LCD assembly by sliding and clipping it into place and then screwing in the Torx screw. Note that the replacement battery likely has zero charge in it and the LCD will start to show the animation for no charge.
All that is left to do at this point is to slide the internal assembly back into the toothbrush body until you see the rear clips engage. Attach the bottom cap and screw it in place with the charge plug. Then snap on the ring at the top. Make sure you still have a working LCD screen.
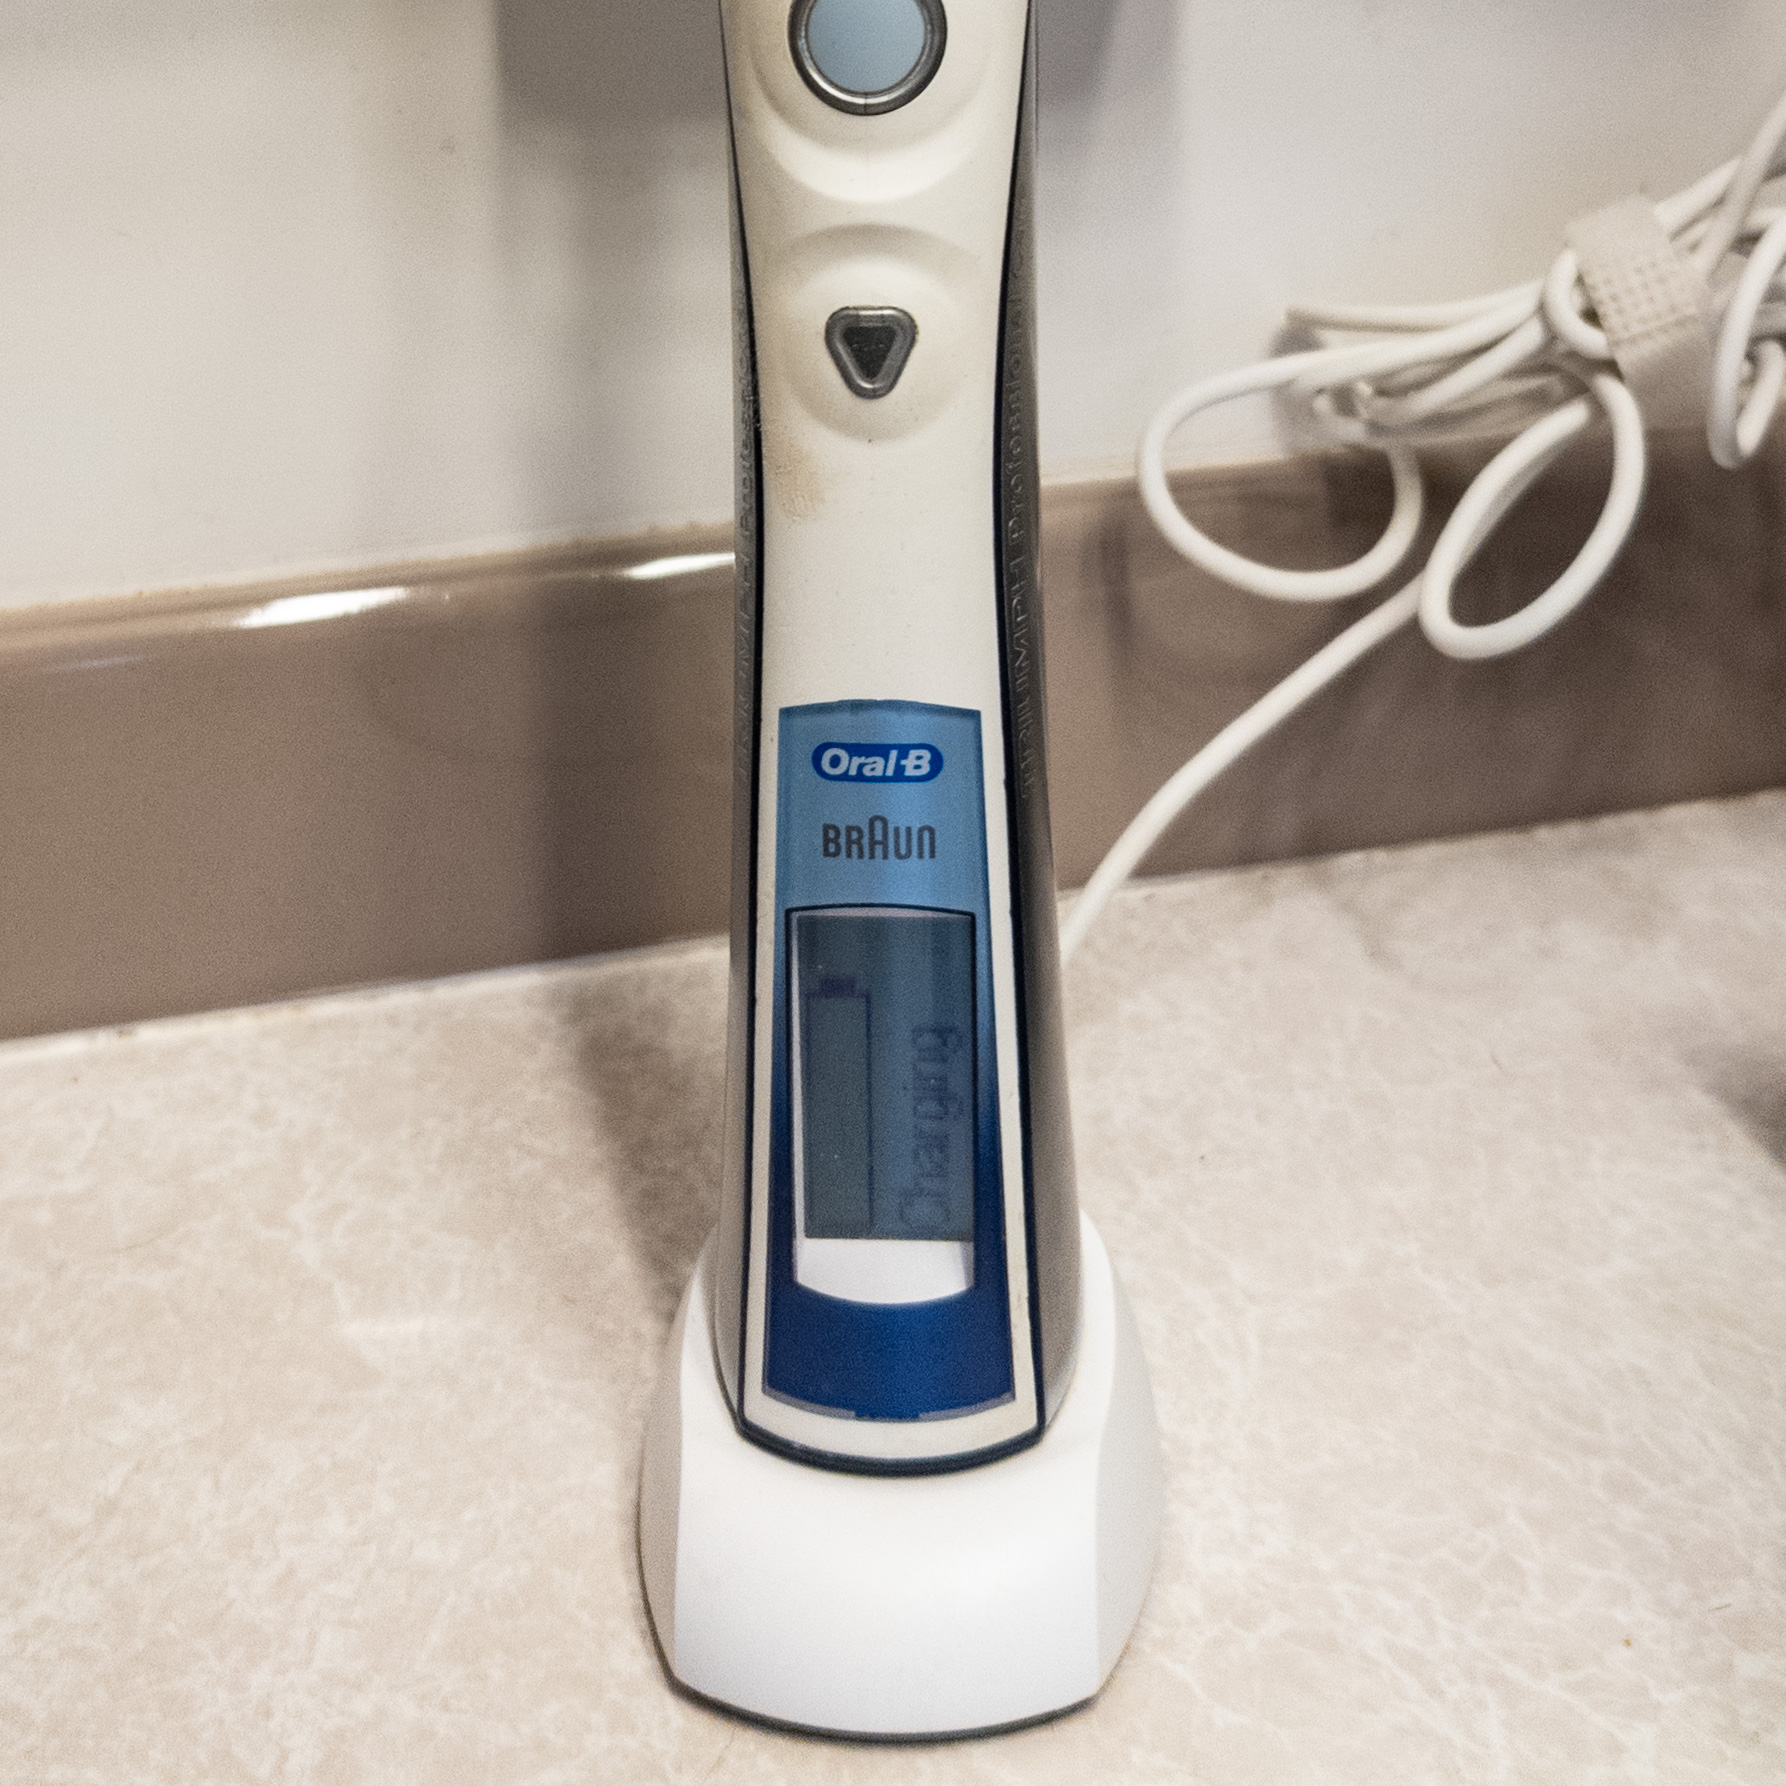
Reinsert the toothbrush head and set the unit in the base to charge and you should be good to go after a few hours. I had previously done this on my wife’s toothbrush more than a year ago and it has been going strong ever since.

Recent Comments