The Rustic Outdoor 2×4 Table

This outdoor table is an easy weekend project that can be built for around $75, including miscellaneous hardware and finish. The original plans came from the wonderful women at Shanty-2-Chic only I modified it somewhat in order to make a more stable top as well as the addition of some leg levelers. The project is easy and simple because you will not be using a jointer or planer to create perfectly smooth boards before hand. This is meant to be a simple outdoor table using as few boards as possible, to be completed in a short amount of time. I drew up the plans in SketchUp and then printed out the drawings you see here.
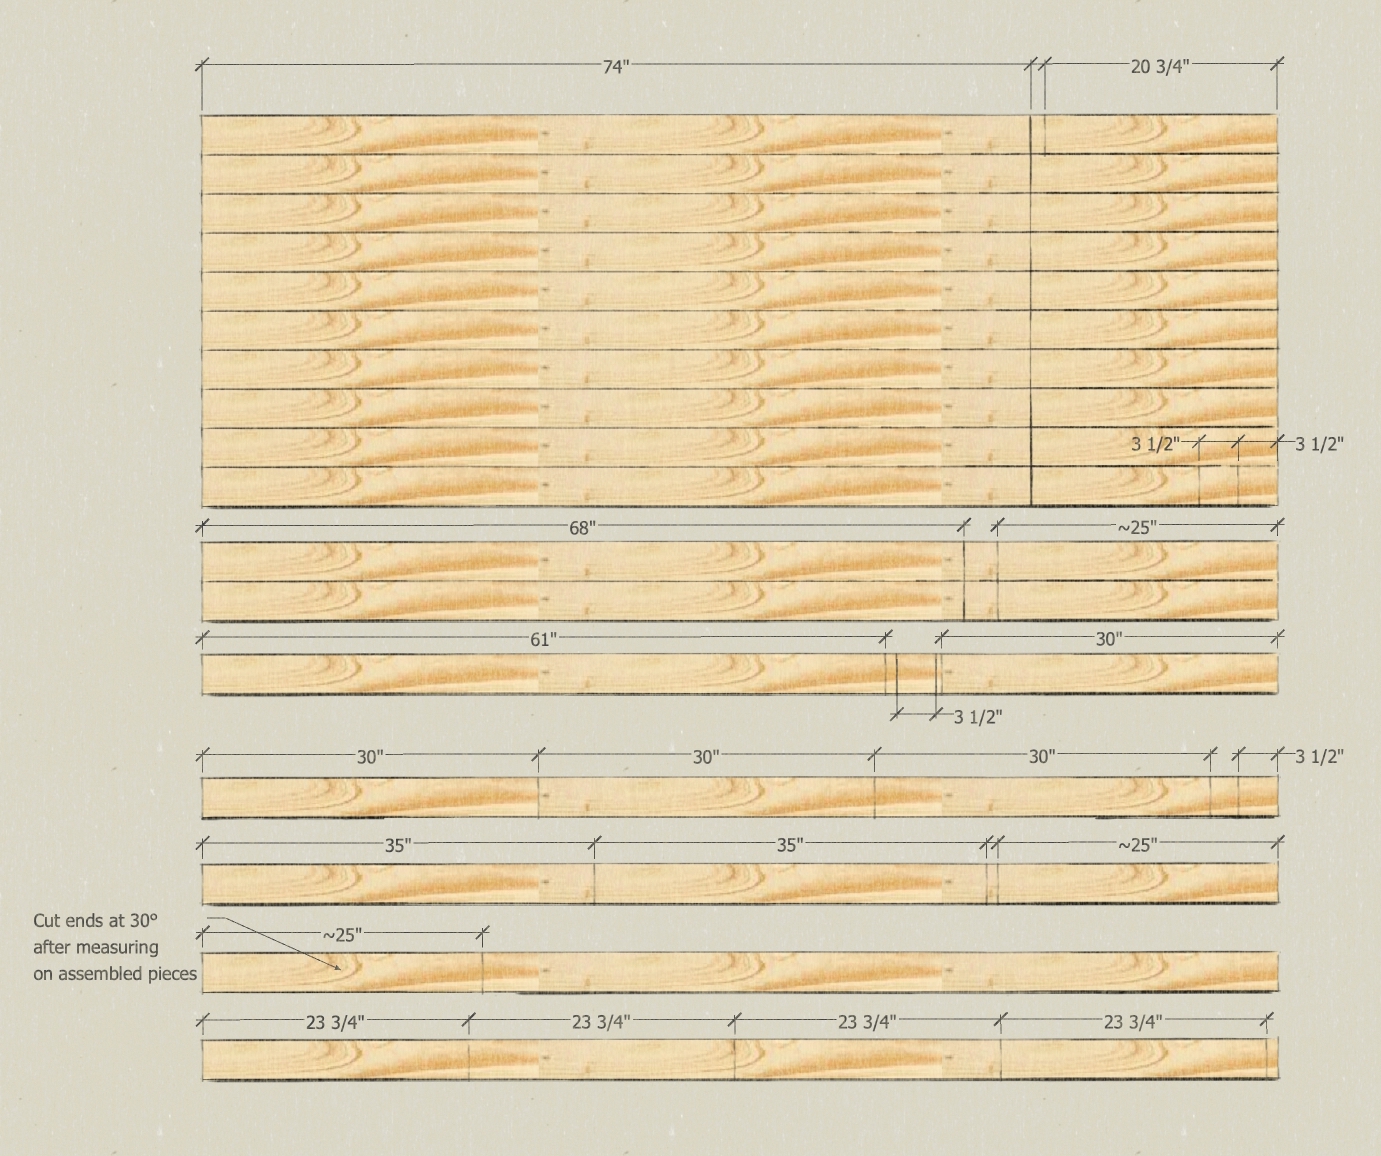
The entire table is made from seventeen 8-foot long 2×4 studs. These are precisely cut studs for building walls and are kiln dried and truer than standard 2×4 boards. Still, take the time to find the straightest boards you can from the selection at the lumber yard. At right is the cut list for all the boards you will need to complete the table.
The original plans call for pocket screwing the entire top including the end boards. This would lead to cupping of the top over time since all the pulling forces would be on the bottom side. Also, drilling all those pocket holes would take a lot more time than I was willing to spend. Instead, I chose to glue the top together using biscuit joints for all the boards, with everything glued together and evenly clamped, and left to dry for ~12 hours.
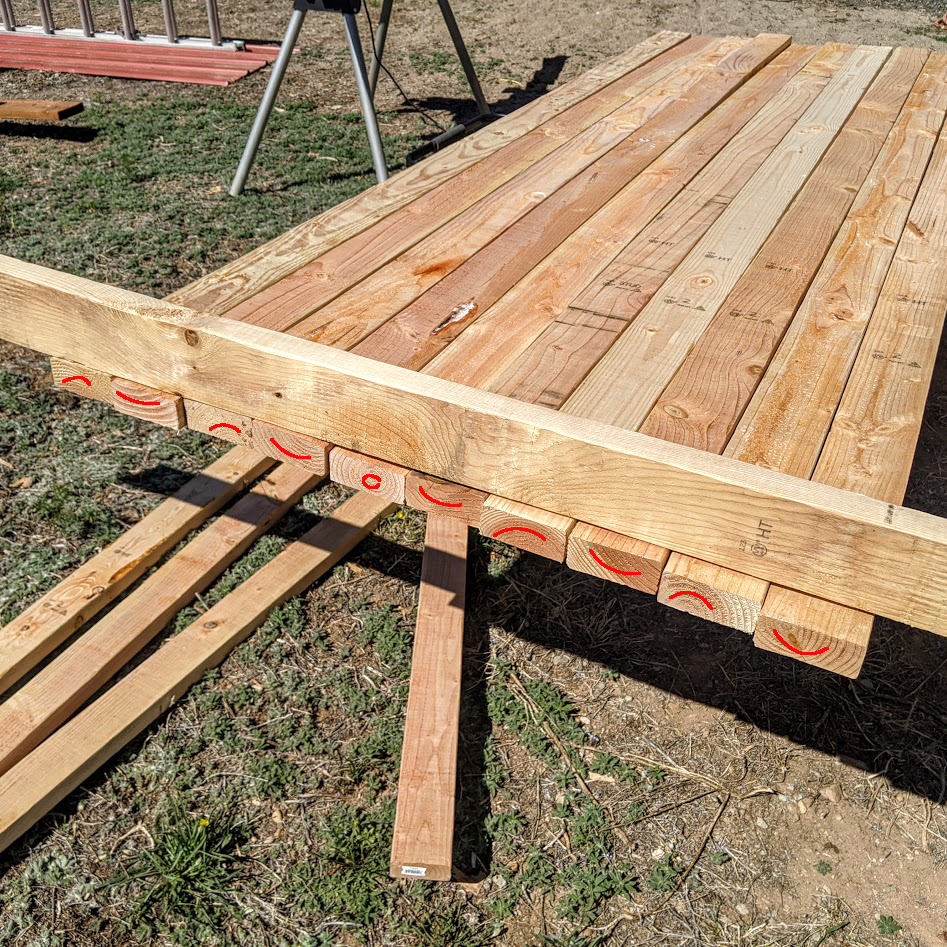
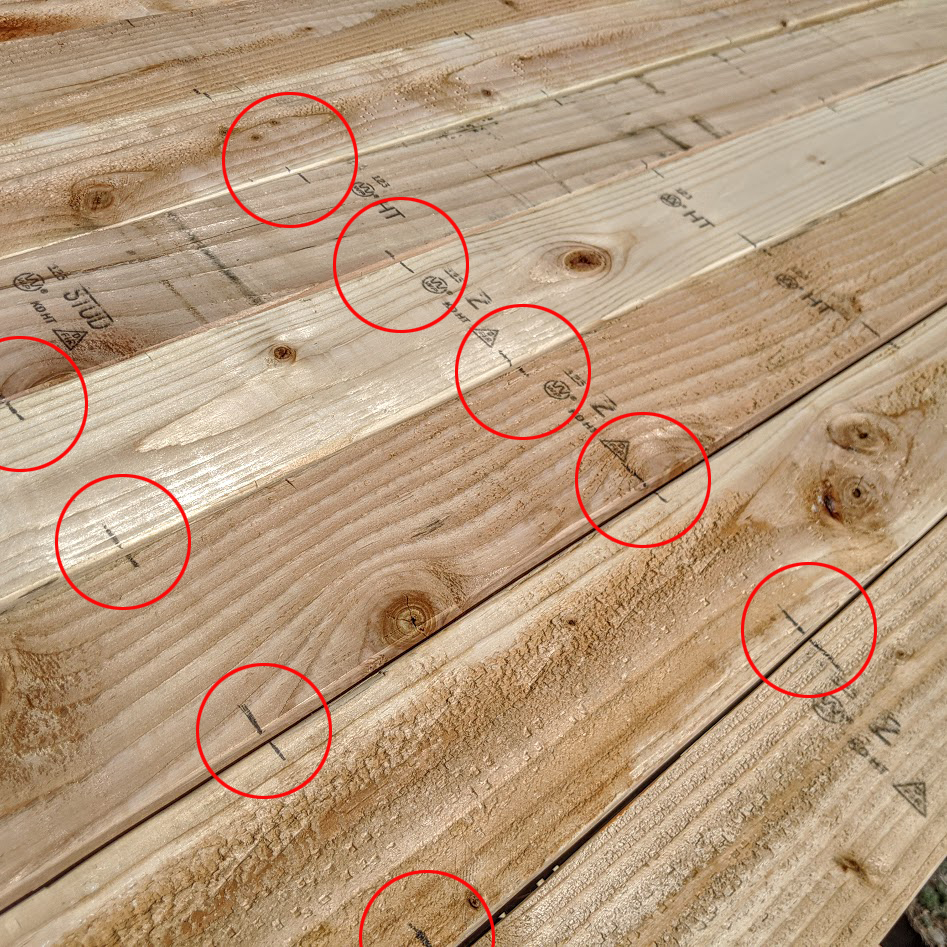
Before you start cutting, however, find the 10 truest boards from those you purchased and set them out next to each other. All of the boards should touch, leaving no noticeable gaps. Look at the end grain of each board. Turn the boards over as necessary so that the end grain patterns are different from one board to the next. As a board swells with changing moisture content during different seasons, they tend to cup in the direction of the end grain. If we created a top where all the end grain patterns were in the same direction, the entire top would then tend to cup significantly in that direction. By mixing it up in the way shown in the photo above we reduce the chance of cupping. With the boards in their final alignment, be sure to number each one so you can set them up correctly after cutting them to length.
Now you are ready to cut all the boards. Unless you are very precise and your boards are perfectly true, cut the 10 boards making up the table top a little long, about a quarter inch or more. After the glue has dried you can use a circular saw to trim the edges of the table top flush to accept the end boards. The same goes for the two end boards. Cut them slightly longer than 35″. Finally, the approximately 25″ boards making up the diagonal braces in the support base are marked and cut when that section is being assembled. It is okay to cut them to 25-1/2″ for now. Although these studs should be square, a few may not be. You might have to cut an 1/8th inch off any non-square ends you find.
Assembling The Legs
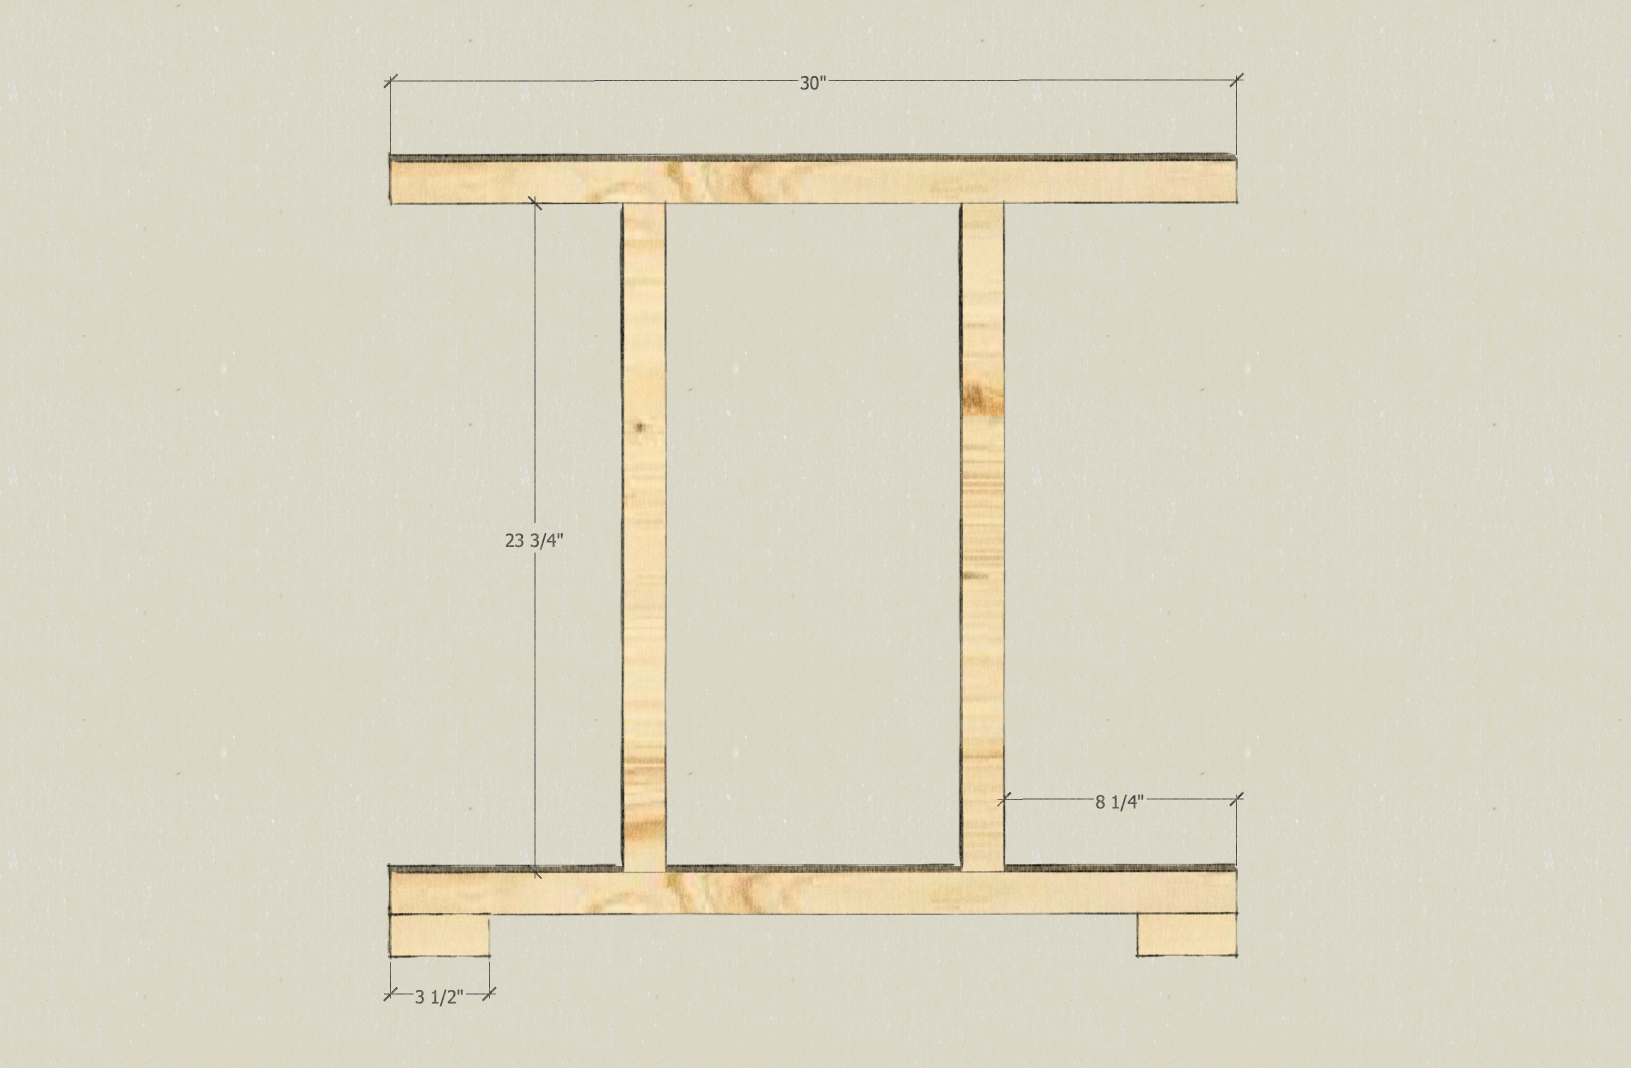
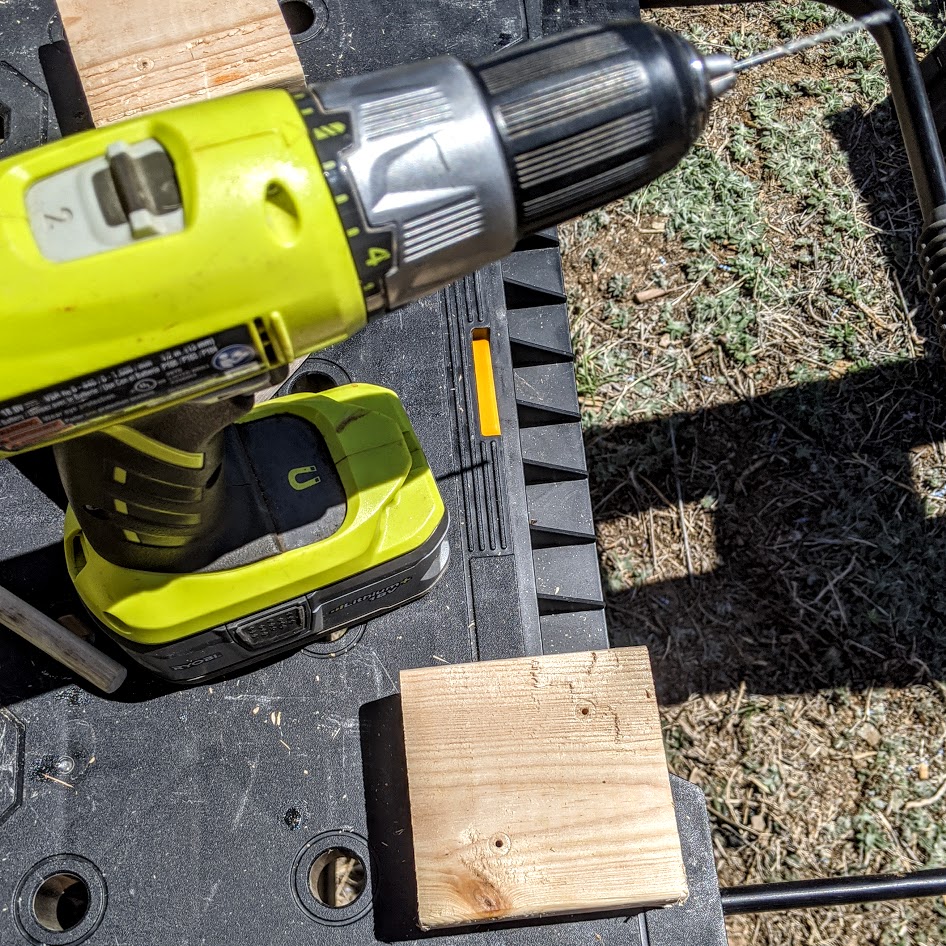
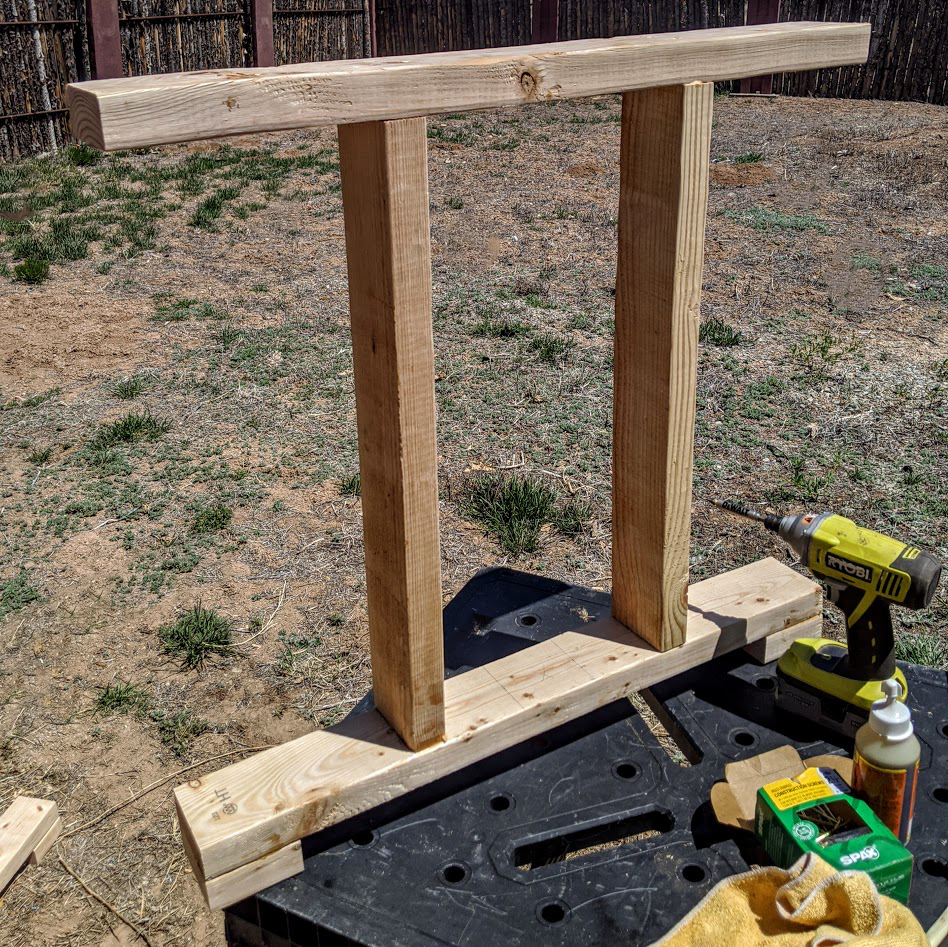
It is straightforward to assemble the two leg sections. Follow the plan above and use a bit of glue at each attachment point and two 2-1/2″ wood screws for each joint. Because the 3-1/2″× 3-1/2″ square feet are small, pre-drill the holes before screwing them in place to avoid splitting. You should end up with two pieces that look like this.
Finishing the Support Base
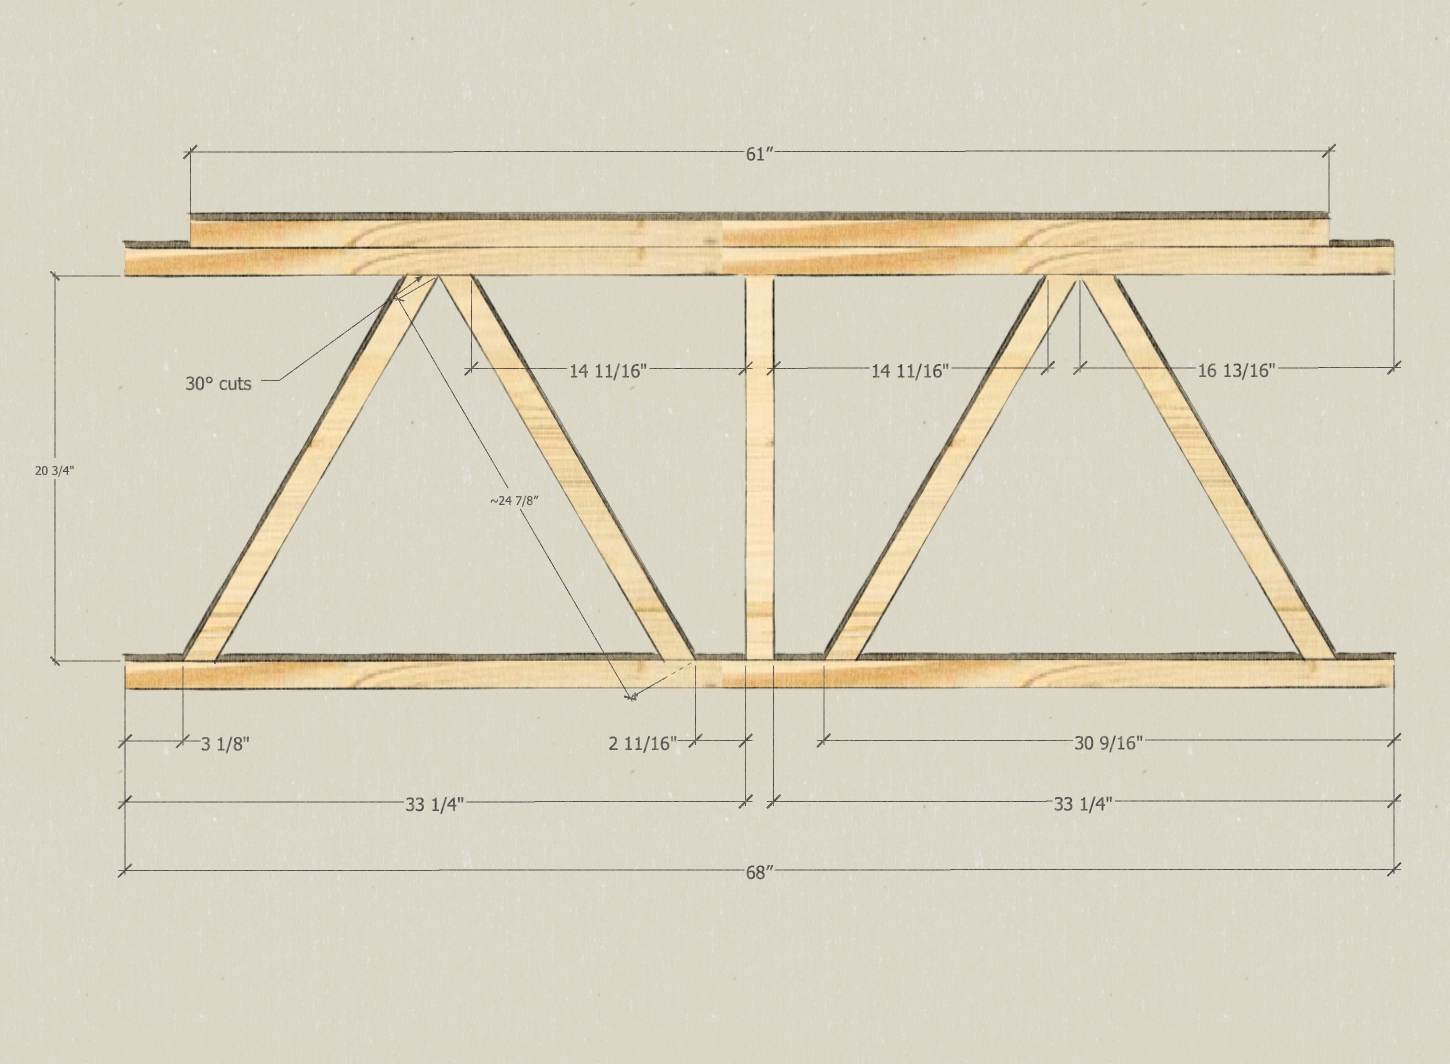

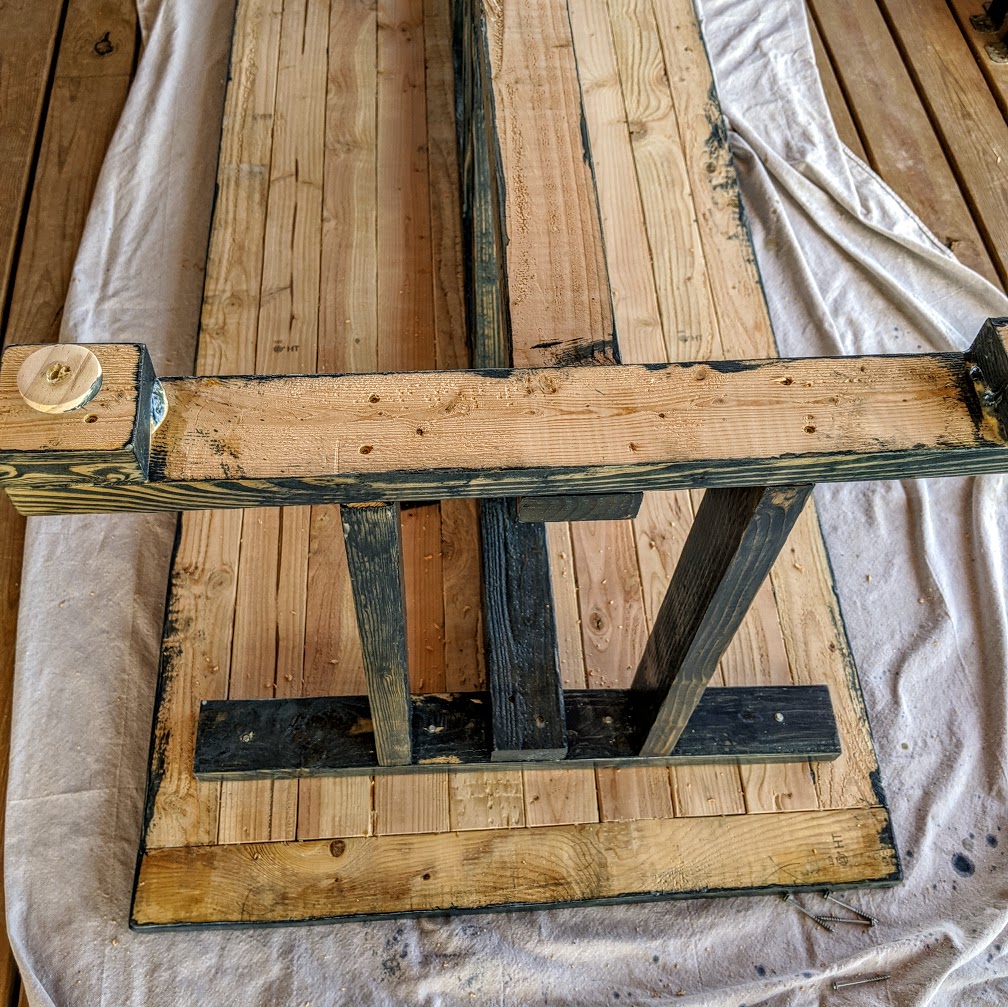
This is the truss system that connects the two leg sections and supports the table top. Pictured at right is a view of the finished table base to show how the legs attach. Begin by attaching the two 68″ boards to the leg sections using two 2-1/2″ wood screws at each joint. Next attach the 20-3/4″ middle support board. For the diagonal braces, mark their locations on the top and bottom boards and then hold one of the ~25″ boards in place while marking where to cut. It should be a 30° miter cut since these boards form perfect 60° triangles. When the diagonal braces are cut, attach them using glue and two 2-1/2″ wood screws, driving them in diagonally from the horizontal boards. Finally, attach the 61″ board across the top using four 2-1/2″ wood screws to complete the base.
Leg Levelers
At this point I decided to make a set of leg levelers since the table base did not sit perfectly flat. Keep in mind that we are going for fast and cheap so even though we chose the truest boards we could find, there is still some warping in them. Also, the deck surface may not be perfectly flat. These levelers are adjustable so the table will not rock no matter where you decide to locate it. You will need a scrap 1/2″ board for cutting four 2-1/2″ disks, four 1″-long 5/16″-18 threaded bolts, and four 5/16″-18 threaded tee nuts. The bolts and tee nuts cost just under $3.
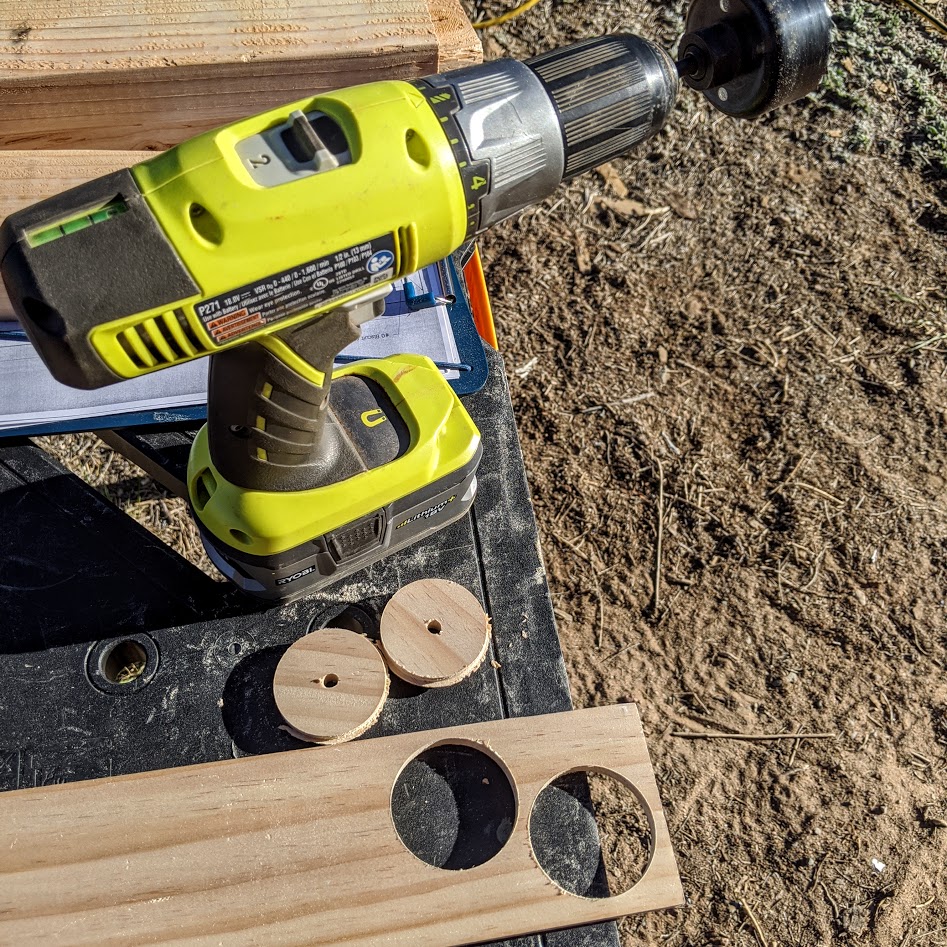
To make them I cut out 2-1/2″ disks using a hole saw. I then drilled a 1/2″ hole into the center of each one. After dabbing a bit of Gorilla™ glue to the head of a bolt, I pressed the bolt into the wooden disks using a vice. This takes very little effort. If you don’t have a vice, a C-clamp will do just fine. Before the glue set, I put each bolt into a drill and turned the disks slowly to make sure it was perpendicular to the bolt. Once you have all the bolts glued in place, set them aside for the glue to dry. In hindsight, I think epoxy would be stronger for assembling these but I did not have any on hand.
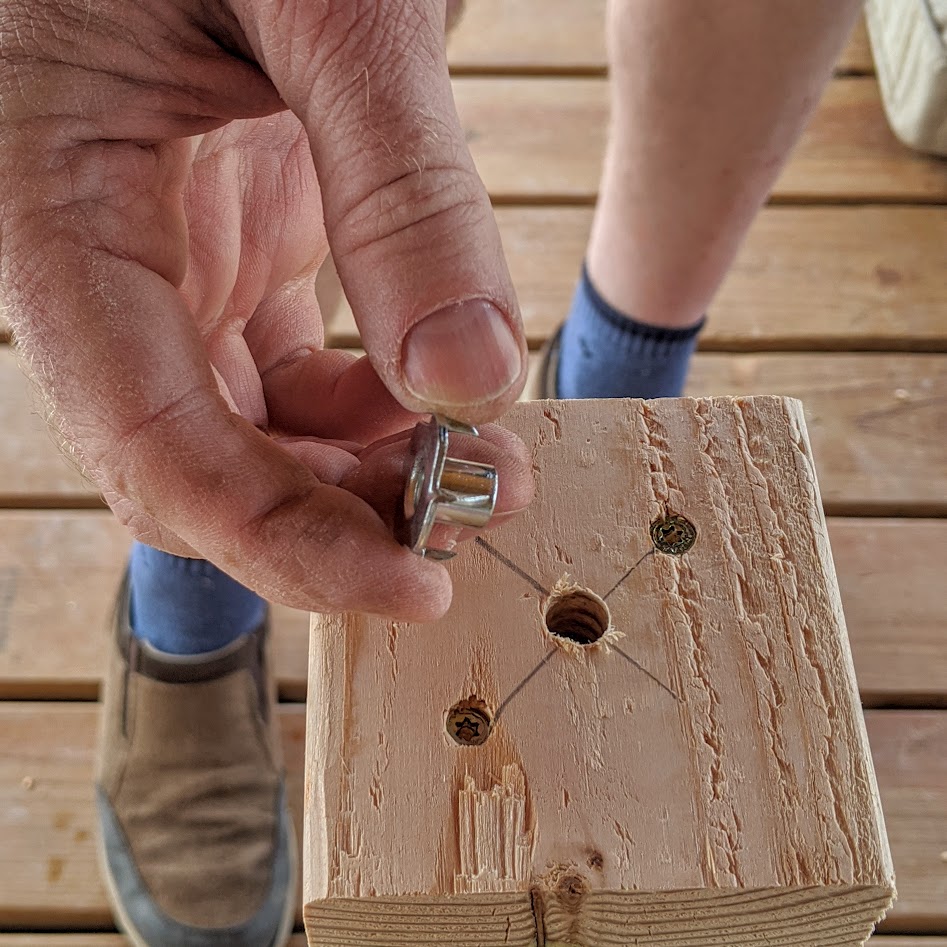
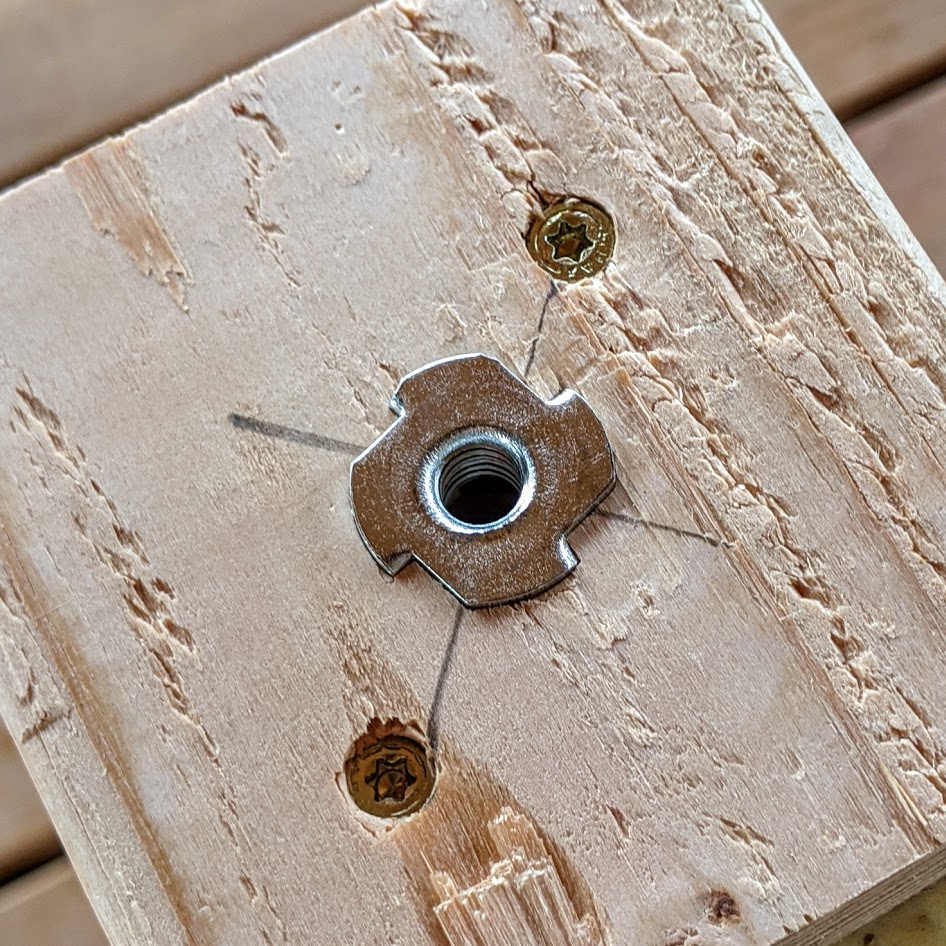
While the glue is drying, turn the table base upside-down and mark the spots to insert the tee nuts. Drill a 25/64″ hole into the center of each foot and lightly hammer the tee nuts into place. If you do not have a 25/64″ bit, a 3/8″ bit will also work but it will be a snug fit.
After the glue had dried, I inserted each bolt back into the drill and sanded away the rough edges of each leveler. Once that was done, they were inserted into the table legs.
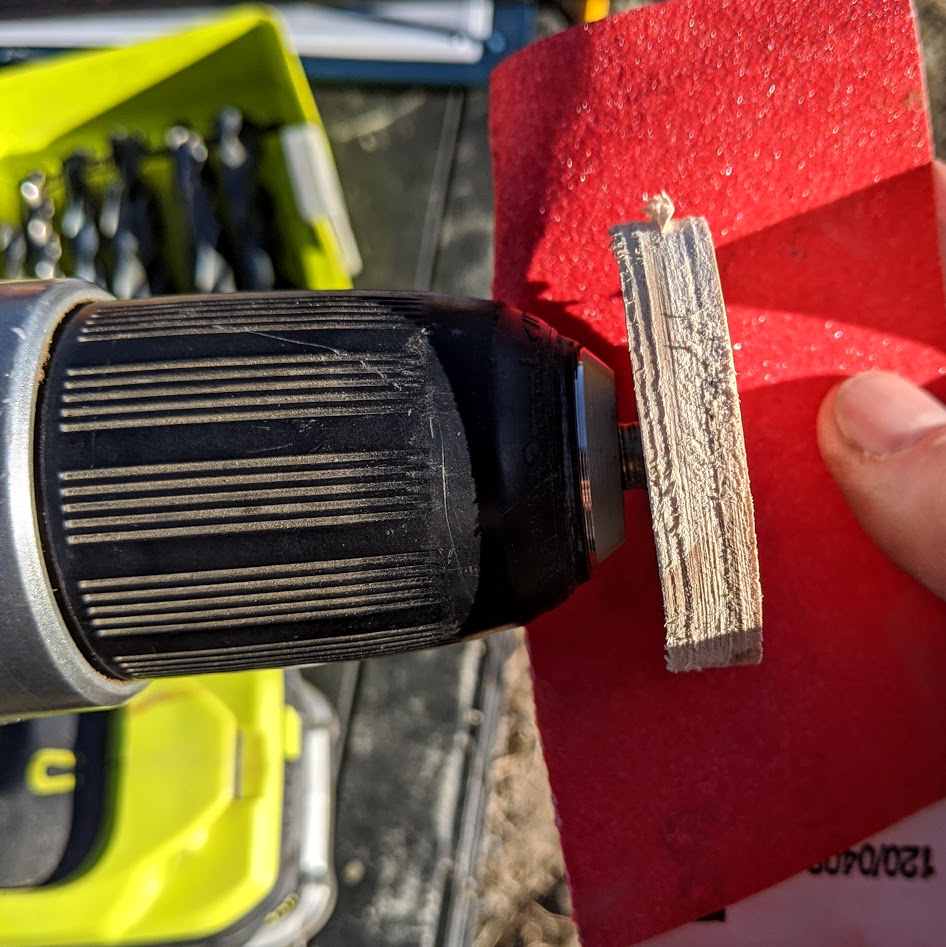
Sanding the levelers 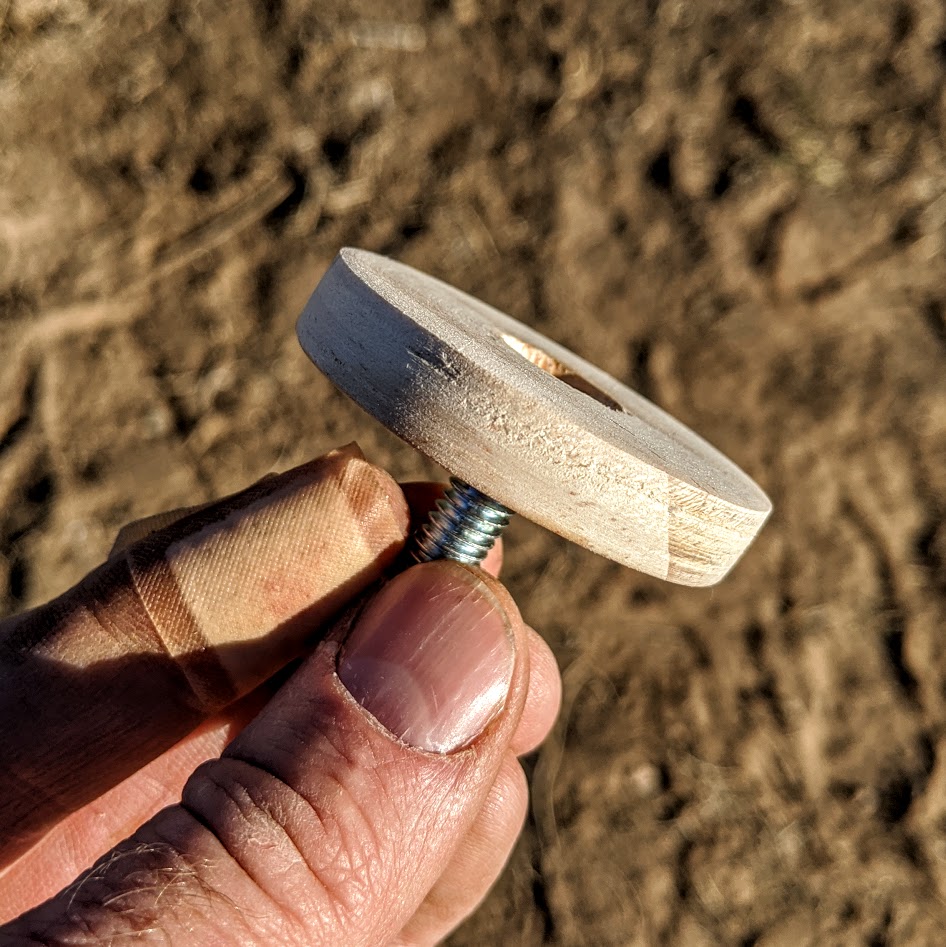
All smooth 
Inserting the levelers
Assembling the Table Top

It is now time to assemble the top. You will need 81 #20 biscuits and 16 #10 biscuits, and a biscuit cutter. If you do not have a biscuit cutter, then you can assemble this top using 2-1/2″ long pocket hole screws and a $15 single pocket hole jig.
Hopefully you remembered to number each of the ten long boards that make up the main portion of the top. Arrange them on a flat surface. I do not have a large workbench so I laid mine out across some pipe clamps on top of a set of sawhorses. I marked the location of each biscuit joint on the boards starting 5 inches from the end and every 8 inches after that (see plans above). The precise location of the marks is not critical but make sure you mark across both boards at the same location for alignment to work. Next, make the 162 slot cuts using a biscuit cutter set for #20 size biscuits. Cut each slot into the center of the 2×4 at the location of each mark.
Marking biscuit locations 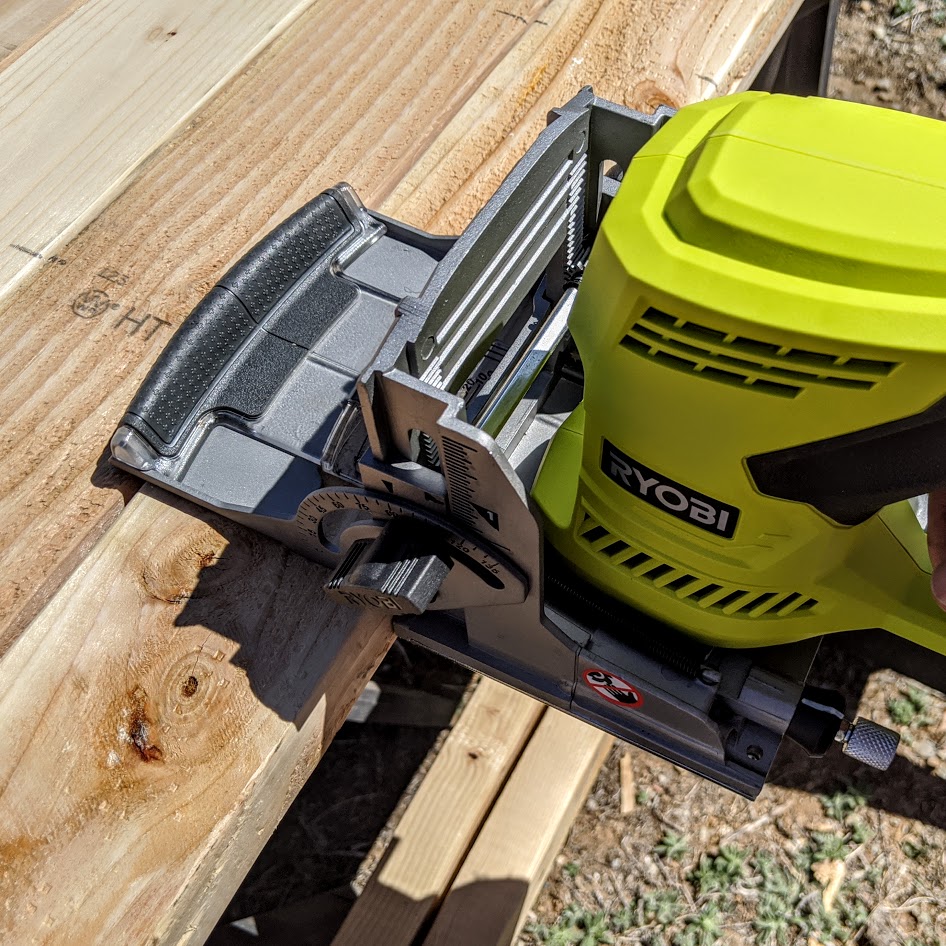
Cutting biscuit slots 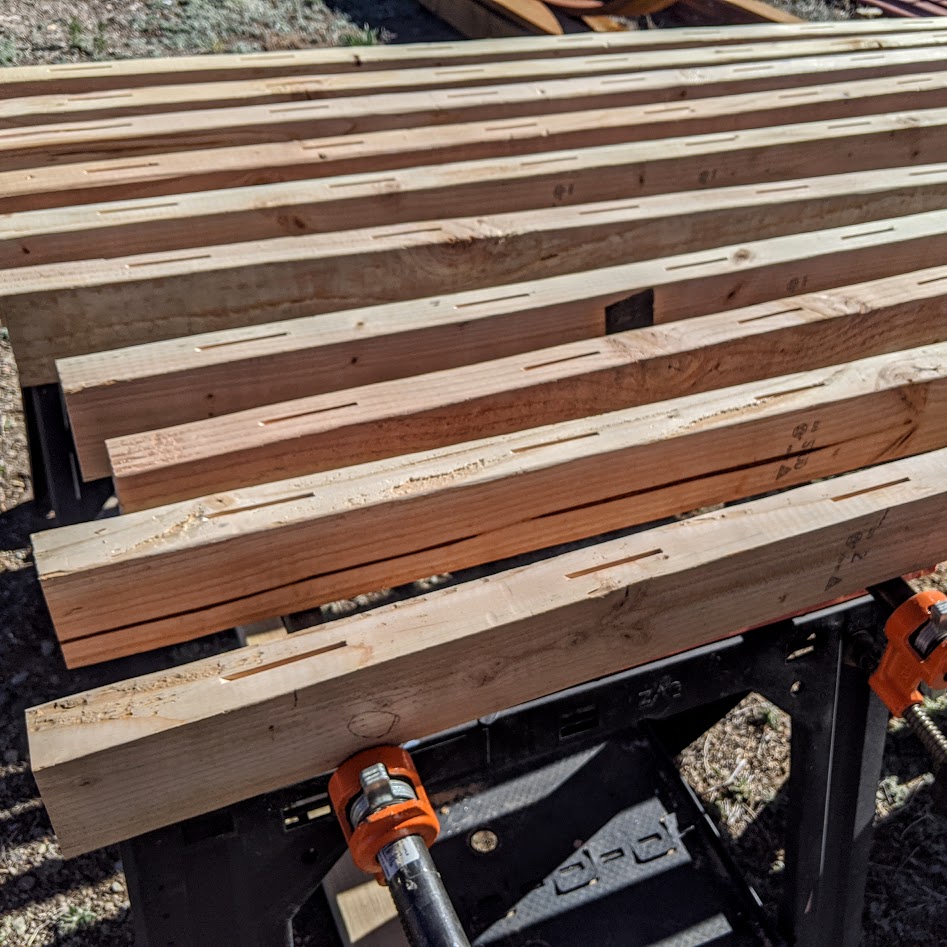
Table top biscuit cuts
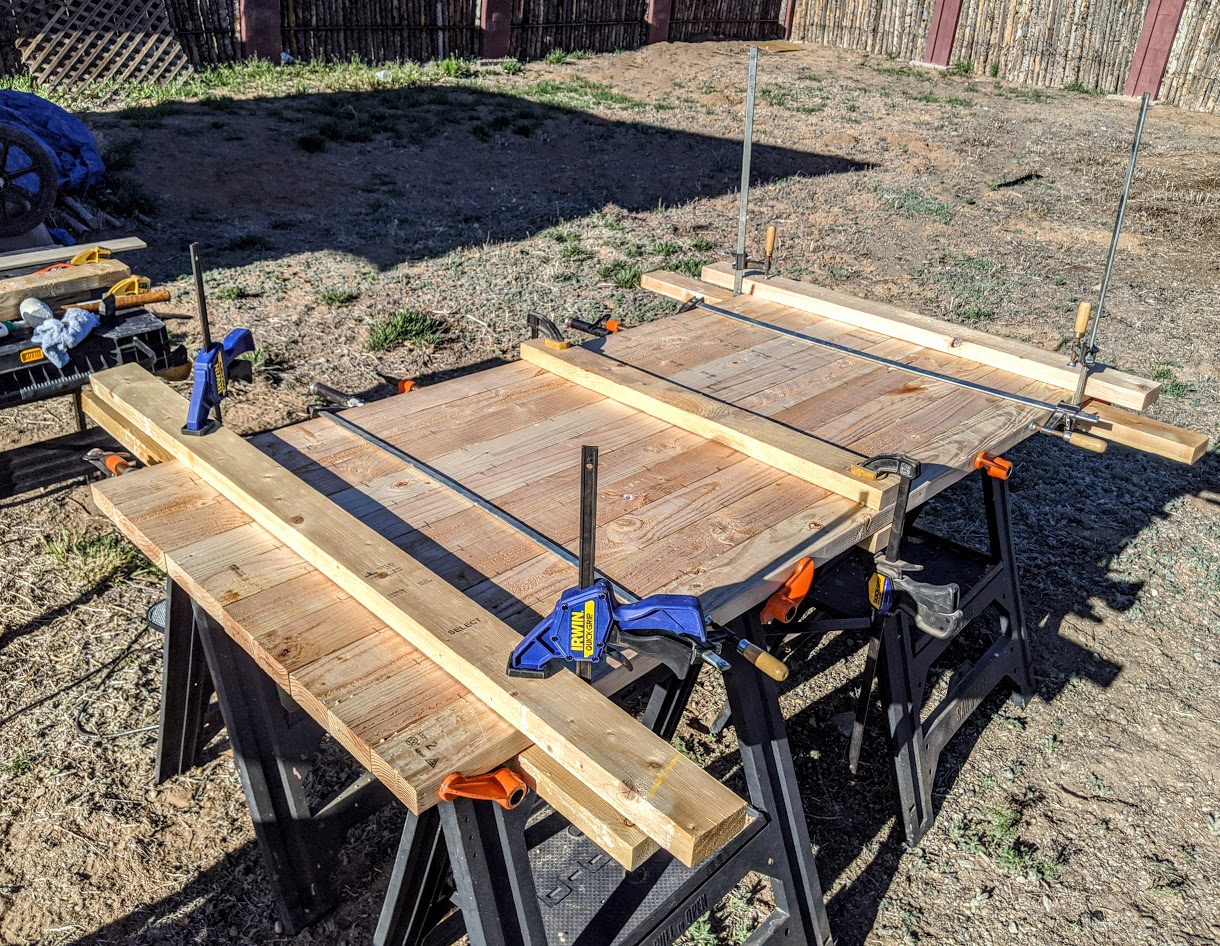
Clean any debris out of each slot and get ready to glue up the ten boards. I used Tightbond III™ since this will be an outdoor table and that glue is perfect. Position the boards in the correct order and lay out on top of four pipe clamps (or whatever clamps you plan to use). Squeeze glue into each of the nine slots on the first board. Insert a #20 biscuit into each and then add glue along the rest of the board length and on top of each biscuit. Turn the board over sideways and press the adjacent board into place, using a rubber mallet to tap into place if necessary. Working quickly, repeat that process for each board until you are finished with all 81 joints. Using a scrap piece of wood and the rubber mallet, tap each board on the end into alignment as you tighten the four bottom clamps. Apply two more clamps across the top of the assembly. Finally, to keep the table top flat as the glue dries, clamp two scrap pieces of lumber at each end and two in the middle, vertically. Here is a photo of my clamping setup.
Allow the glue to set for 12 hours or more. Afterwards, remove the clamps and, using a circular saw, trim each end so that the boards are flush. Next, mark the center of each of the eight interior boards on each end. Hold one of the 35″ end boards in place and transfer the markings to the end boards. Cut #10 sized slots into the ends of each of the eight interior boards and the corresponding spots on the end boards. Dry fit each end board in place using #10 biscuits so you can mark the location for two 3-1/4″ wood screws on each end of the end boards. Drill a 3/8″ hole 2″ deep on each end for countersinking the screws. I used a piece of blue tape to mark the depth of the drill bit. Apply glue just as you did for the interior boards and affix each of the end boards, using four 3-1/4″ wood screws for each one. If you have long enough clamps, use them to keep the end boards in place as the glue dries. I did not have long enough clamps.
After the glue has dried on the end boards (or while it is drying) cut eight 1″-long plugs from 3/8″ diameter pine dowel (about $1 for a 3′ long dowel rod). Apply glue to each plug and tap into place, leaving a bit sticking out so you can cut it flush with a trim saw after the glue has dried.
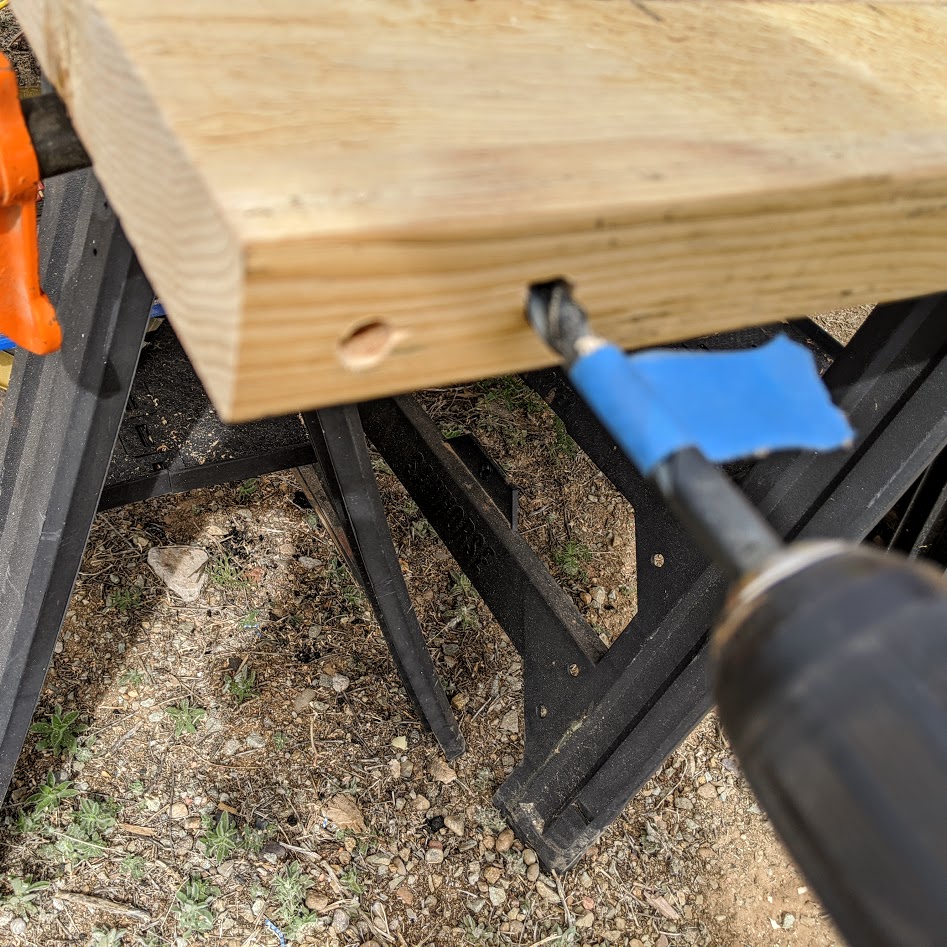
Drilling out holes for long screws 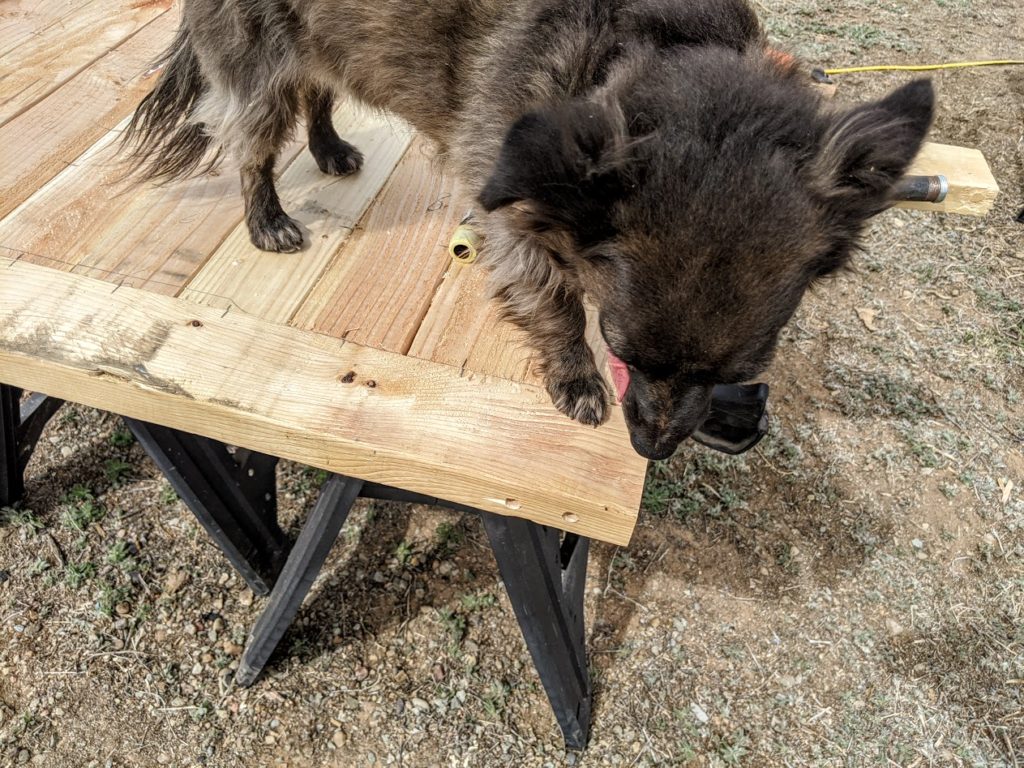
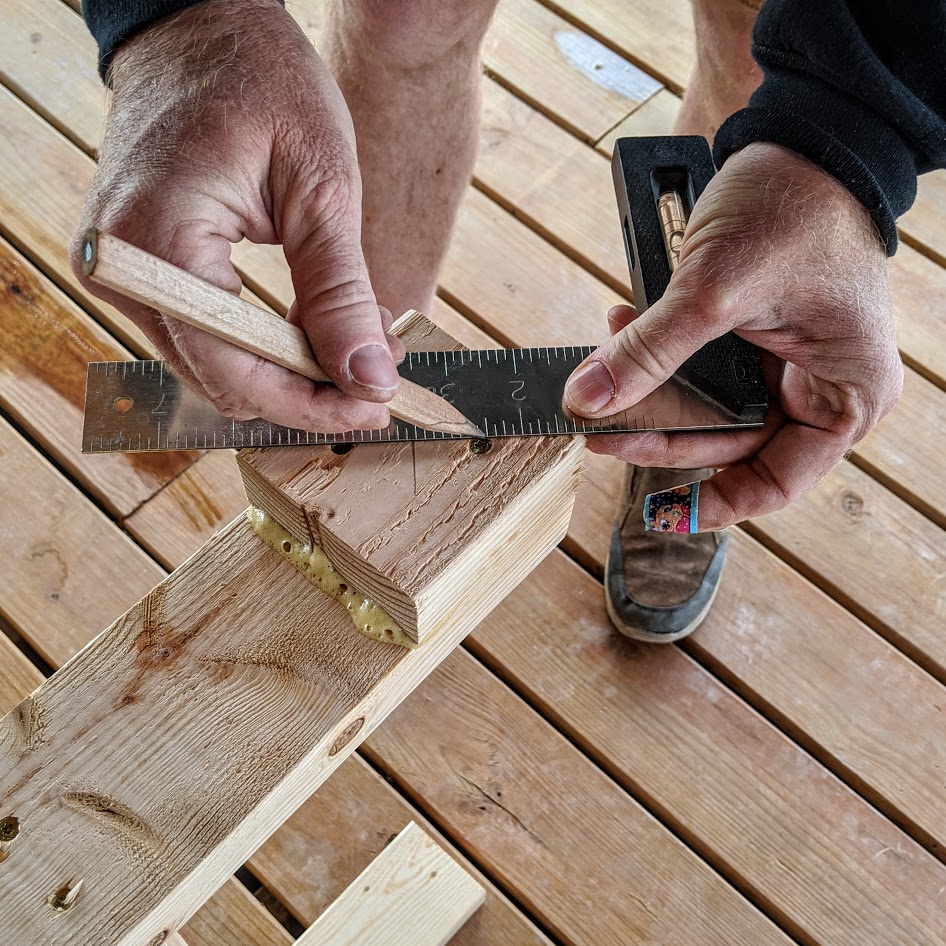
Attaching the endboard while El Bee checks for square. 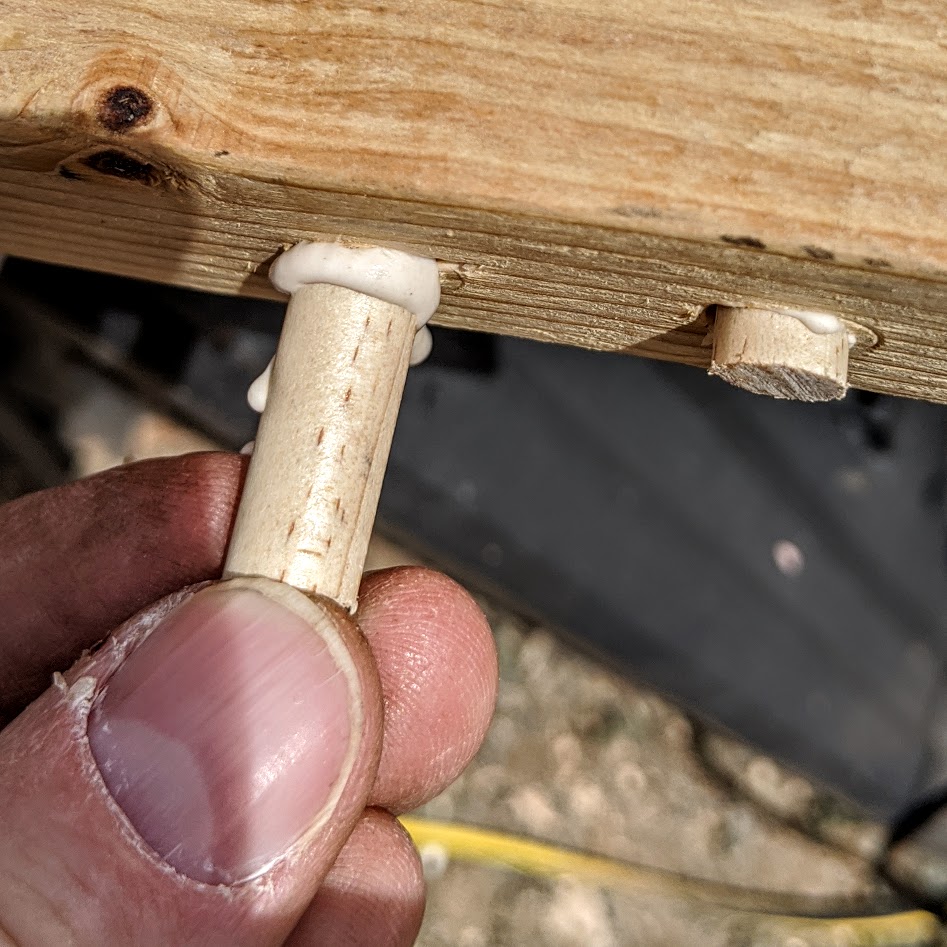
Inserting the dowel plugs 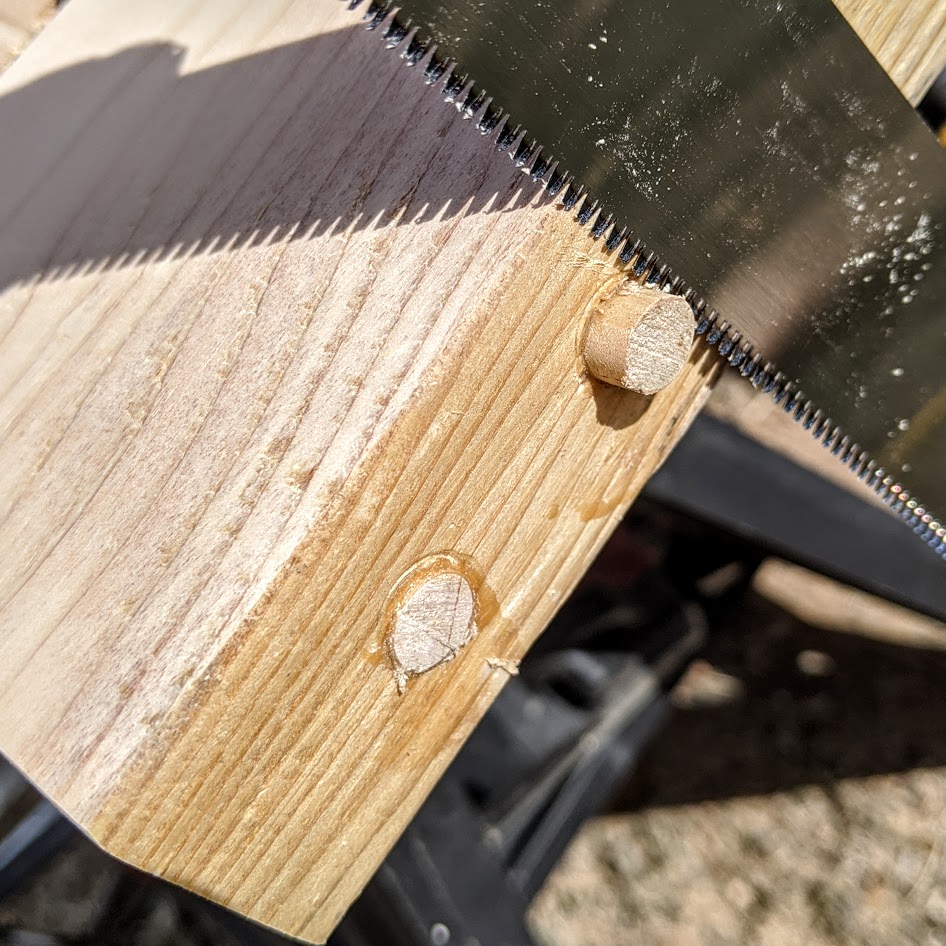
Trim the dowel plugs with a fine-tooth trim saw.
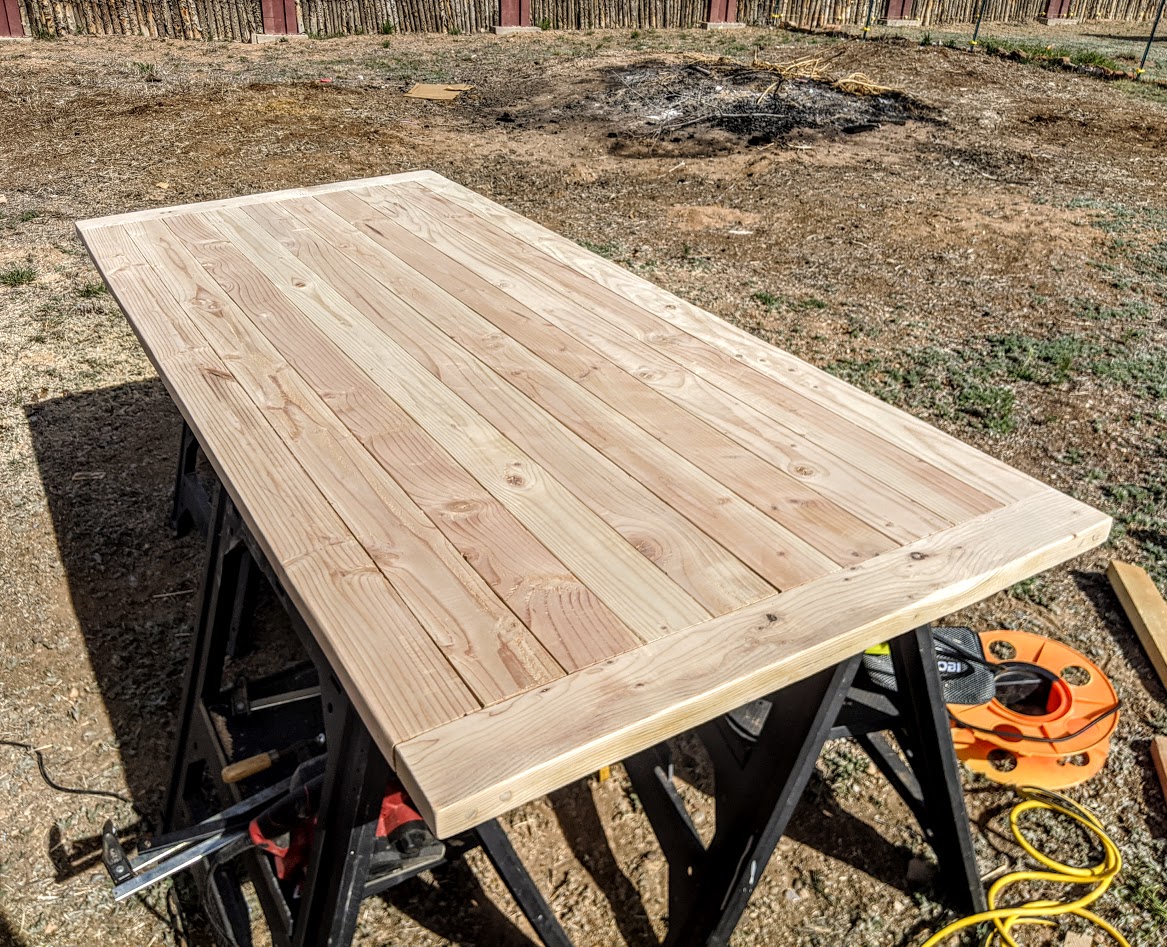
After all the glue has dried you will need to sand the table top before applying any finish. If you are lucky, you have a fairly even top. I had a few noticeable high spots that I did not want even for a rustic table. I used an electric hand planer to knock those down and then went over the entire top with a belt sander with 50-grit paper. After that, I used an orbital sander and 150-grit paper to smooth over the entire surface and the edges, knocking down the dowel plugs nice and flat. I also rounded over the edges and corners using the orbital sander. Here is the final sanded top.
I then sanded down the assembled table base using the orbital sander. I was primarily interested in removing the letter-branding on the boards and any marks made during shipping and so on, as well as removing any obvious flaws.
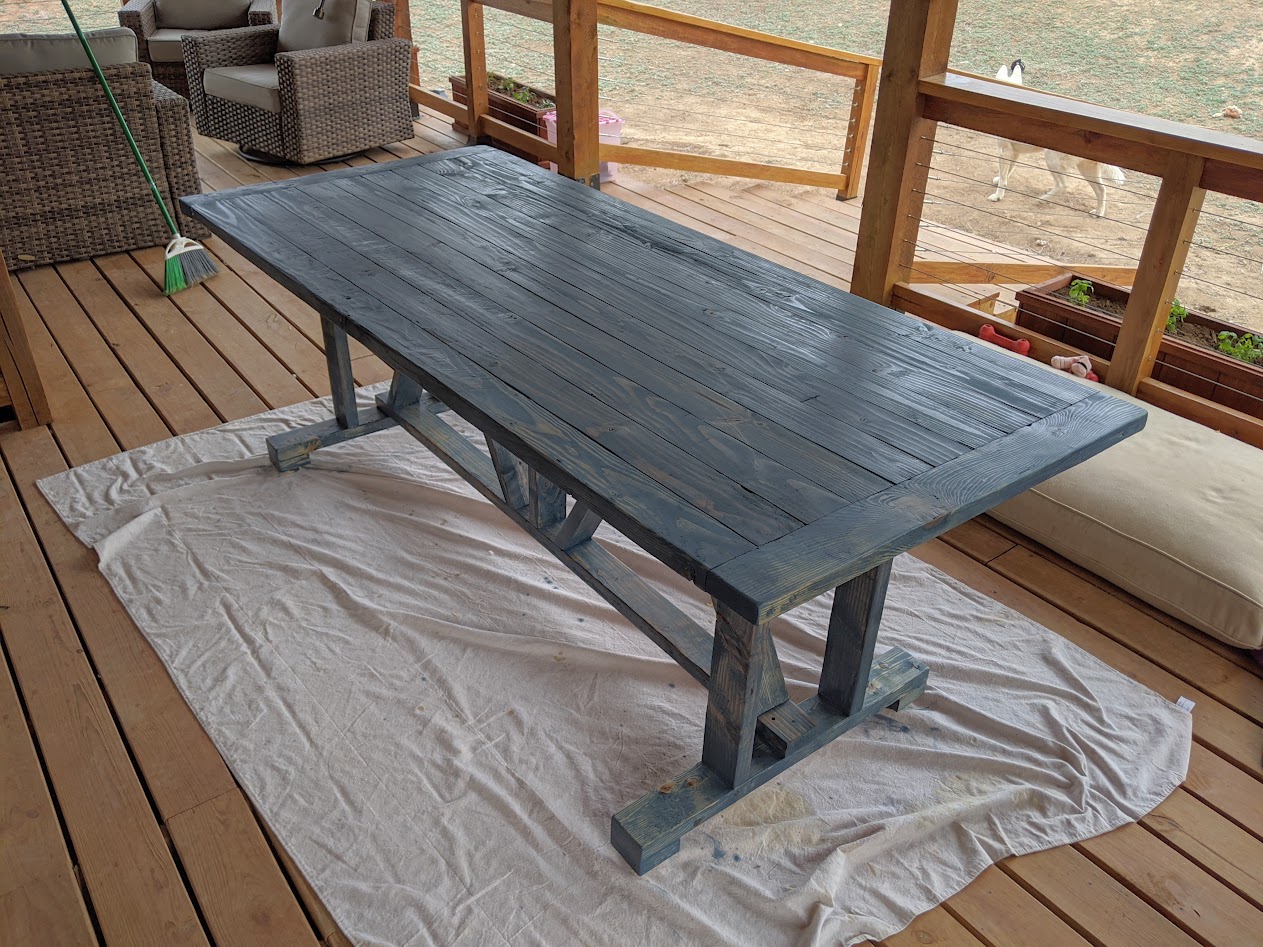
Next I finished the table top and the base separately, using an exterior grade stain in the shade of Worn Navy. Shown below is the stain without the final three coats of urethane applied. The top is still unattached so I can work on each piece separately for this phase.
After the stain had dried, I applied a coat of urethane to all stained surfaces. The table top received an additional two coats of urethane with a light sanding (300 grit) between coats.
Finally, it was time to attach the top to the base. Since this is an outdoor table I expect the wood to move quite a bit. The original plans called for screwing the top directly to the base, from the underside. Instead, in order to allow for seasonal movement, I used 2-1/2″ Simpson Strong-Tie screws with a 1/4″ hole pre-drilled in the base. The screws are galvanized but most importantly, they have a wide head. The screws were installed so that they were snug against the table base support, drawing the top down securely, but still allowing for lateral movement if necessary. I used four screws on each end of the table.
Attaching from the underside 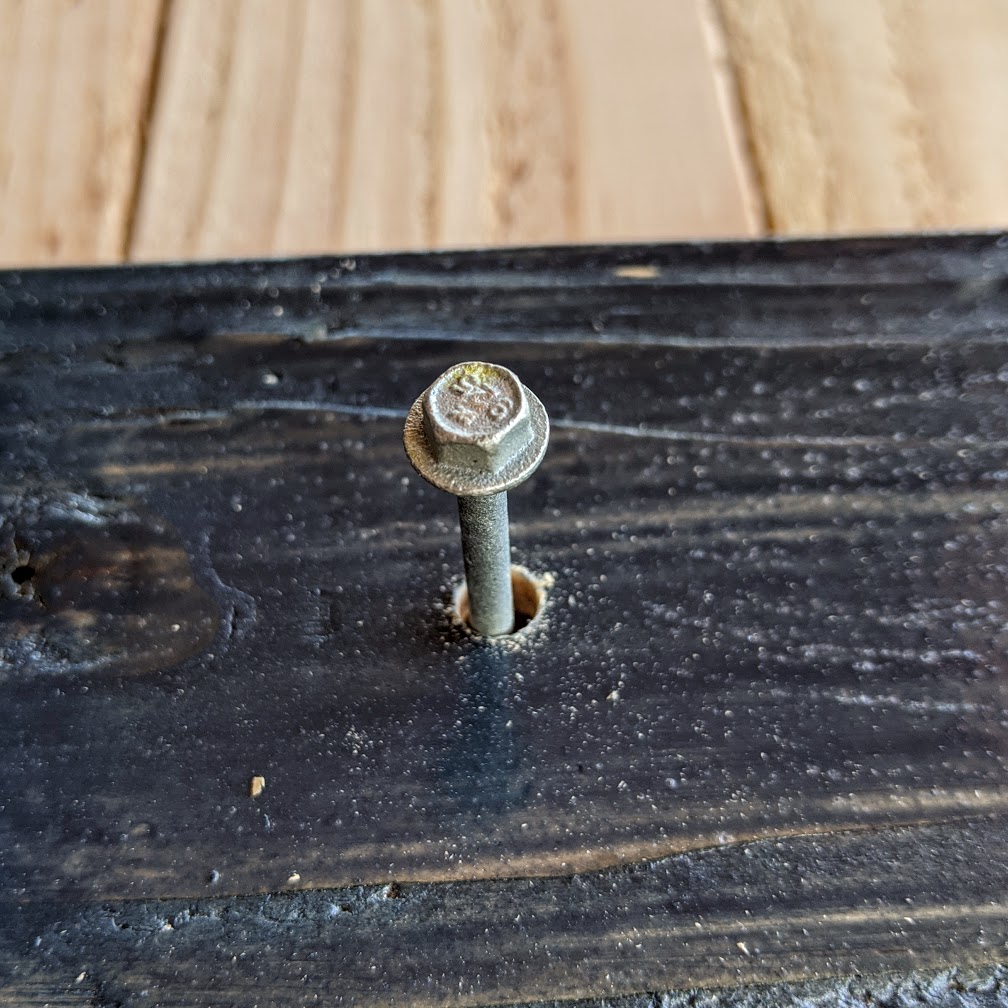
1/4″ hole for movement 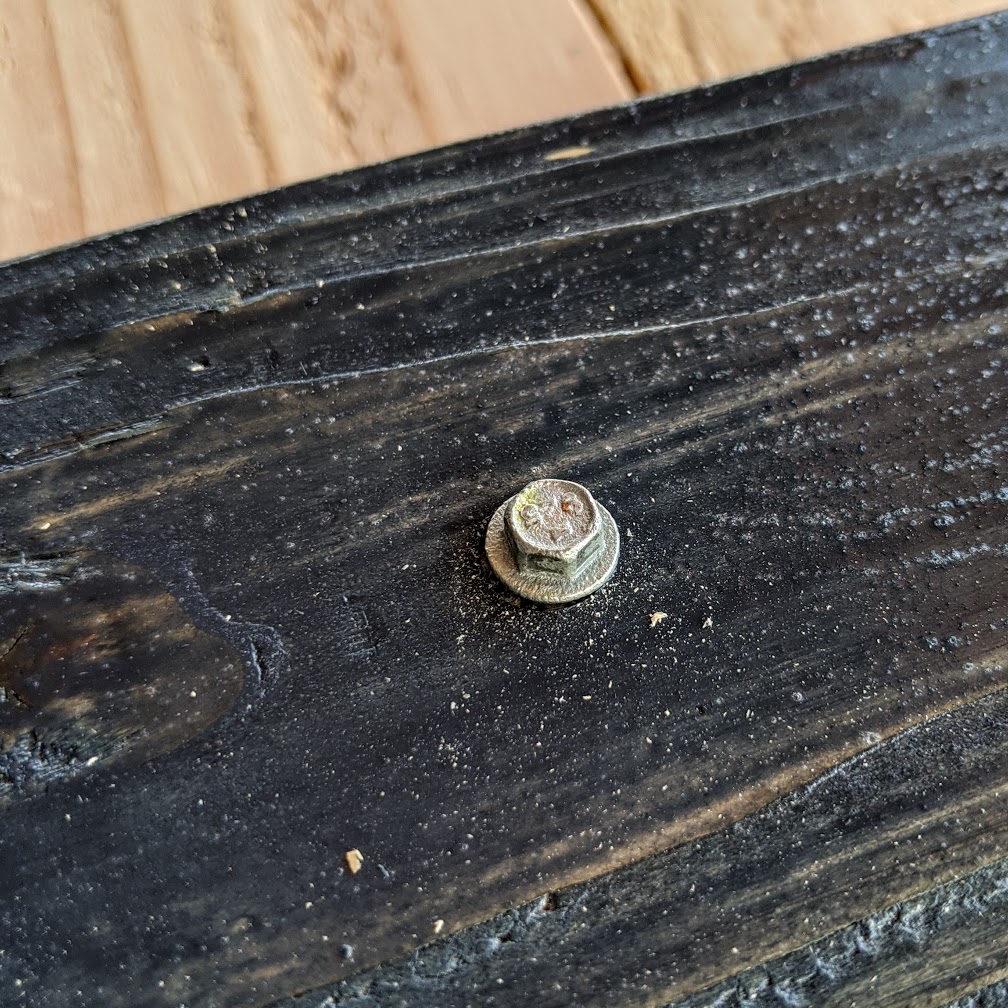
Just snug enough
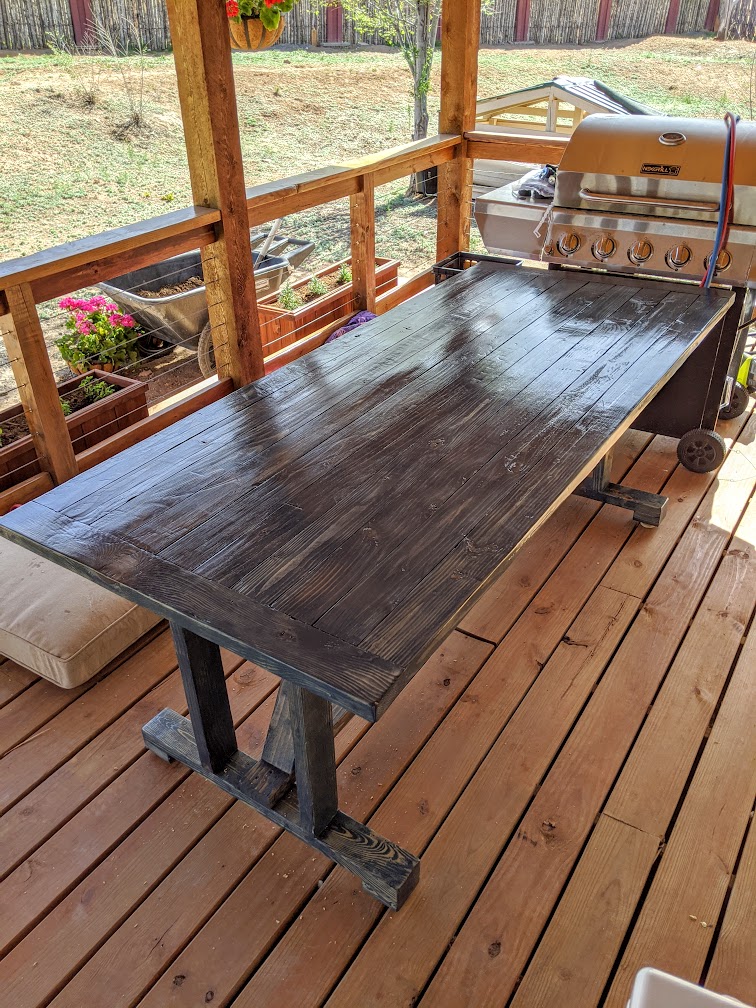
Here is the final look, after attaching the top and all the urethane had dried.

Recent Comments