Rustic Dining Chairs

Simple Dining Chair – Illustrated 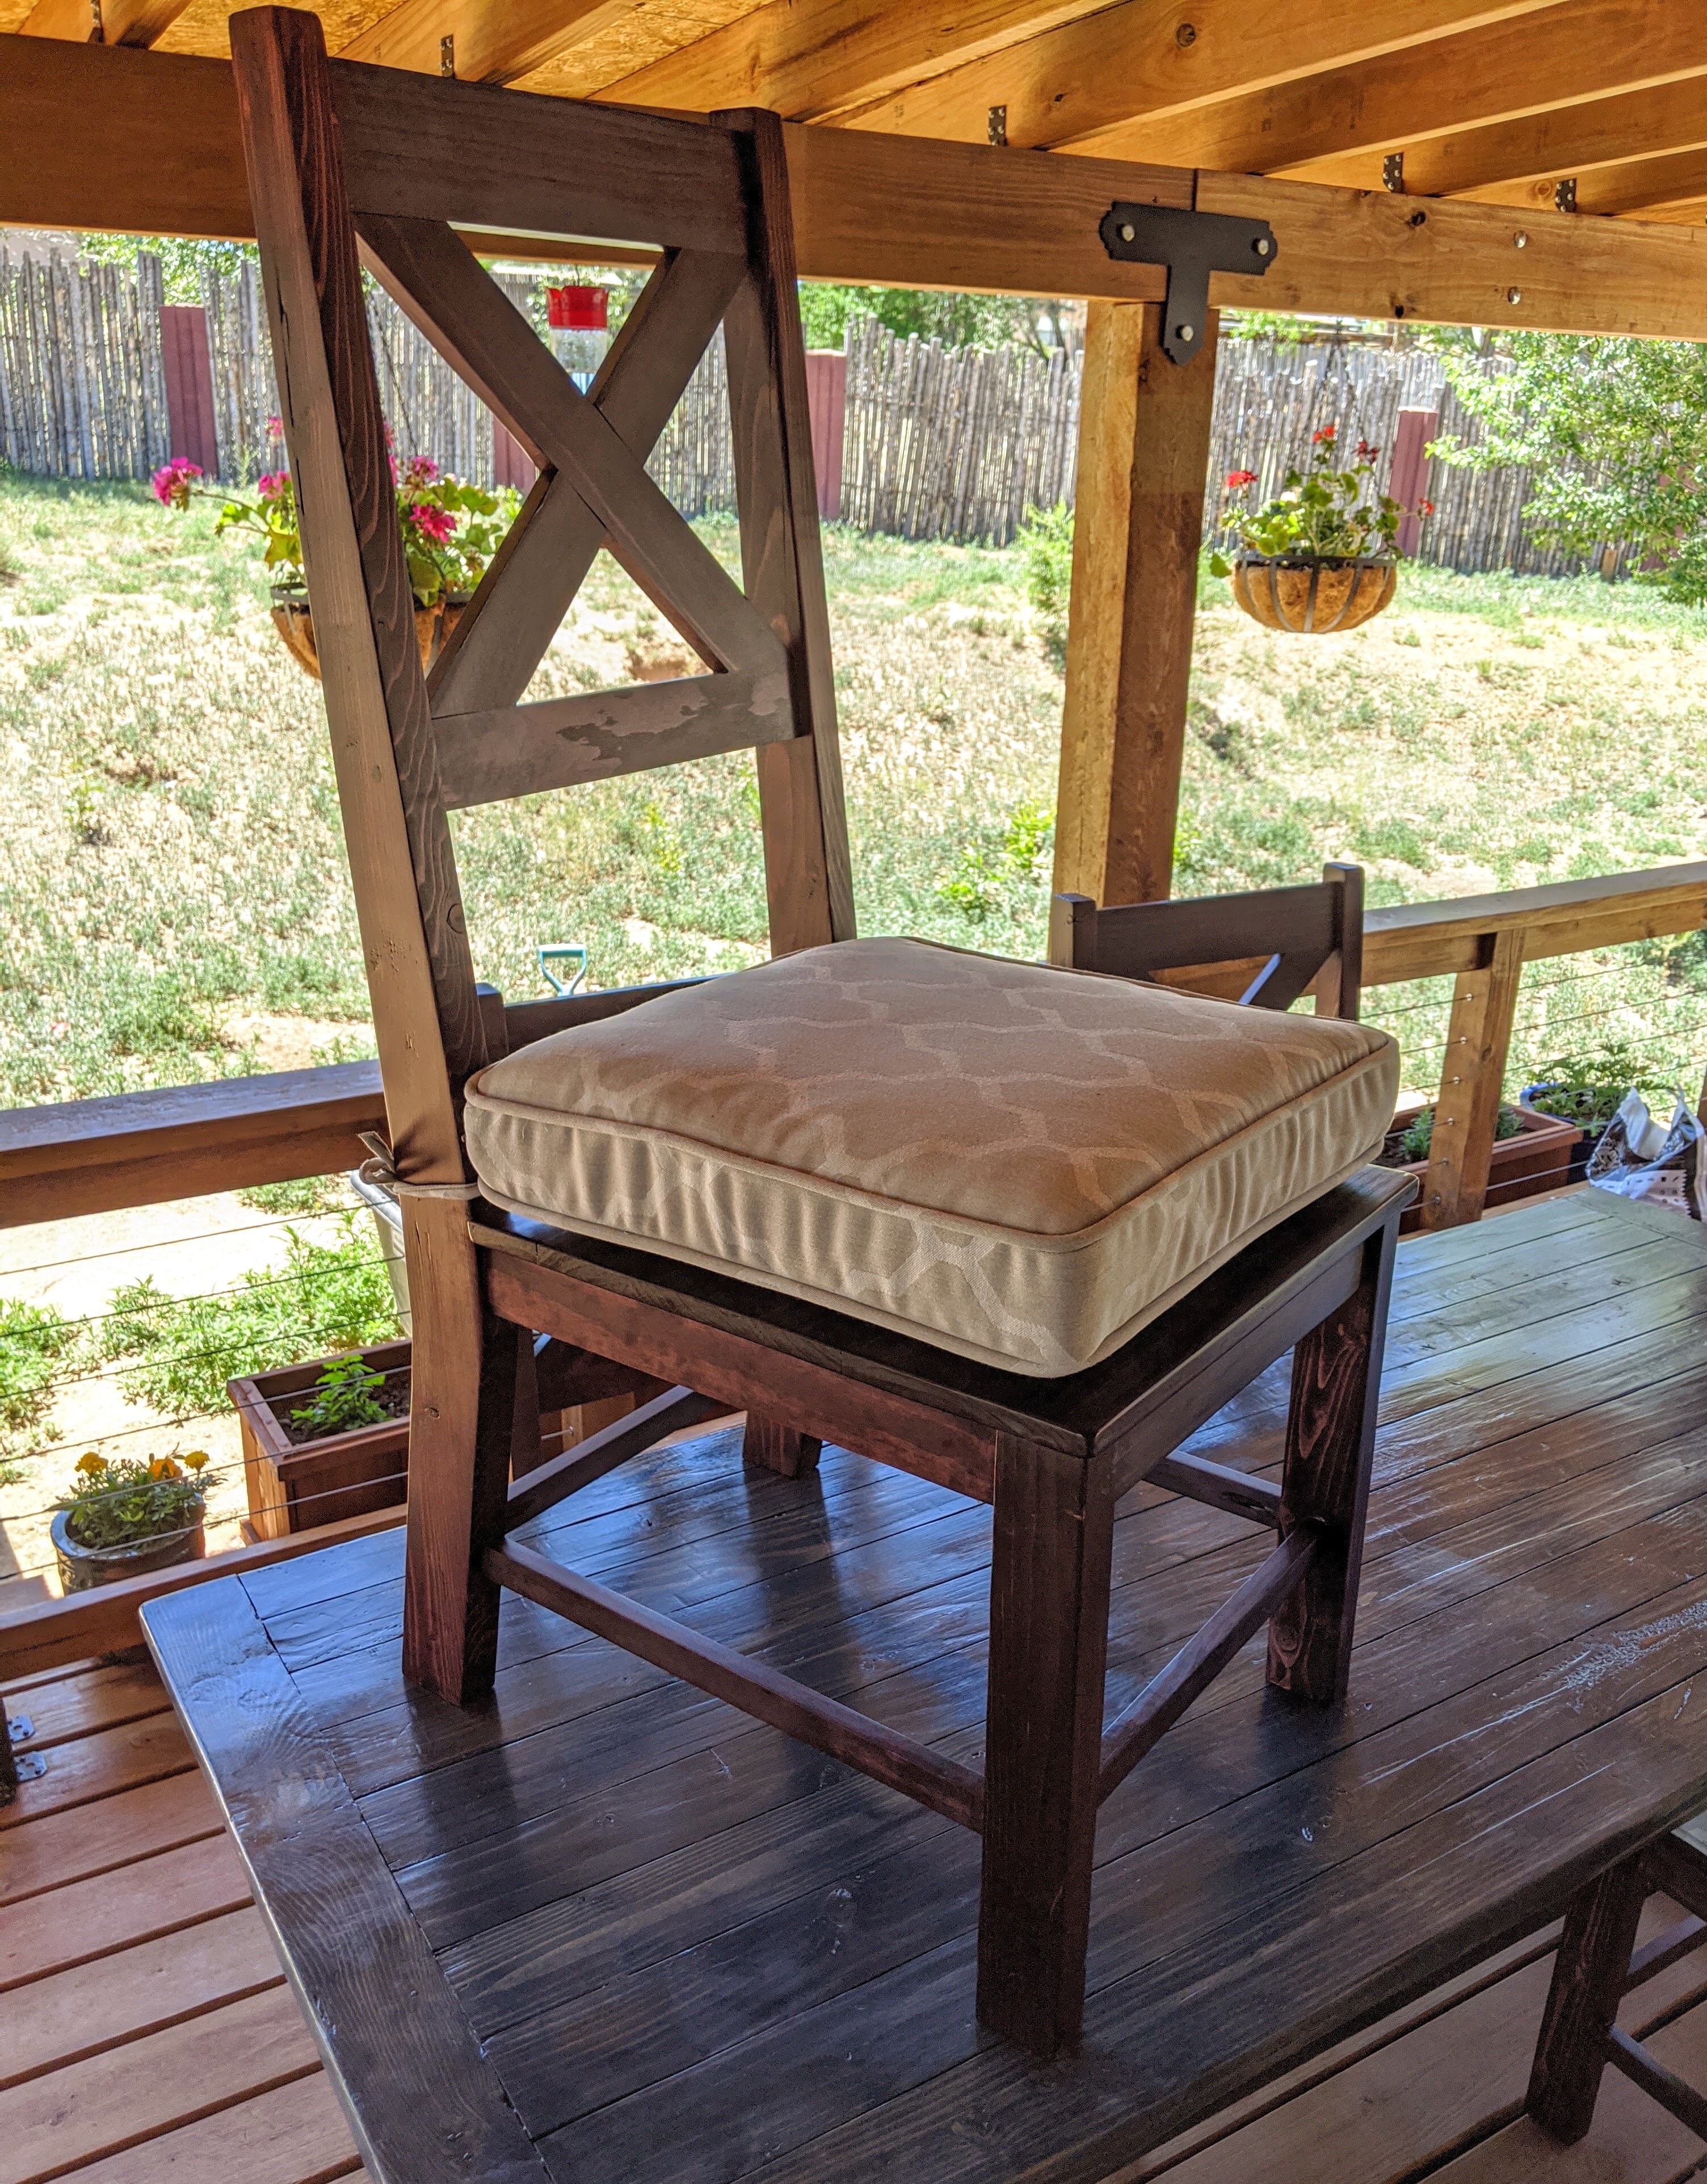
For my last project I made a simple rustic outdoor table out of a bunch of 2×4s. I looked around for a set of chairs to complete it but didn’t see anything for under $350, more than three times the cost of the table. It only seemed appropriate to go ahead and build a set of chairs in a style complementing the table. I looked around at a few woodworking sites for ideas and found this one. It was designed by someone who had built a similar table following plans from the same two women at Shanty-2-Chic, who designed the table. I made several changes to how I assembled my chairs and instead of upholstering the chairs, I created a flat seat from 1×3 boards and relied on store-bought cushions for comfort.
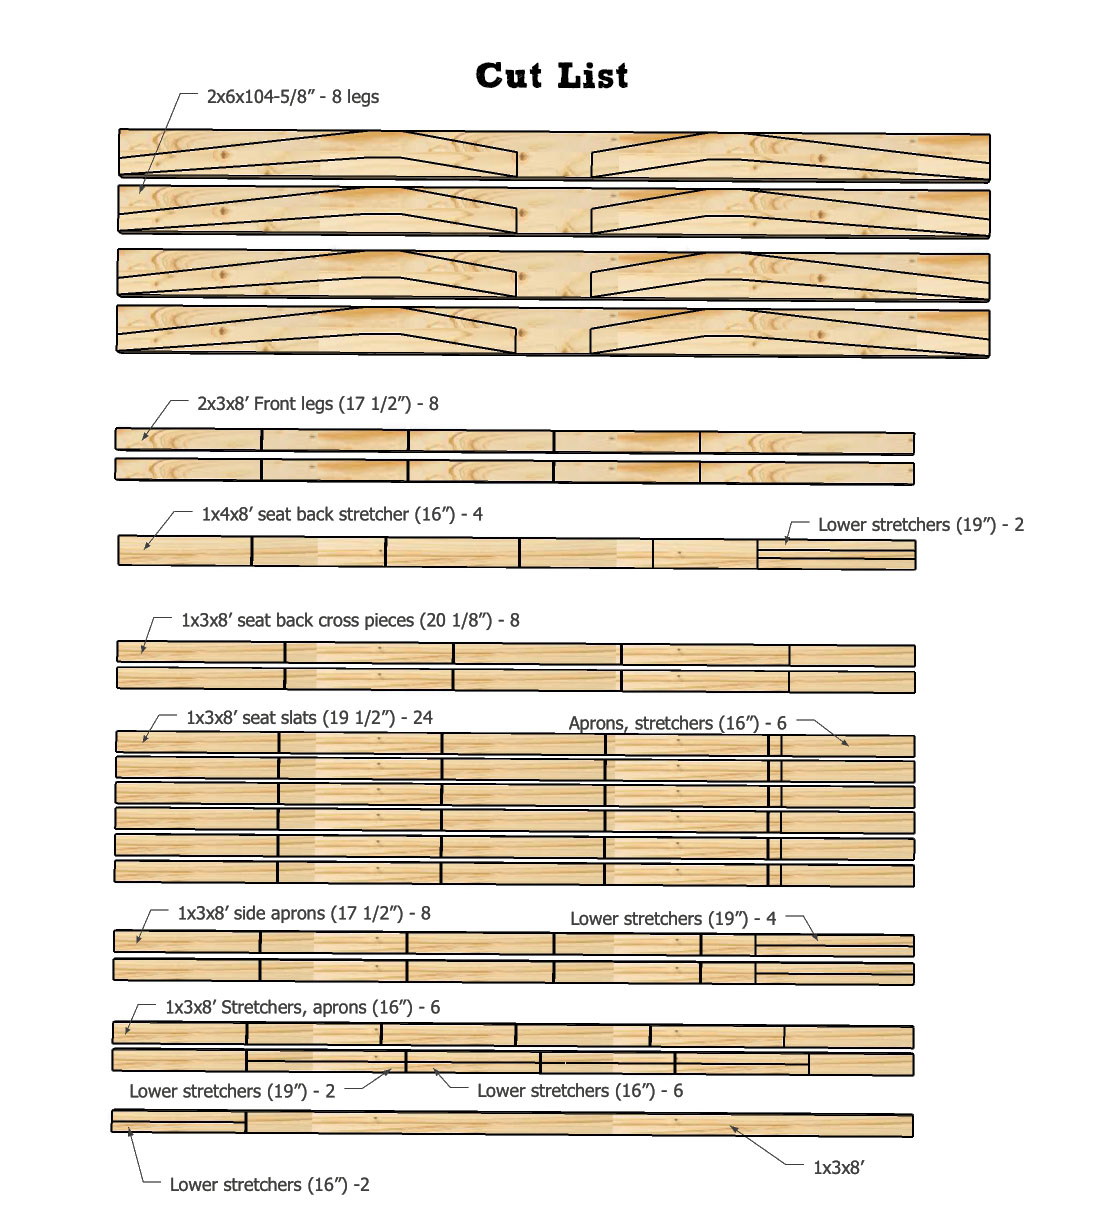
The Cut List
The list below gives all the boards needed to make four chairs total. The Cut List figure shows from where each piece is cut. The local big box store was out of 2×3 boards, so I ended up purchasing 2×4s instead and ripping them down after cutting the front legs to length. I took great care in selecting quarter-sawn boards for the 1×3s for the extra strength and reduced warping tendency when gluing up the chair seats. In all it was around $140 in lumber. I used screws, glue, and biscuits left over from the table build.
- (4) 2×6×104-5/8″ construction grade boards
- (2) 2×3×8′ construction grade boards
- (1) 1×4×8′ select pine boards (s4s)
- (13) 1×3×8′ select pine boards (s4s)
Chair Seats
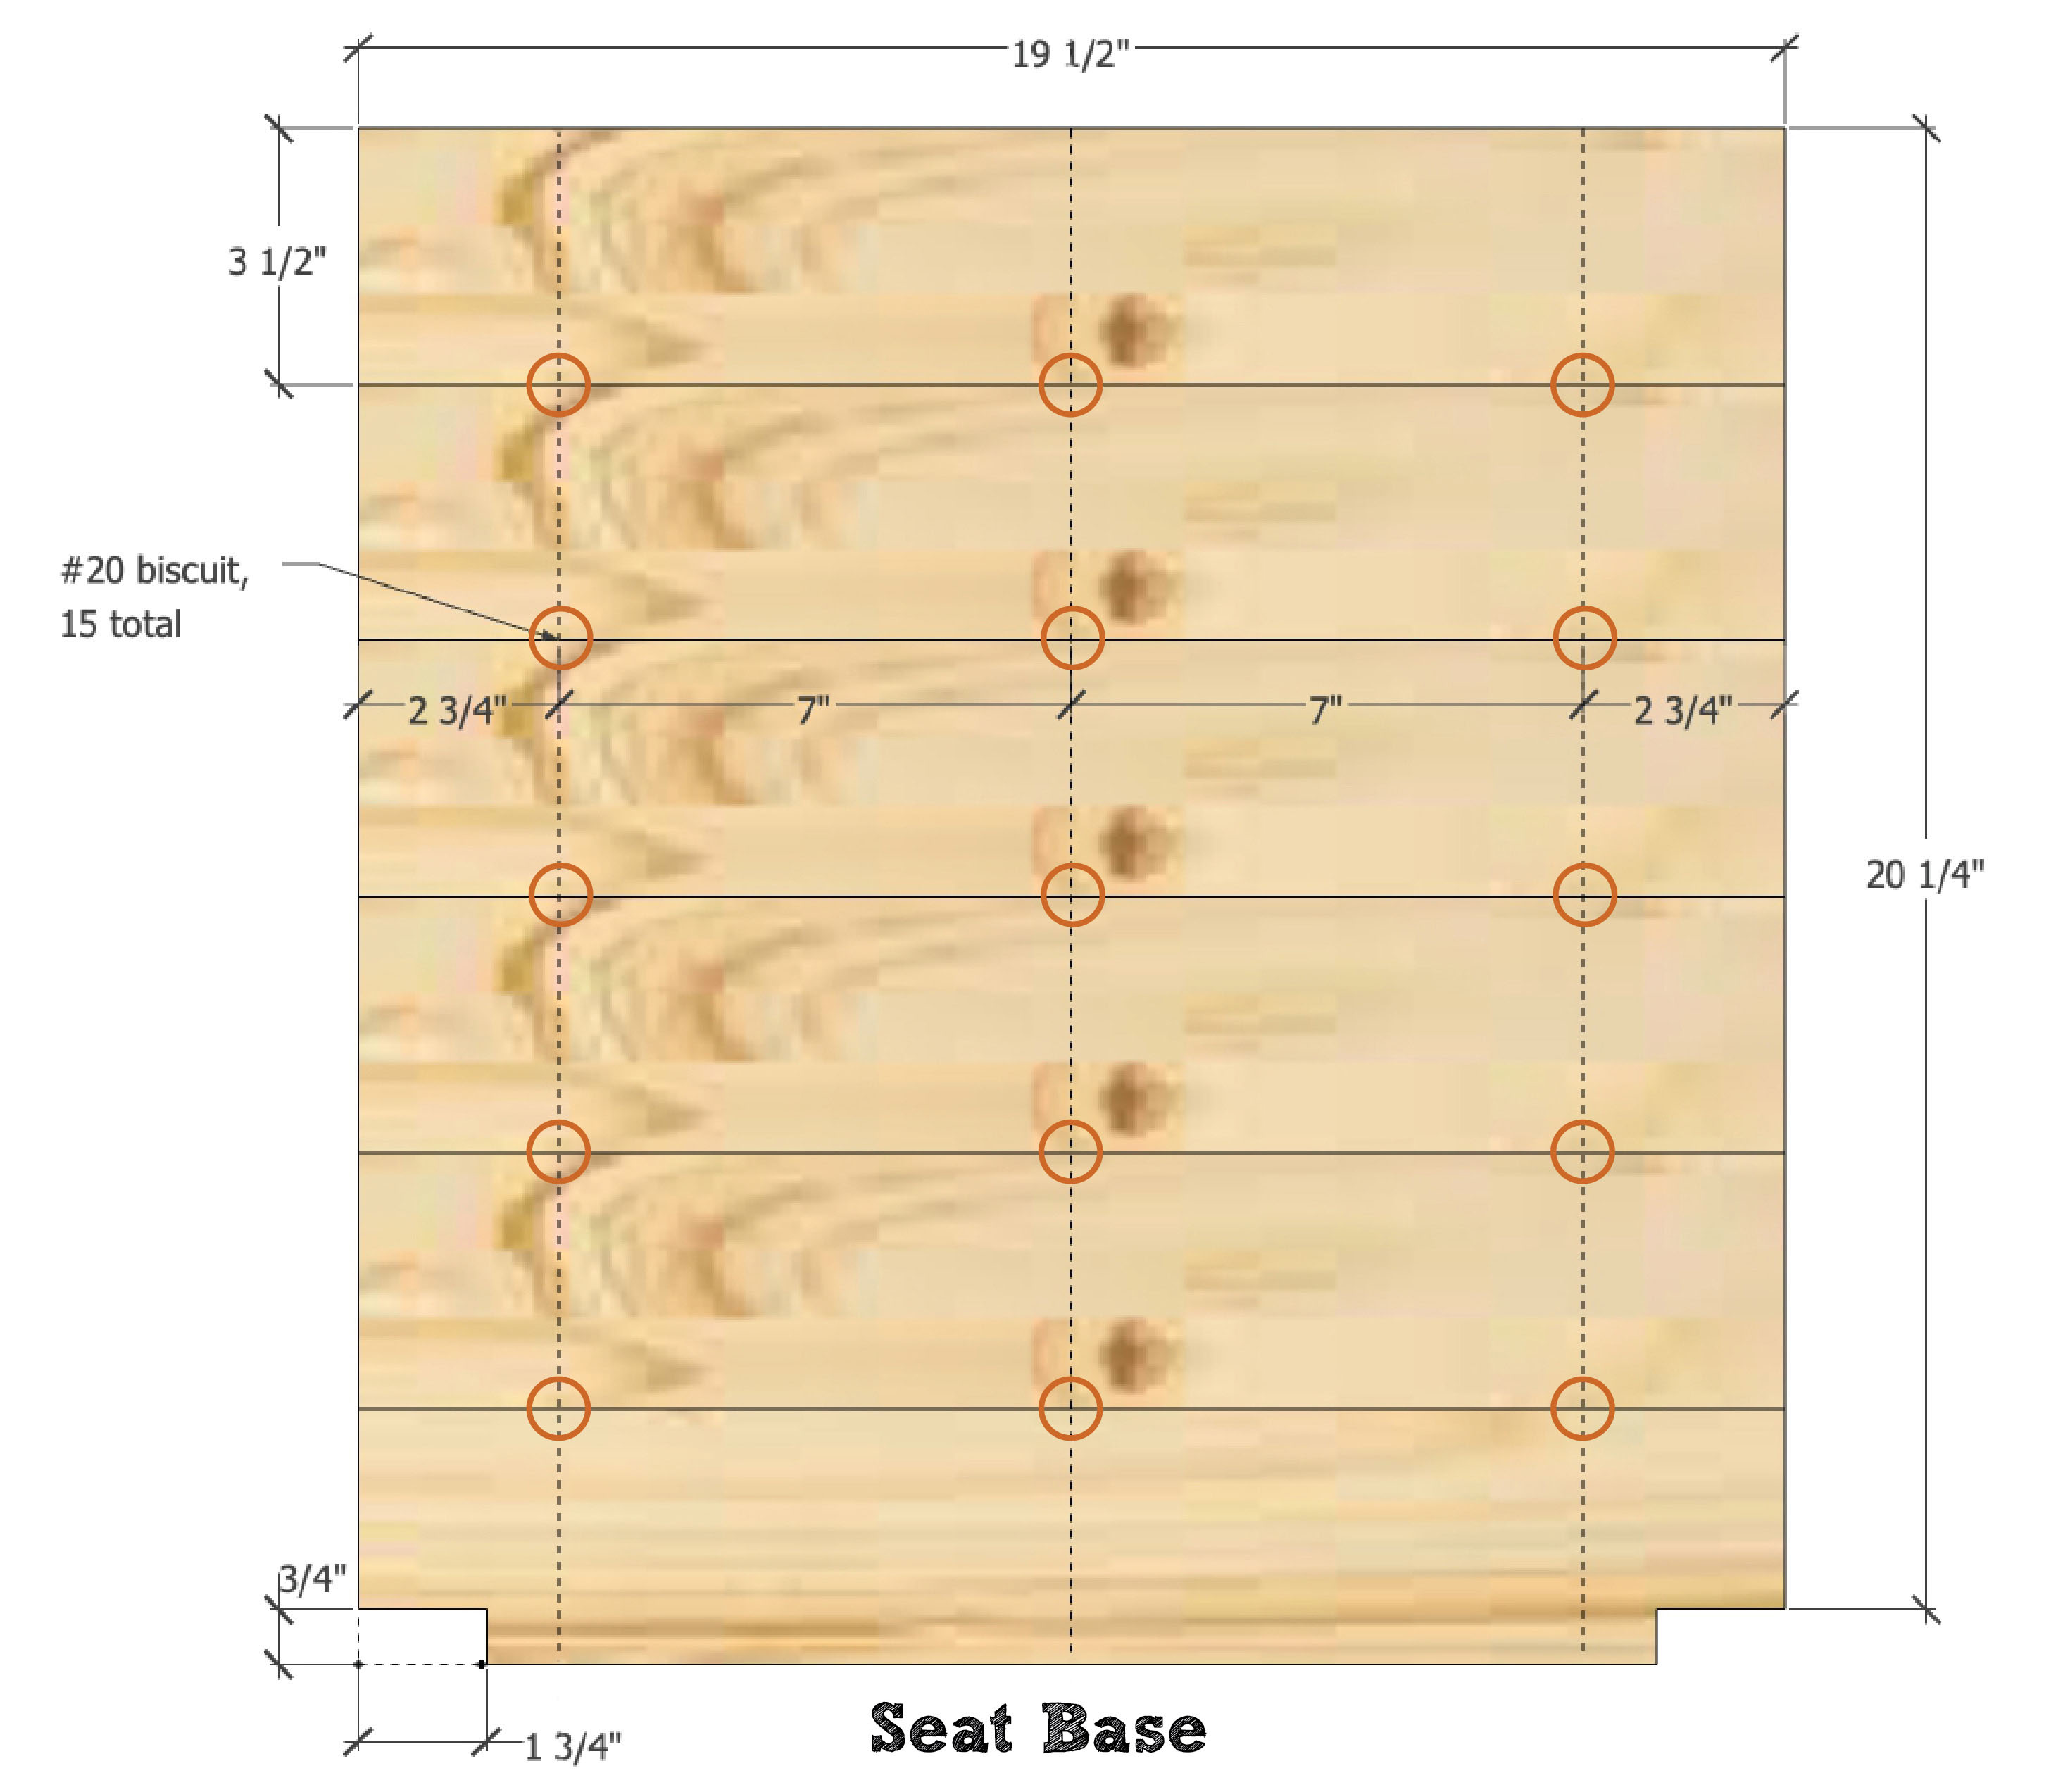
It is probably best to start by cutting all 24 of the 19-1/2″ long boards that will make up the chair seats. Six boards are edge-glued together with biscuit joints as shown in the following diagram and photos. I cut these boards about 1/4″ longer than necessary so I could trim them flush after gluing them up. In hindsight, if making these chairs again I would cut them to 20″ final width, since 20″ wide cushions are readily available at any garden center.
Take care in selecting boards that are true with minimal cupping and warping. If you chose select or S4S boards this should be easy. Also, be sure the endgrain changes direction from one board to the next, as shown here. It is not as critical with these quarter-sawn boards but doing this will minimize cupping down the road.
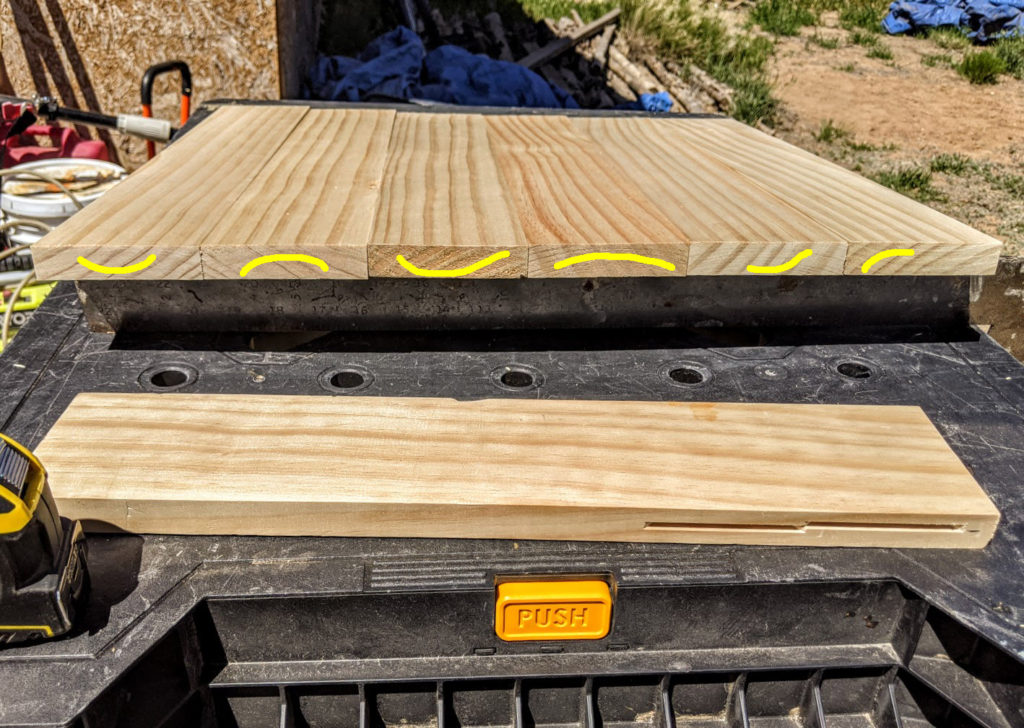
Once you have the boards laid out, mark the locations for the biscuit cuts and number them to make it easy to keep them in order. Cut all the slots and then glue everything up. I used a large carpenter square to keep one edge straight while gluing, reducing the number of cuts I would have to make when trimming them to final size later. I used two parallel-bar clamps on the ends to squeeze the boards together and clamped two straight 2×4 scraps down the middle on each side to keep the boards flat, as shown below.
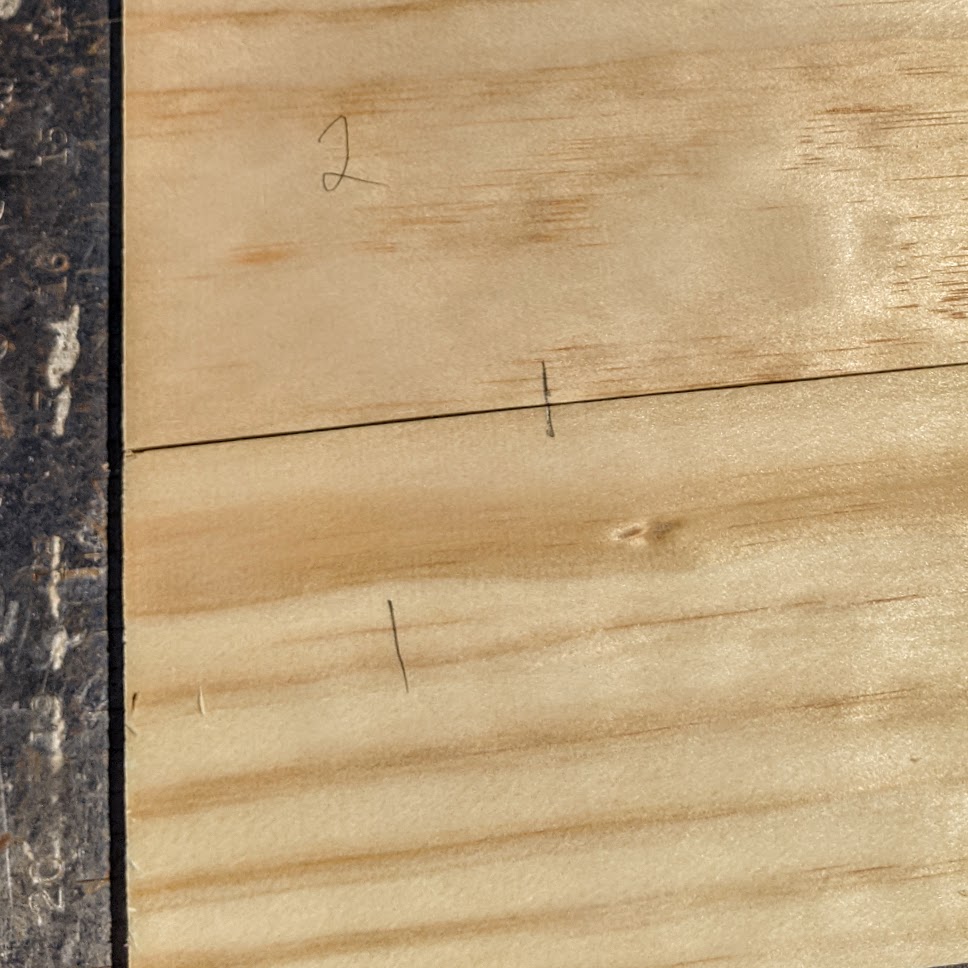
Numbering the Seat Boards 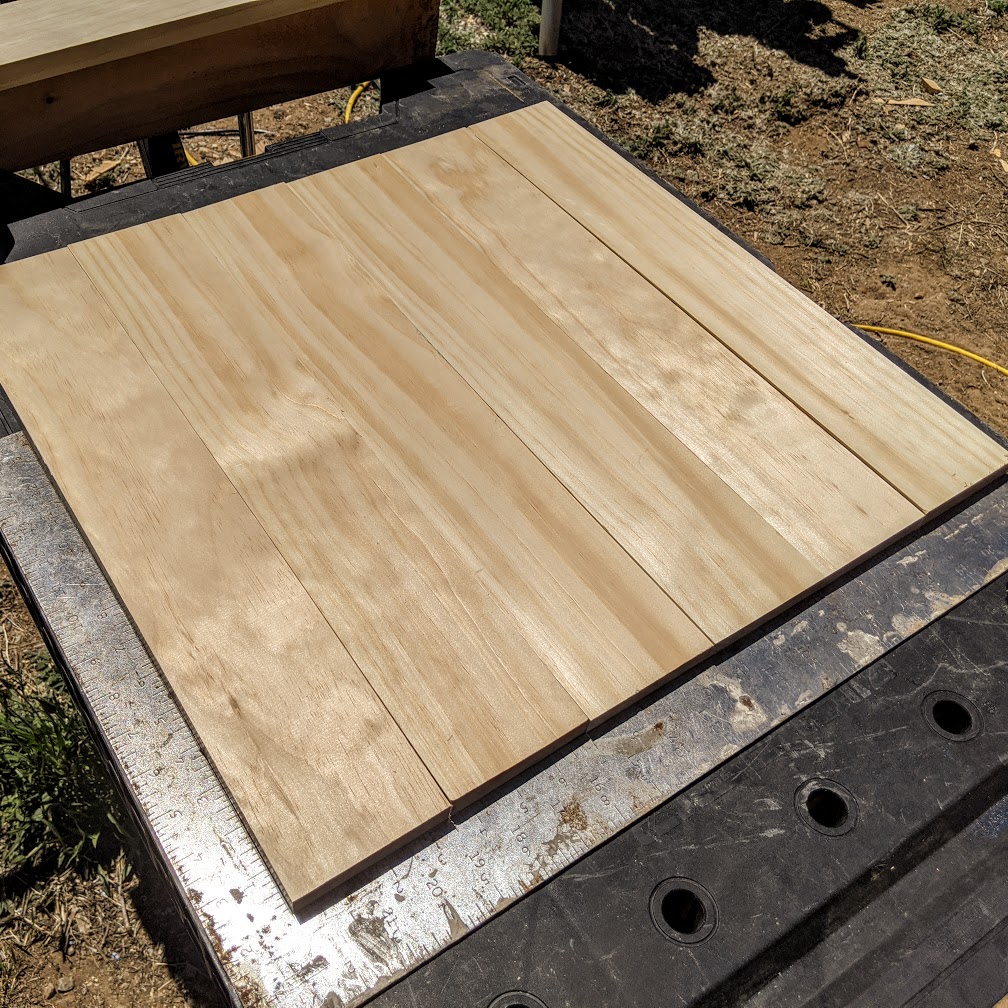
Squaring the Seat Boards 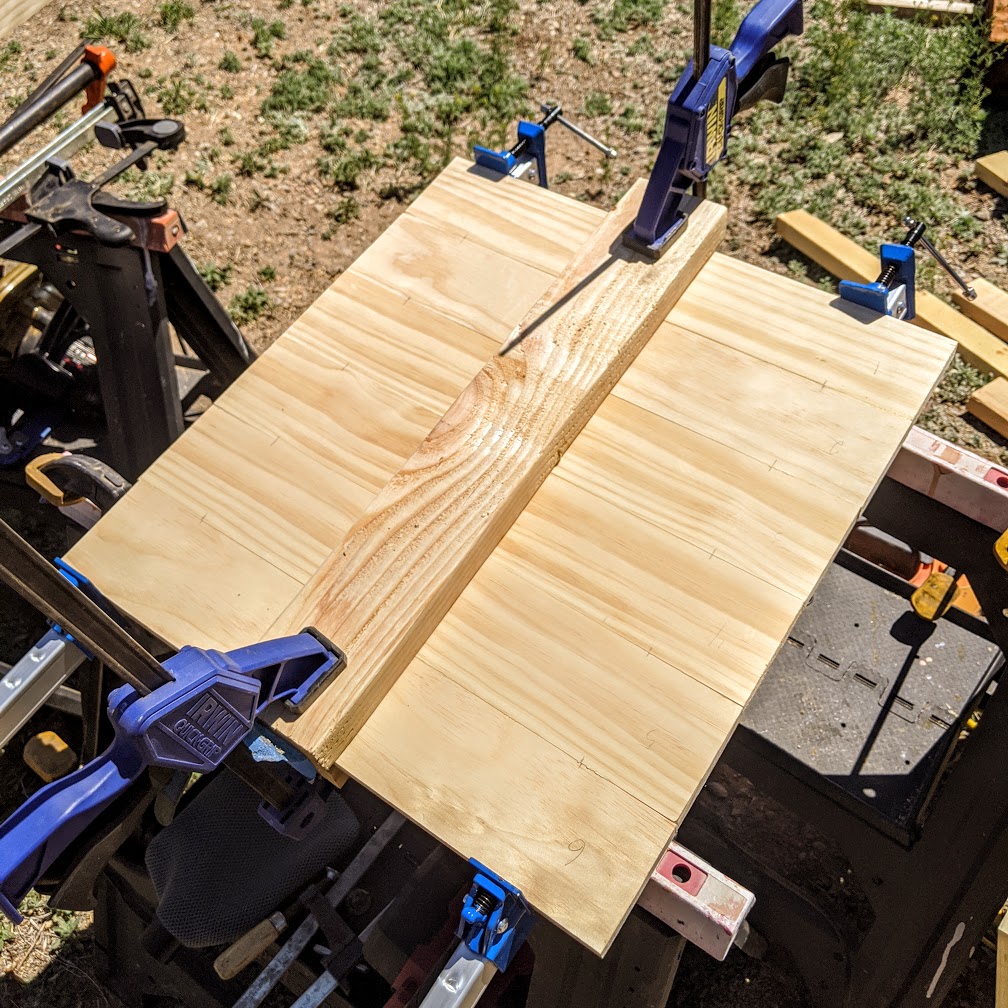
Seat Board Glue-Up
After the seats have dried, sand both sides smooth and then trim the seats to the final 19-1/2″ (or 20″ if you want to fit most off-the-shelf cushions). Cut out the notches for the rear support legs as shown in the diagram (correcting the measurements for 20″ if necessary) with a small saw or backsaw. Sand the ends smooth and round over the edges by hand using a palm sander, round-over trim router, round-over plane, or whatever your favorite method is.
Back Support
While the seats are drying you should next cut out all the boards for the chair support backs. It is crucial that you cut all of the diagonal boards the exact same way. They will fit to form a nice “X” between two stretchers that will fit between the upright back supports (see diagram at top). The patterns for the cross pieces and the stretchers are shown here.
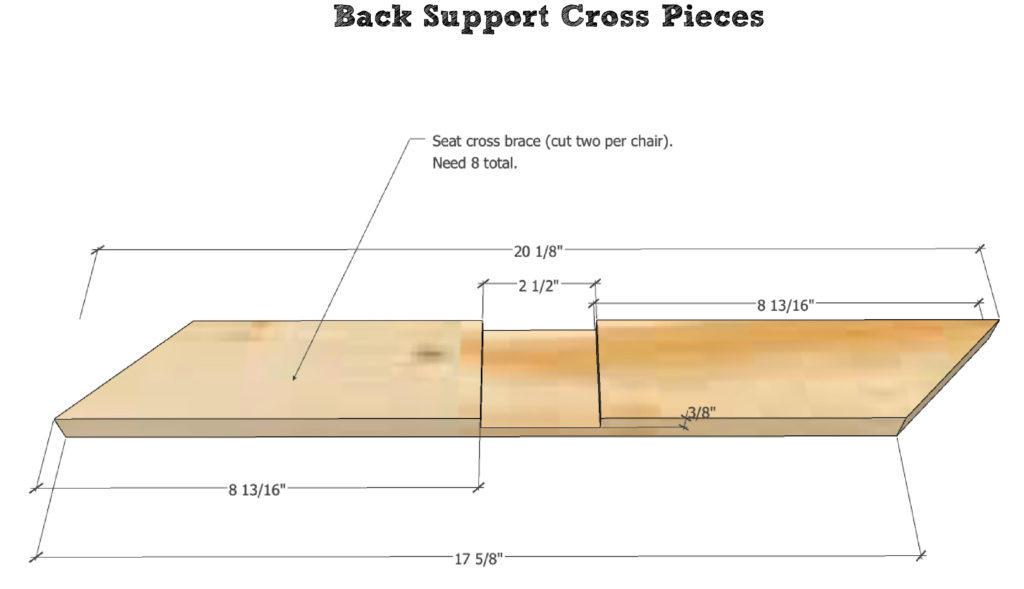
Back Support Cross Pieces 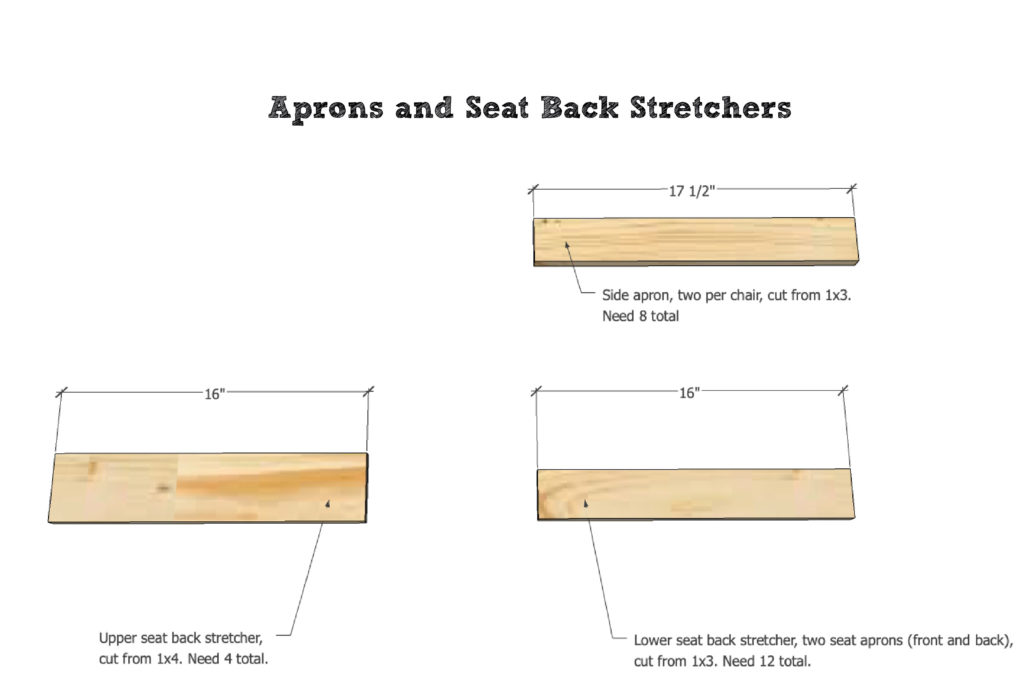
Aprons and Seat Back Stretchers
The original design called for gluing the cross pieces together and attaching them to the stretchers using 2″ finish nails shot in diagonally from the outside. I thought it would make for a stronger joint to attach them using biscuits. The photo below shows how I laid everything out and used one biscuit in each corner. The second picture shows my clamping process.
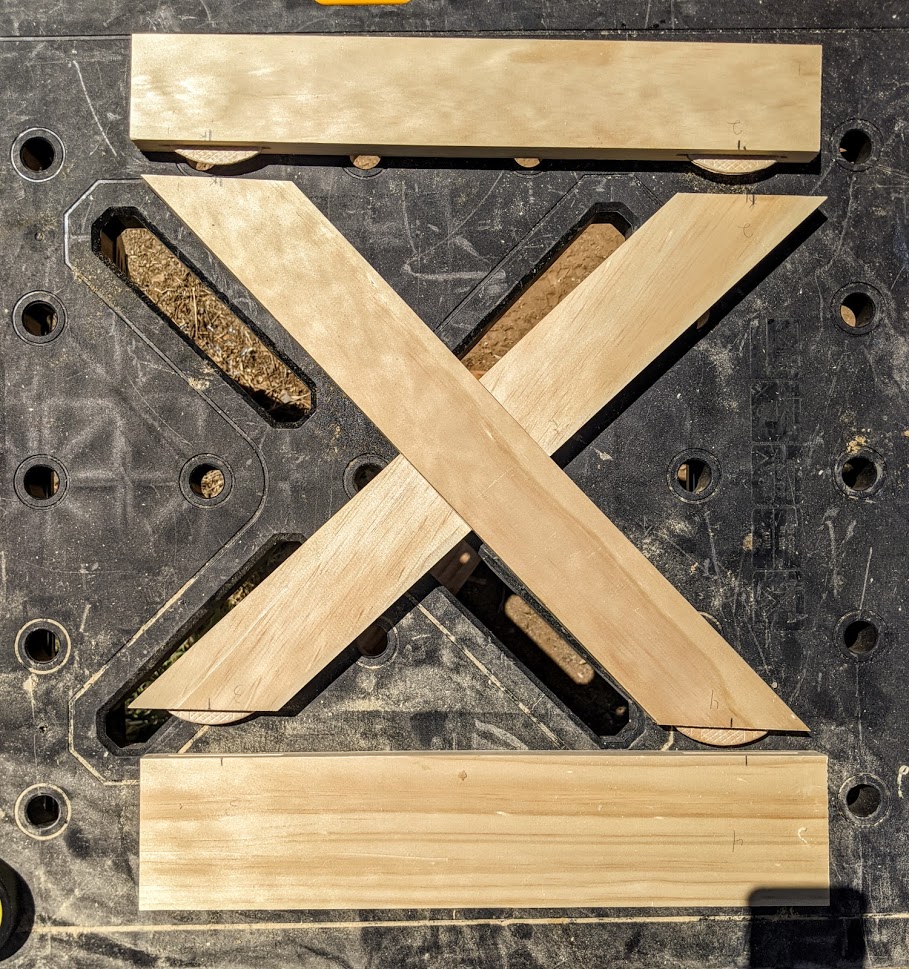
Seatback Layout 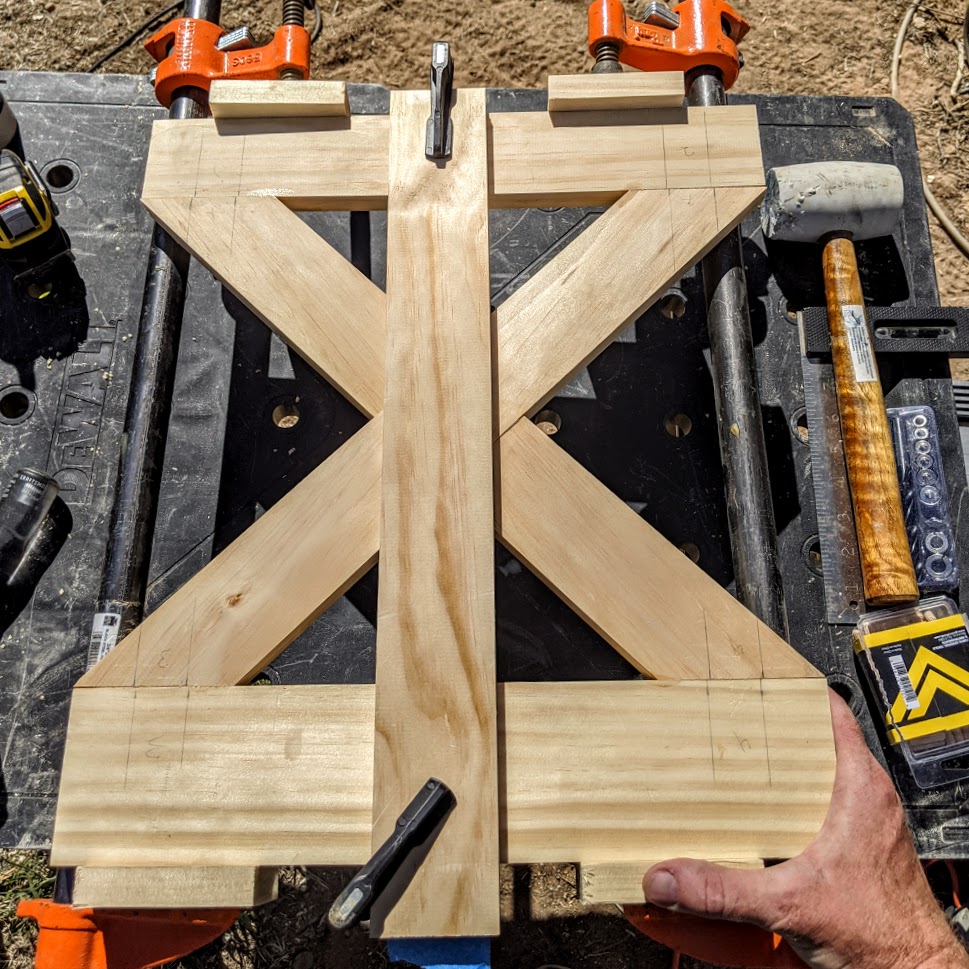
Seatback glue-up
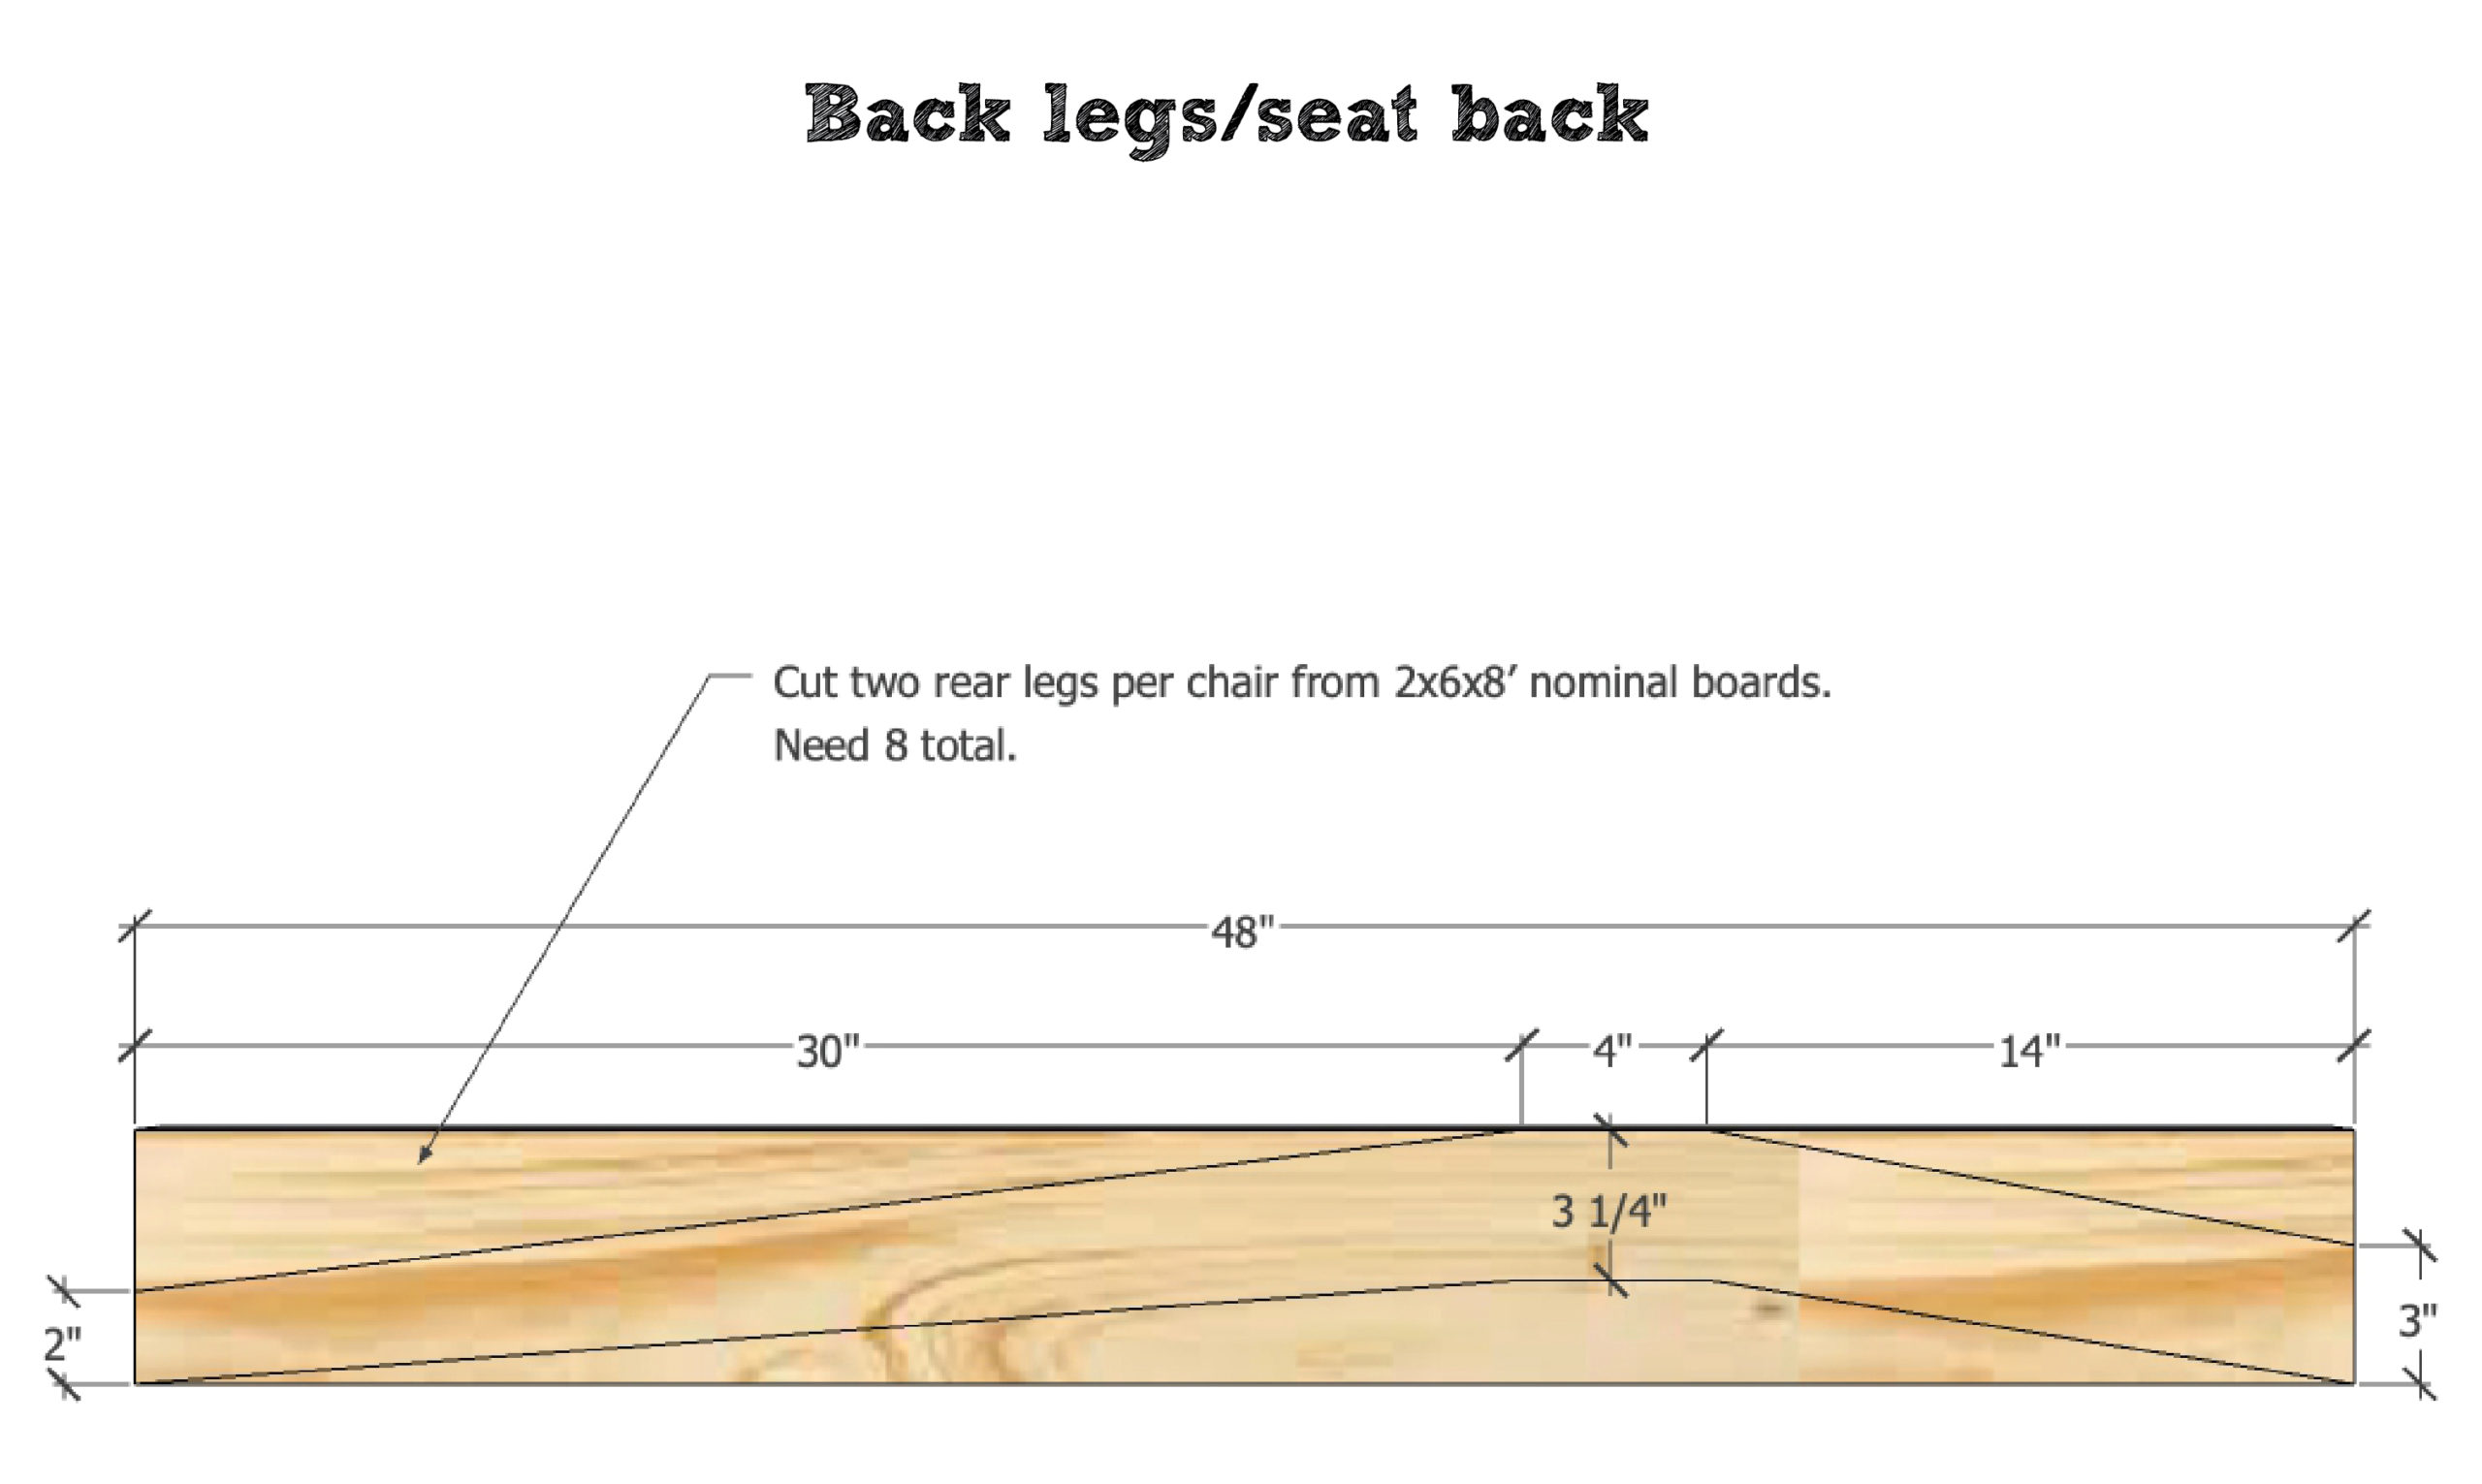
Cutting the Rear Legs/Upper Support
Use the diagram below to mark the legs on your 2×6 boards. You can use a circular saw for most of the cuts and then a jigsaw to get the inside middle part, or if you have access to one, use a bandsaw to cut the legs out. Cut just close to the outside of your lines and then finish with a sander. Round over all edges using your favorite technique.
Here are the photos of my process.

Cutting Rear Legs 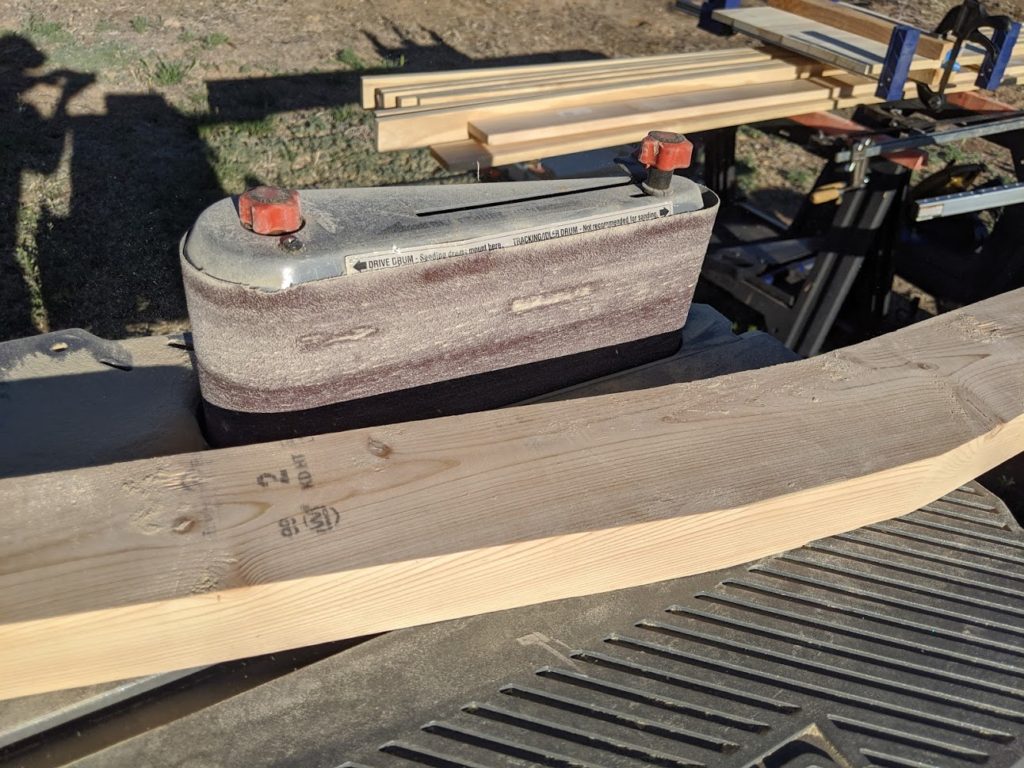
Sanding Rear Legs 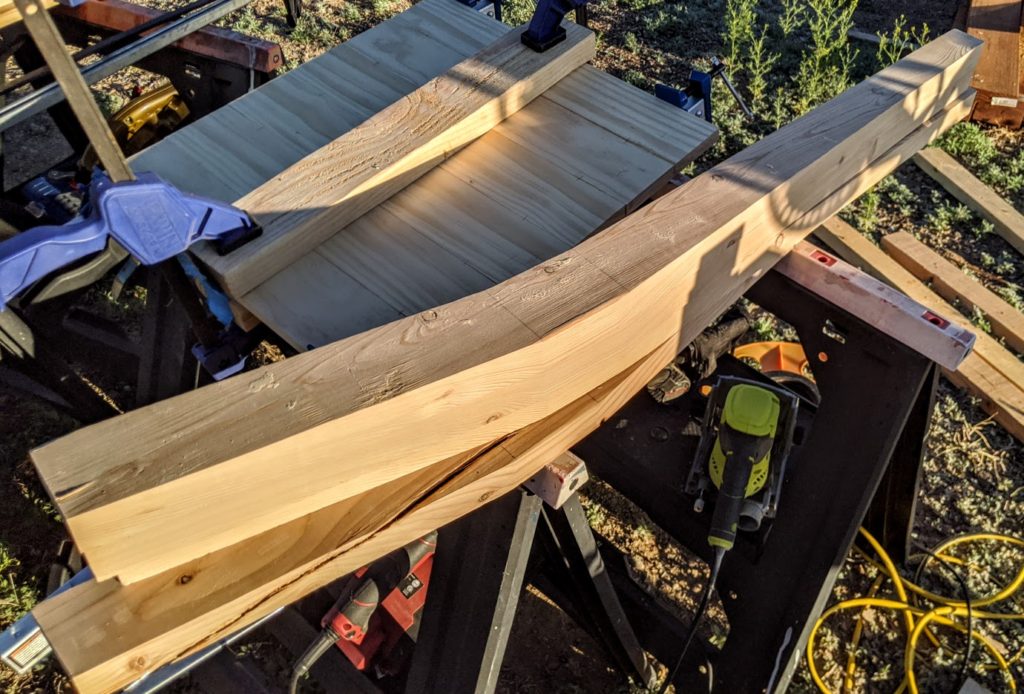
Finished Rear Legs/Back Support
Cutting and Drilling the Remaining Pieces
With that, all that remains is to cut out the remaining pieces—front legs, seat aprons, and lower stretchers—given in the diagrams below. After cutting out the aprons (diagram above) and lower stretchers, drill the pocket holes in them, as shown in the accompanying photos. For this I used the Kreg Pocket-Hole Jig 320 because I already had it and because the dual-unit is perfect for quickly centering the jig on the aprons, clamping, and drilling. The jig splits into two separate single-hole jigs for use on drilling pocket holes in either end of the stretchers. For the 19″ stretchers with the 10° angle you must pair up the stretchers before drilling your holes. Make sure you drill on whatever side is going to be the inside of the chair for each stretcher. Mark these pairs so you can keep track of them. The front/back stretchers are interchangable so this isn’t critical.
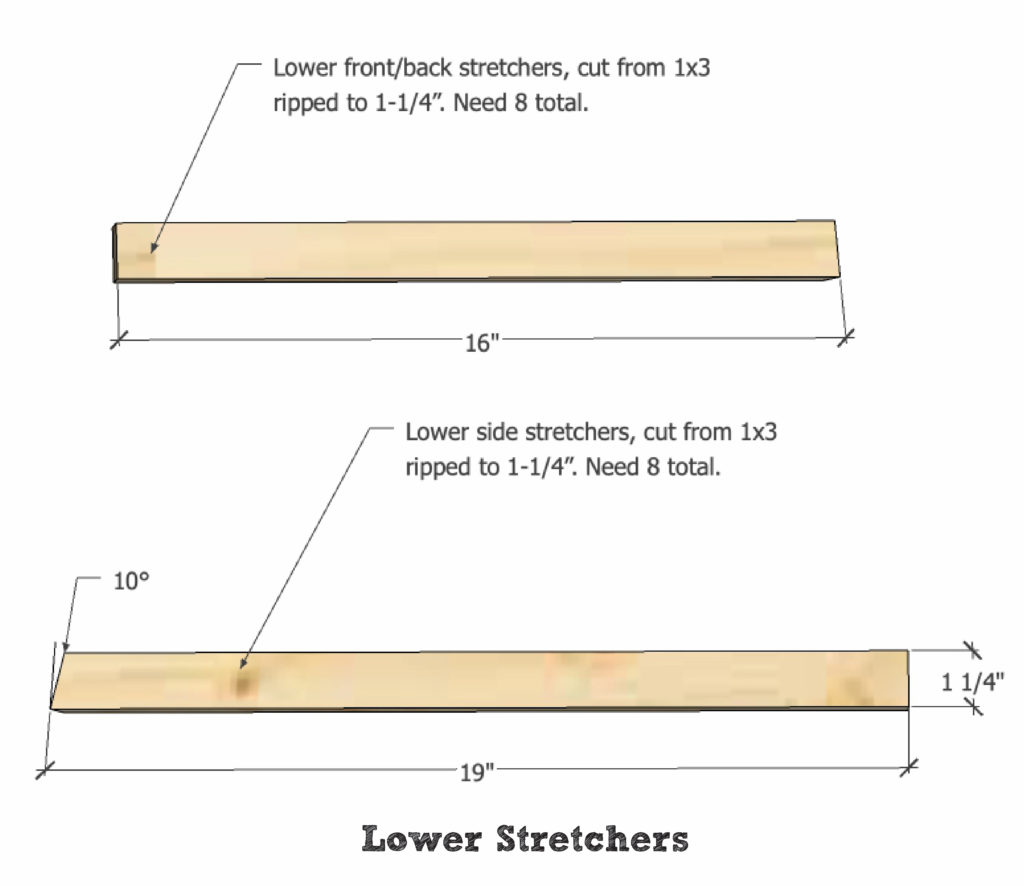
Lower Stretchers 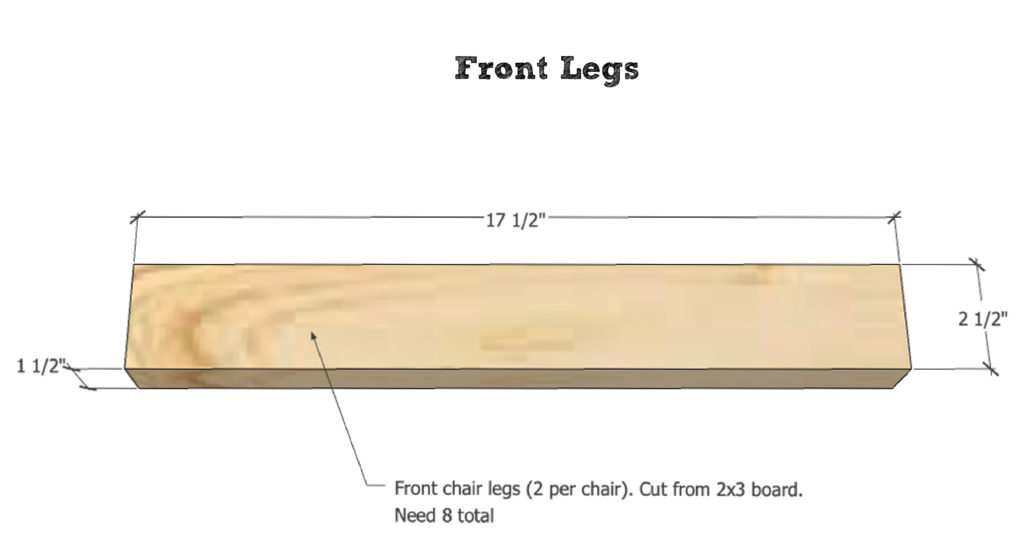
Front Legs

Apron Pocket Hole Pattern 
Stretcher Pocket Holes
Chair Assembly
Before assembling the chairs, sand all the pieces to your desired finish level. Since these are rustic and meant to remain outdoors, I stopped with 150-grit paper.
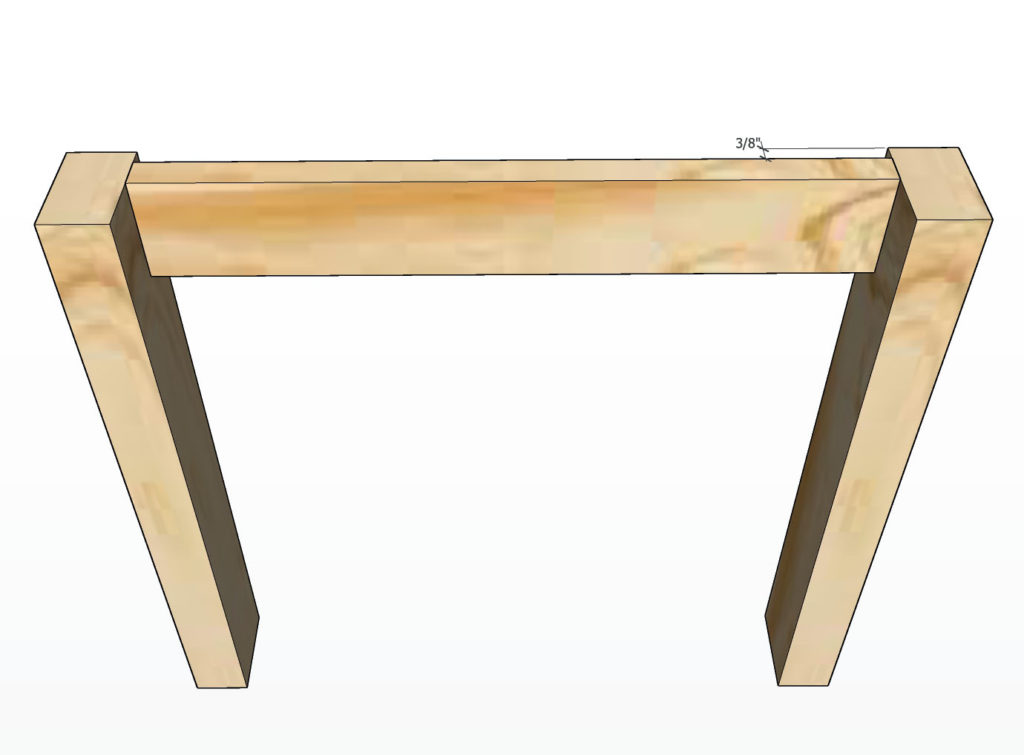
This is the first time I have ever had to assemble something so complicated, requiring a lot of intermittent steps and clamping. If you are more experienced, you will probably know of an easier way to do this. I started by attaching two front leg pieces to the apron piece that goes between them. The aprons and stretchers are set back 3/8″ from the outside edge of the legs so I began by cutting two pieces of scrap material to exactly 3/8″ thick. This gives me spacers I can lay the aprons on while attaching them to the two legs using 2-1/2″ pocket hole screws. (The original design called for 1-1/4″ pocket hole screws and I discovered that this barely held the pieces together. There is no way the chairs would hold up over time.) The ends of the aprons were covered in glue first, then a parallel clamp was used to hold everything in position as the screws were driven in.
After four front leg sections were assembled, I then attached the side aprons to them using a similar method. I set the apron on the 3/8″ spacers, coated the end that would butt up against the front leg with glue, and then clamped them into place. 2-1/2″ pocket hole screws were then driven in.
After the glue had set on those assemblies, I could then attach the rear legs. This was the trickiest part of the build. On my work table I propped up one of the front leg assemblies on its side while placing my carpenter square against the front leg to show me where the bottom of the rear leg should be when in position. The side apron was resting on the 3/8″ spacer, glue was applied to the end and then it was pressed into the rear leg and clamped. 2-1/2″ pocket screws were then driven in. Attaching the the second rear leg was a bit more difficult as the other leg must then be propped up with some scrap wood. It is a bit unwieldy. Unfortunately I did not take photos of these steps.
The rear apron was then easily glued and screwed into place. Note that there is no offset for this piece, due to the seat not extending far back enough. I would change this in a future build. The rear apron was attached flush to the inside edge of the rear legs.
The assembly process thus far is shown in these diagrams.
Front Legs and Apron 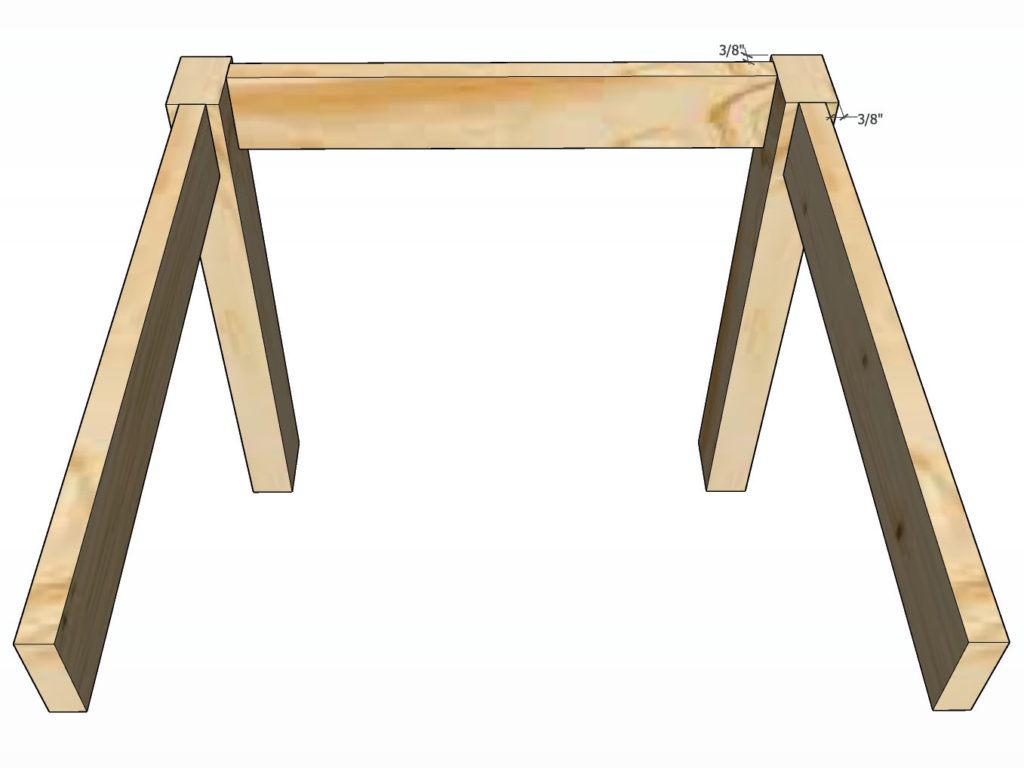
Front Legs and Side Aprons 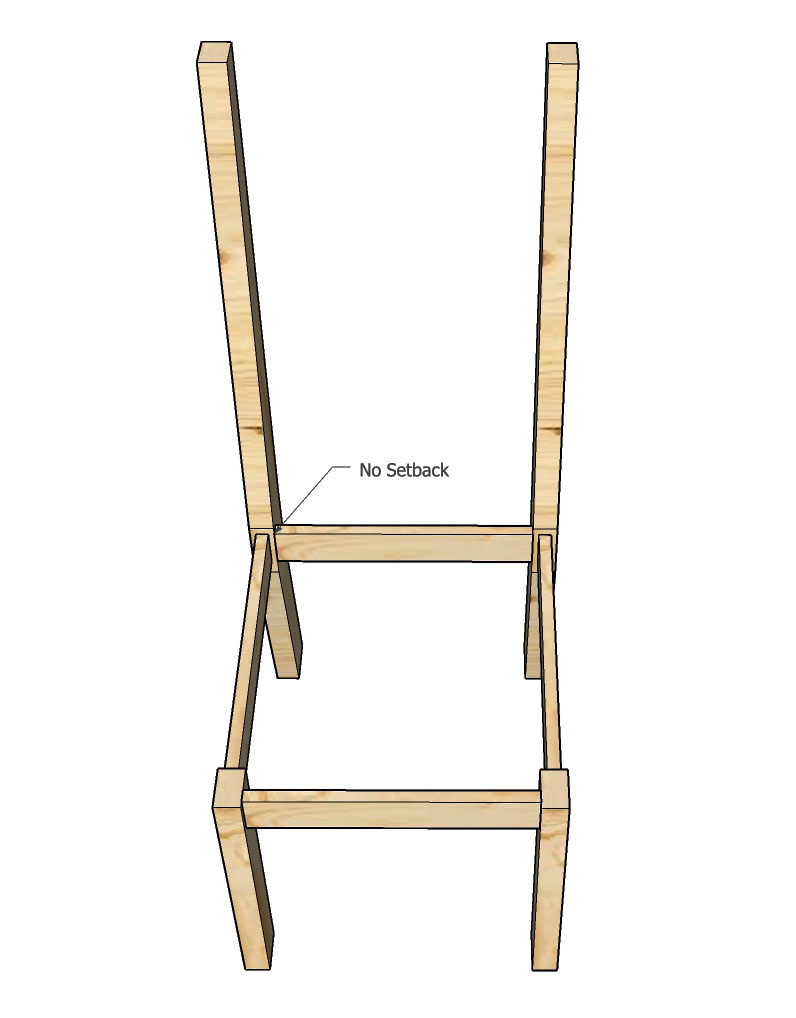
Rear Legs and Rear Apon Attached
Attach the Seats
The seats are easily attached from three sides with 1-1/4″ pocket hole screws through the side and front aprons. Do not glue these in place since there will be some amount of seasonal movement. If you want, you can use a small angle bracket to attach the seat to the rear apron.
Attaching the Back Supports
Attaching Seatbacks 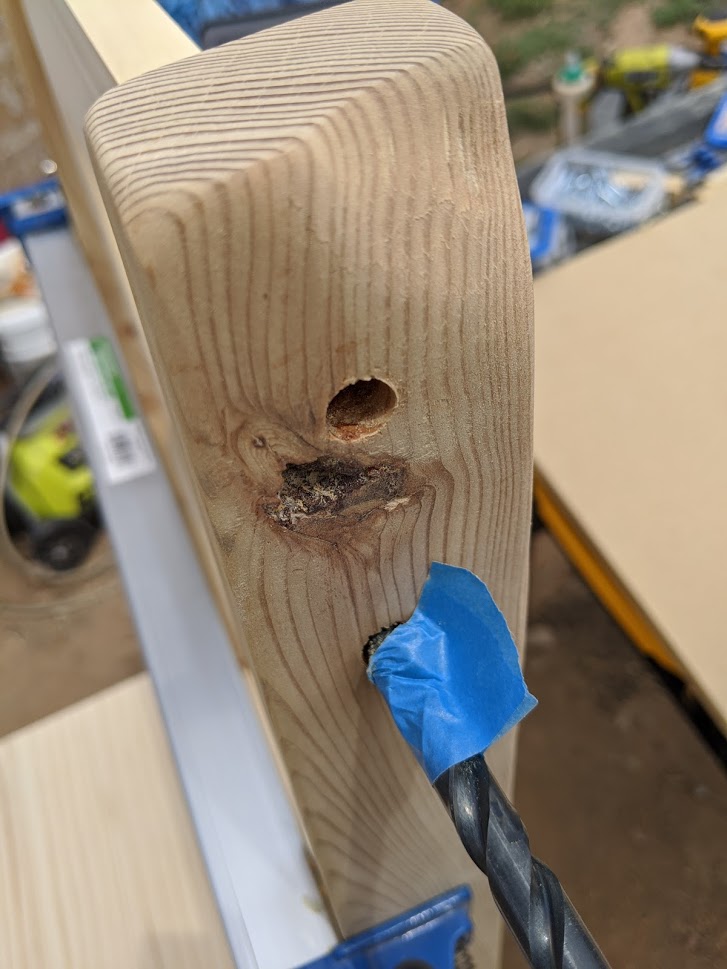
Countersink seatback holes using 3/8″ bit with tape to mark depth.
The back supports were attached to the chairs with an offset of 1/2″ from the front edge and 3/4″ down from the top. I did this after putting one in several locations to see what looked natural. You may have other ideas.
Once the position was found, three pilot holes were drilled from each side and into the supports—two at the top, one at the bottom. A 3/8″ drill was used to countersink these holes. The back supports were screwed into place using 3-1/2″ screws and the holes were filled with plugs cut from a 3/8″ pine dowel.
Attach the Bottom Stretchers
The bottom of the stretchers are placed 5-1/2″ from from the floor to the bottom edge of the stretchers. They are simply glued and screwed into place with a setback of 3/8″ using 1-1/2″ pocket hole screws.
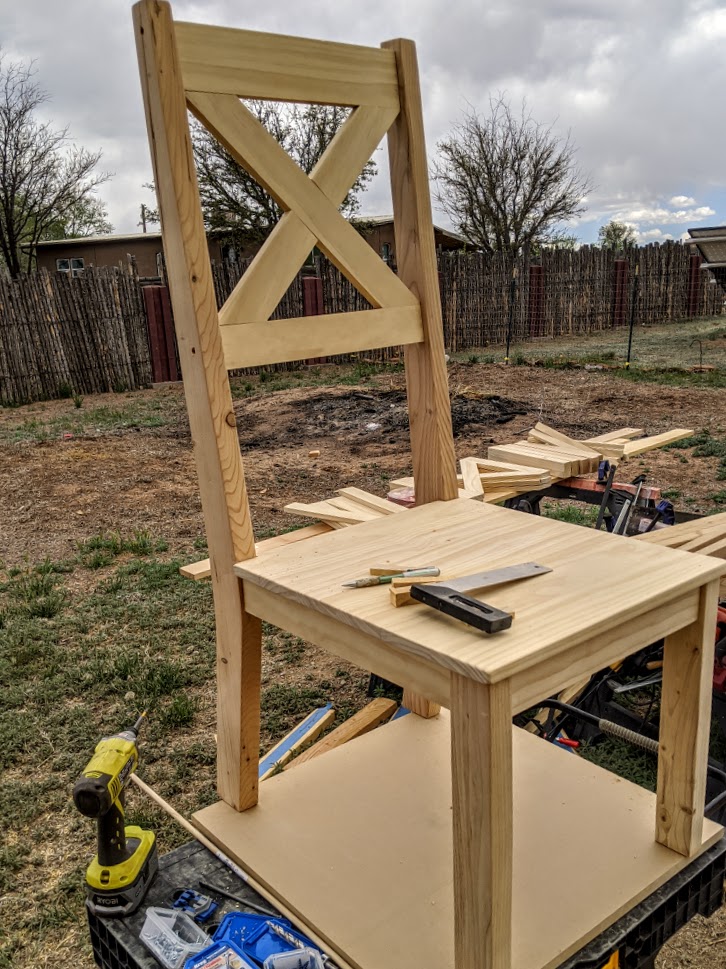
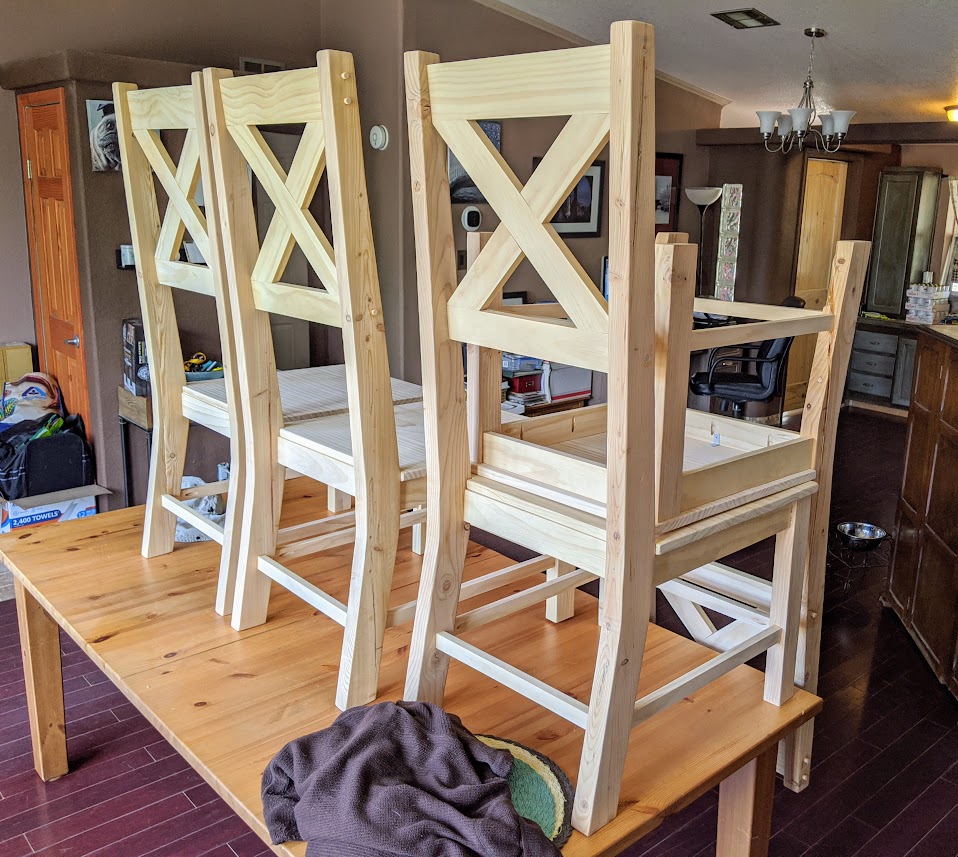
Shown below are the finished chairs prior to final finish. Note that the dowel plugs have also not been trimmed flush.
Finishing
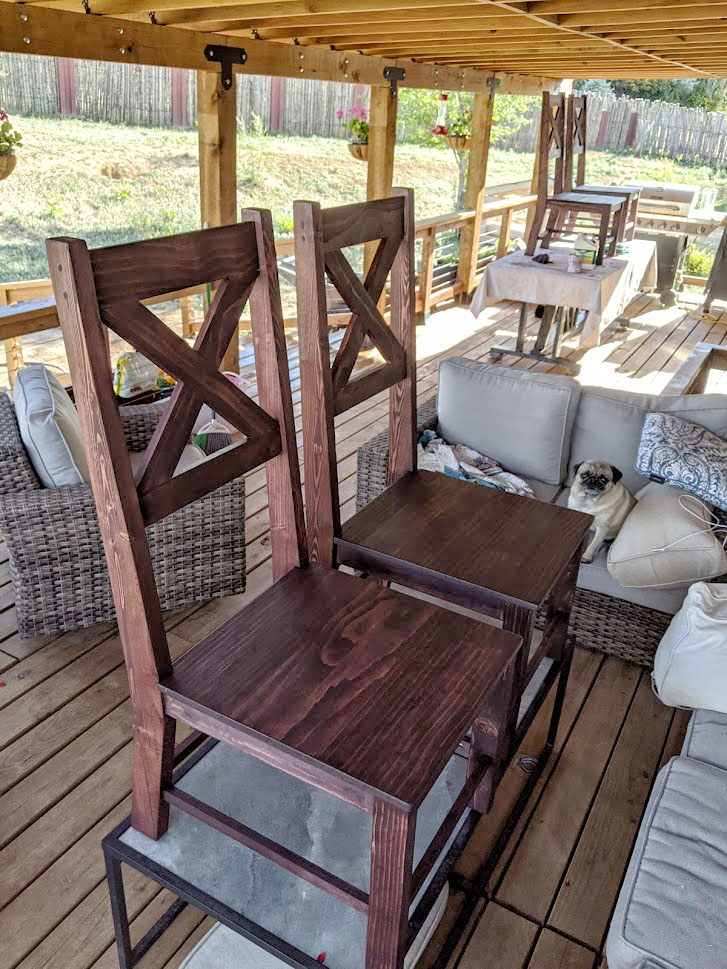
The chairs were finished with a Varathane stain and two coats of wipe-on polyurethane, with a 220-grit sanding done between the coats of poly. Here are the finished chairs.
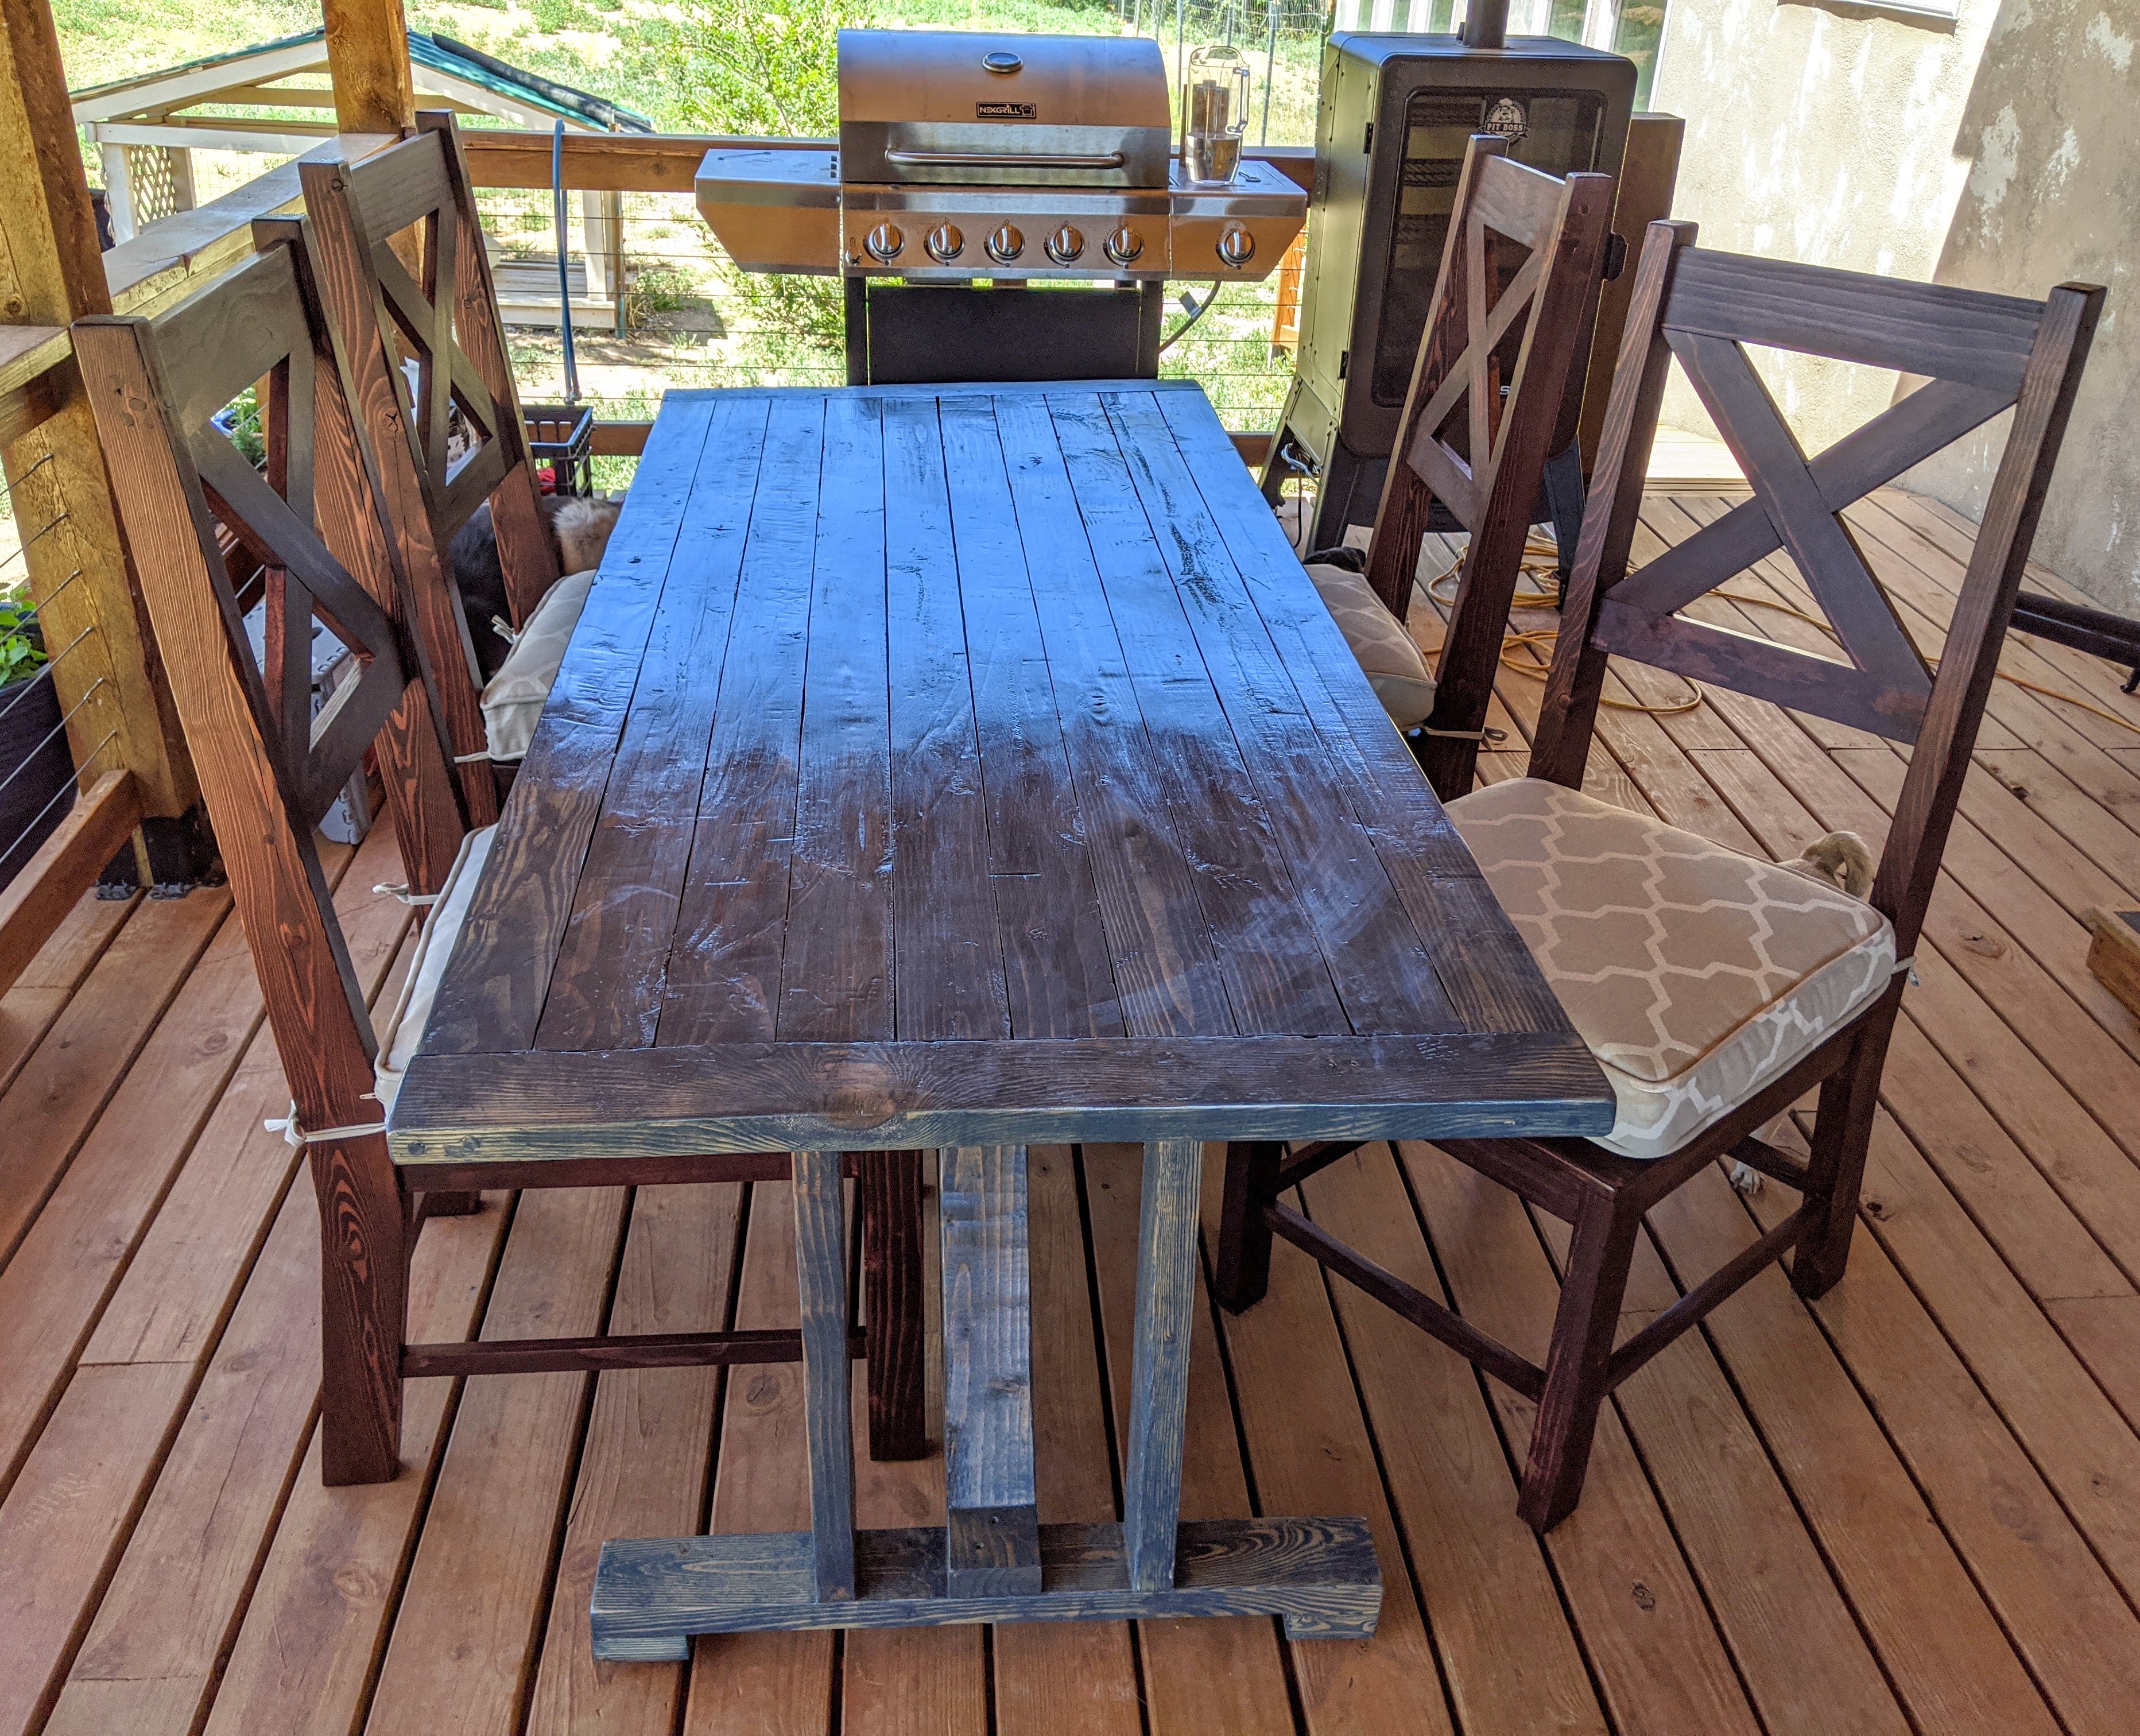
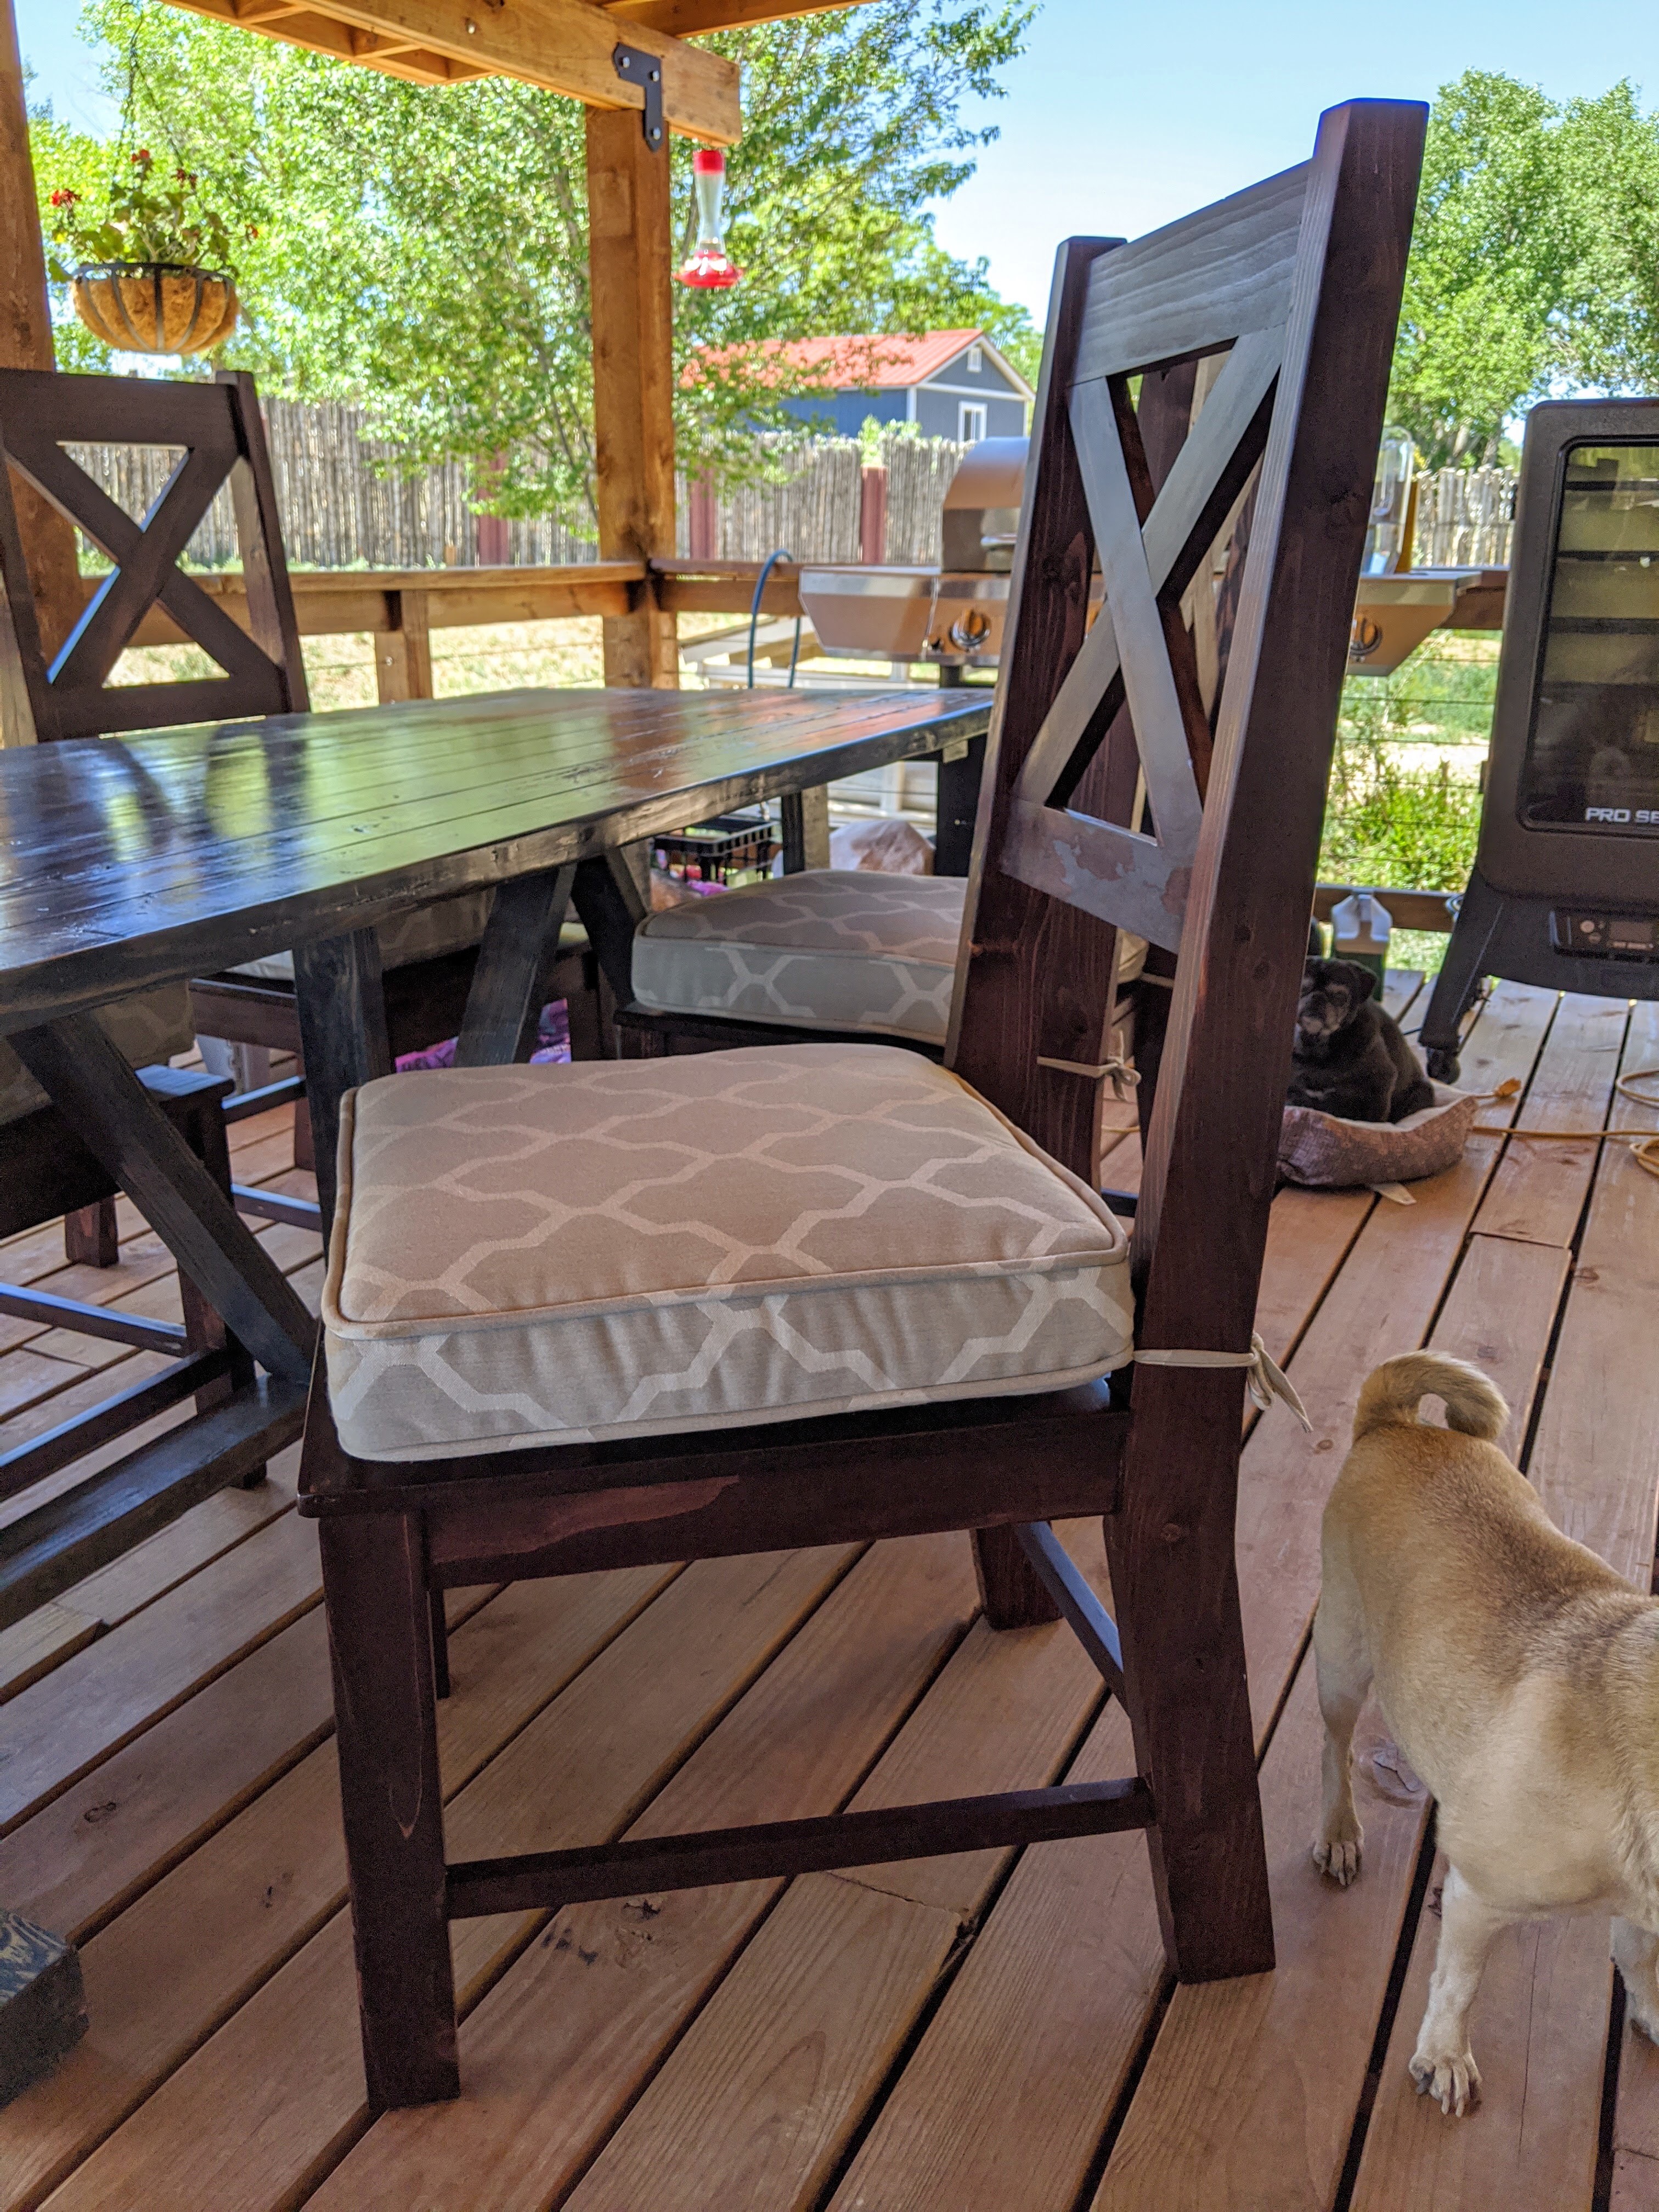
Here is the set of four, outfitted with cushions and shown next to the table.


Recent Comments